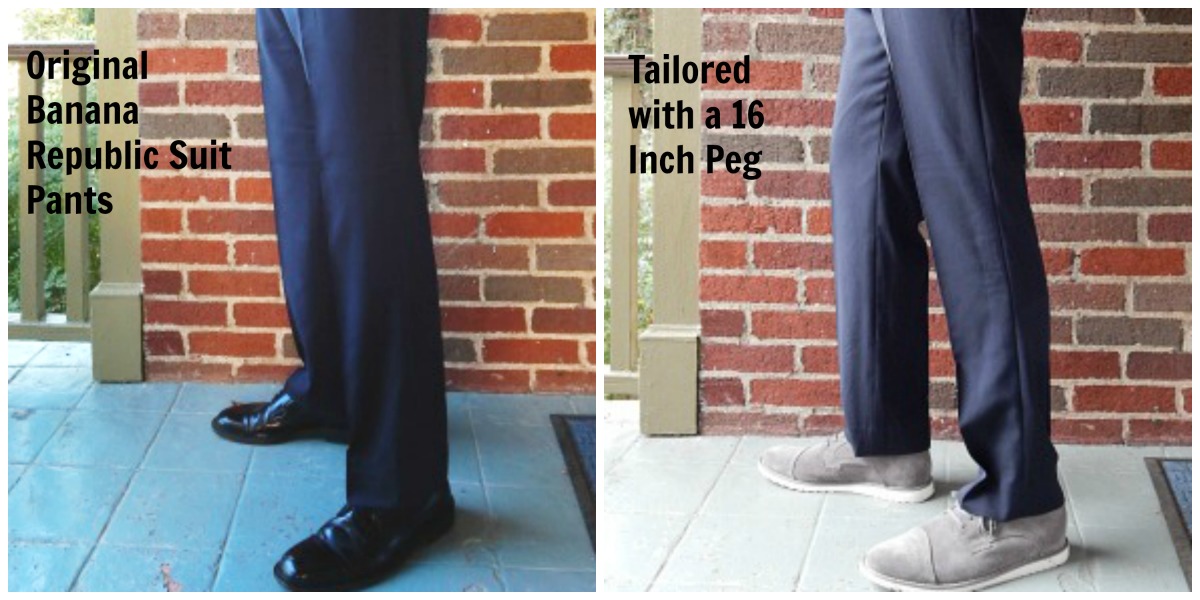
My husband has always worn flat front pegged pants. Even though currently this style is easier to find in the stores, sometimes ready to wear pants are just shy of being how he likes them. So was the case with a recent pair of suit pants.
Banana Republic makes a great, trim fitting, men’s suit. The jacket fit my husband perfectly in fact. The trousers however needed to be trimmer in the legs for his taste. Suit pants are pricey so you may think you need to send them to a tailor but anyone can peg pants. It’s easy and quick. The one thing you have to be extra careful about with suit pants is pressing.
At home, I had my husband try on the pants so I could figure out the details of this alteration project. I always need a visual. First, I measured up from the hem to see where his knee was. This measurement is a reference point. Then I needed to figure out where to start taking the pants in. (We decided just below where the bottom of the pocket is joined to the outside seam and a few inches down from the crotch seam on the inseam.
The finished taper should be subtle so start taking in the extra width up high on the leg and make it very gently come to your finished peg, anything drastic and they will look like jodhpurs.
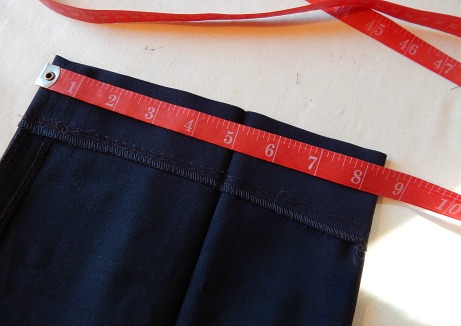
With the pants flat on the table and the front and back of the leg stacked on top of each other, I measured the pants at the hem, measuring on the double. Note the back piece of the pants will be wider than the front piece, just as the back of human legs (the thighs) are larger than the fronts (the quads) so stack the pant leg evenly.
My husband knows he likes a 16″ hem (that’s a 16″ circumference at the hem) so I knew what the altered pants would need to be. I now needed to know how much fabric to take in. If you don’t have any idea what you want the finished hem circumference to be then try on a bunch of pants (already owned favorites, or at the shops) to see what you or the person you’re altering for, likes and make a note of it. I measure each leg separately and a good thing too because these legs were different widths at the hem.
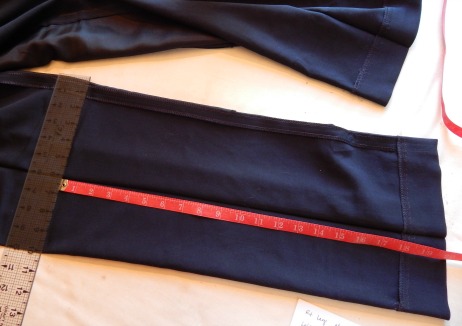
I measure up from the hem to the knee to find out what the width of the leg is at that point. I write it all down.
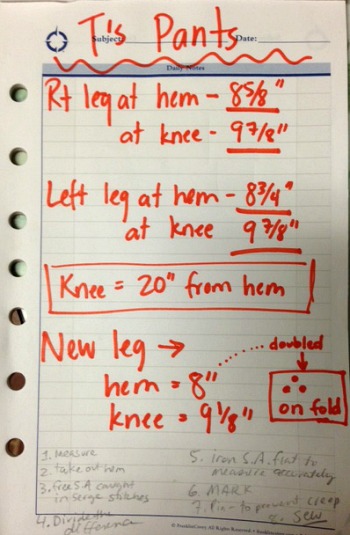
I know I want the hem to be 16″ around so I take the difference (the current hem circumference minus the desired hem circumference) and divide in two. Because my pants are now laying flat on the table the leg is doubled – I’m only measuring half of the circumference when I measure side to side the width of the leg. So 8 and 5/8″ minus 8″ = 5/8″ – the difference – which divided by two is 3/16″. I need to move both the inseam and the outer seam in 3/16″ at the hem.
I do the same at the knee (9 and 7/8″ minus 9 and 1/8″ = 6/8″, divide that in two and it’s 3/8″ taken in at each side at the knee). Remember to divide the difference (the current circumference minus the desired circumference) in two and take that off both the outer seam and the inseam.
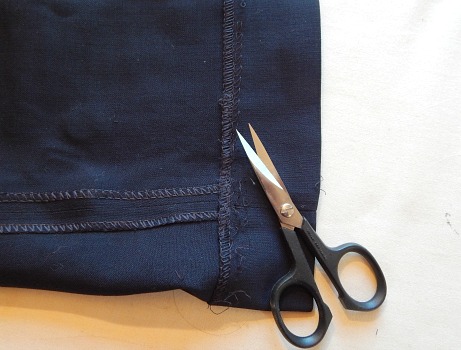
Remove the hem stitches. Measure and mark how much you have to take the pants in on the hem crease.
Always take in pant legs on both the outside seam and the inside seam so the leg does not twist or come to the front on either seam.
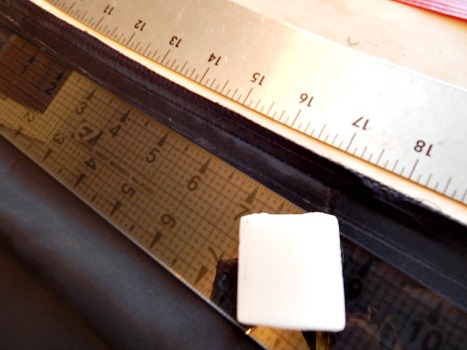
Mark at the knee how much to take in. Then go up to the starting mark and with a ruler, a hip curve and tailor’s chalk, connect the dots. Subtle and smooth.
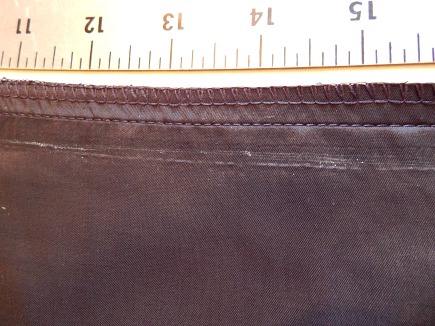
Basically, the new seam will be from the mark close to the top of the pant (where the tapering begins) to the mark at the hem passing through the mark at the knee on BOTH sides. Remember, it should not be a drastic slope.
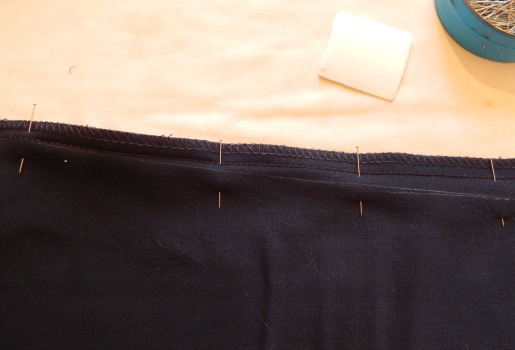
Pin the new seam line to prepare it for sewing. The original seam is still intact. It has not been removed. Sew from top down then press the stitching using a press cloth.
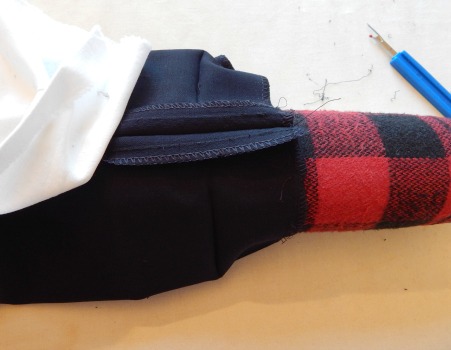
Remove original stitches. Open up the seam and using a seam roll or a rolled up towel press the seam open. Always use a press cloth on wool suiting so as not to leave a shine on the wool.
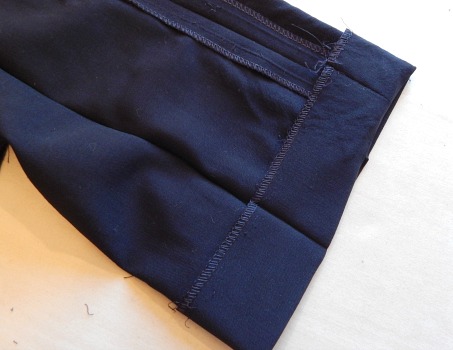
Fold the hem back up. Press. Hand stitch the hem back in place. Press again. Keep pressing until your seams and the original crease are once again crisp. And use a press cloth.


I have a pair of hemmed pants that my son likes and unhemmed suit pants he wants tapered in. Should I temporarily hem the suit pants and then do the knee and temporary hem measurements for the taper?
I would start with measuring the pants which fit how he likes; the hem circumference, and the inseam (I think we can leave out the knee circumference). Then measure the pants that need tapering and hemming.(and turn them inside out) First I would mark the new desired length with chalk, but not bother hemming it yet. (mark the finished length, where the fold will be but when you cut remember to add the hem allowance 😉
See how much you need to take in at the hem (the chalk line, going across the front of the inside-out pants). Let’s say you need to take 1 inch in. You would measure in 1/4″ inch on the outside or side seam and 1/4″ in at the inseam for your new seam line. (1/4, doubled because you’ll sew 1/4″ out of the back at the inseam & out of the front at the inseam And you’ll sew 1/4″ out of both the front and back at the side seam)
Now, draw a temporary line (chalk) that goes from your mark in at the hem’s side seam up to the base of the side seam pocket. The line should be smooth, subtle, and will blend into the original seam when it stops. This is your new side seam. Do the same on the inseam. The line going from mark at hem up to the crotch seam. Pin the legs and sew your new seams before you take out the old seams. Then hem the legs.
Does that help? I hope so. I just reread this post and I think I may need to rewrite it to make it clearer.
And, You may want to just see the photos for this post about taking in baggy pants: http://www.thedailysew.com/2015/01/how-to-easily-fix-baggy-pants/
They show how the line for tapering blends into the original seams
I understand but have a few questions still.
1: how do I measure the inseam circumference?
2: there is a sizable difference in the amount of fabric in the front panel of the leg
and the back panel. Do I need to do something special to make sure things come
out right after I sew the new seams?
3: (after some experiment sewing and try-ons I found that the crotch looks way to bulky.
The pants are lined and have a horrible looking saddle, both have caused me trouble.
For Ralph Lauren you would thin well made, but no. Anyway, the question)
I found that the side needs taken in all the way to the waistband but looks weird if I just
sew straight up. the area from the bottom of the pocket to the waistband don’t look
right. Do I do this a certain way?
I looked at the link you included but it didn’t really help. I would send pictures but don’t know how. And by the way thank you for you reply. I would have sent something sooner but for some reason wasn’t notified anyone had replied and I took a few days to try and get over the frustration of this project. I’ve been sewing on and off for years but small simple stuff and I have learned mostly from trial and error.
Hey, I had to think about this answer and I’m still not absolutely sure I’m correct. This sounds like more than a simple alteration. You’re brave.
Whatever you try, baste it and have a fitting before you cut.
1: how do I measure the inseam circumference?
Measure the upper thigh of the person the pants are for. Measure the pants at this same place (as close as possible). Lay the pants down flat. Draw a horizontal line across the pants with chalk where you’re going to measure on the front pant piece and then flip over and do the same on the back pant piece. Add those measurements together to get the circumference.
For slim pants you want the pants to be the measurement of the person plus 1” wearing ease.
The lining will be this amount and the pant fabric could be ¼” more.
2: there is a sizable difference in the amount of fabric in the front panel of the leg
and the back panel. Do I need to do something special to make sure things come
out right after I sew the new seams?
I’m not too sure about how but I would try to keep it the same ratio. If it’s because of a pleat I might sew the pleat down temporarily (hand basting stitch) so as not to accidentally take that pleat release into the new side seam and distort the pleat.
3.a: after some experiment sewing and try-ons I found that the crotch looks way to bulky.
Have you reduced the inner leg at the crotch seam? You shorten the crotch extension. You want to maintain the curve of the crotch, just shorten how long it extends horizontally.
This will also reduce the upper thigh circumference of the pant which may be the reason for the bulk.
3.b: I found that the side needs taken in all the way to the waistband but looks weird if I just
sew straight up. Do I do this a certain way?
Well, I would take the waistband off and taper the side seam in at the waist slightly instead of going straight up. That might help but it’s the pockets I don’t like messing with 😉