

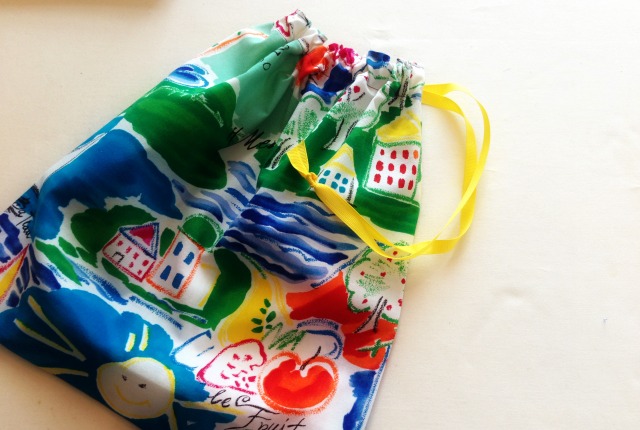
You know how the sequel is usually a disappointment? This second version of the drawstring bag is even easier to make than drawstring bag I just posted so I’m hoping you will not be disappointed.
I’ve made this bag without a button hole. There is no figuring out the placement of the buttonhole or sewing the buttonhole. It’s easier but just as practical and just as cute.
Like some other sequels you may need to read the first post about drawstring bags to completely, fully, undeniably understand this post. Although I hope that’s not true.
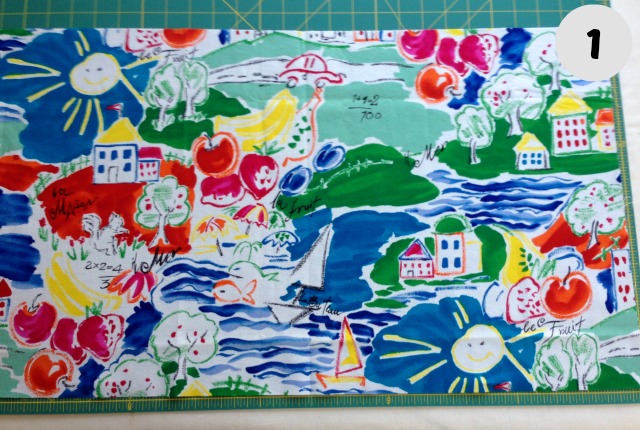
Cut fabric two times the finish width plus 1″ (for a 1/2″ seam allowance on both ends) by the desired height plus 1/2″ seam allowance for bottom edge plus depth of casing* plus 1/4″ to turn top edge under. My fabric is cut 26″ by 15″.
*What’s a casing? Like a sausage casing, it’s the tube made by the fabric when you fold the fabric onto itself and sew it along the horizontal edge. A casing is needed in a drawstring bag for the drawstring or cord to go through. It’s used in elastic waist skirts or elastic cuffs on a peasant style blouse. A casing can also be used in a curtain panel for the curtain rod to slip through.
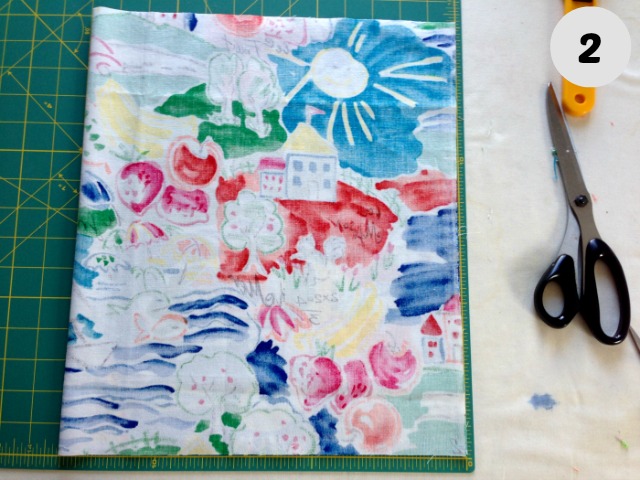
Fold fabric in half and square up the top, bottom and sides if needed.
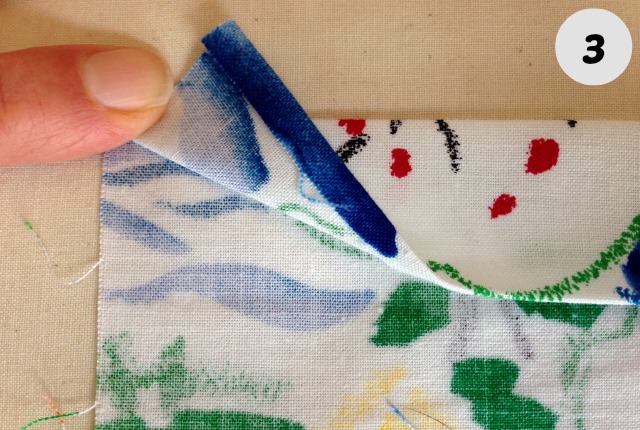
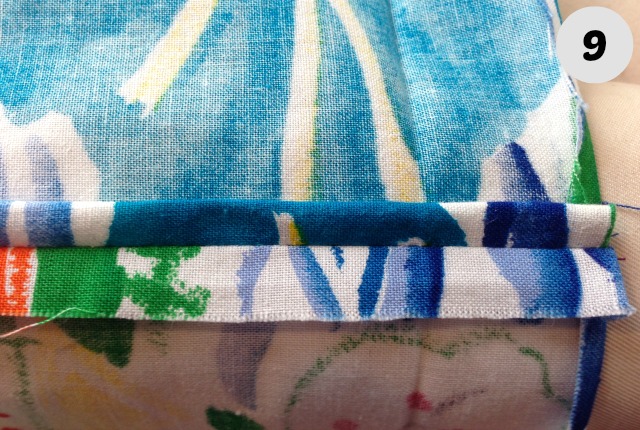
Open up the fabric and turn over the top edge 1/4″ (wrong sides touching) and press. Fold over the depth of the casing and press.
Fold the fabric in half horizontally, right sides touching.
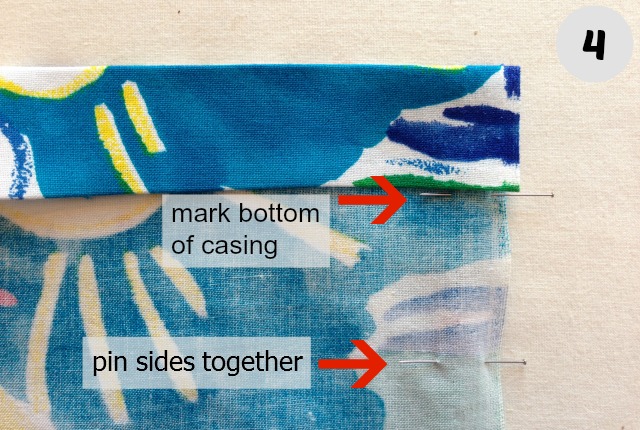
Pin the sides and bottom together starting beneath the casing to ready them for sewing. One side of your fabric is a fold and not open. Therefore it will not need to be sewn. With the casing folded down mark, with a pin, where the edge of the casing lays on the side seam. Unfold the casing.
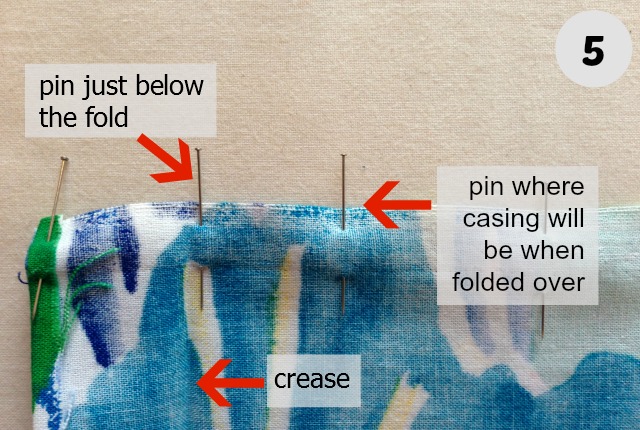
With the casing opened up you can see the crease where the fold was. One pin will hold the top edges together, leaving the 1/4″ hem still folded down. The second pin is placed just below the crease, or, we could say, just inside the casing. The third pin is the pin you placed to mark the bottom edge of the casing when it was folded over.

Now, mark the second and third pin in a distinct way. I place two pins side by side. For me this catches my eye better than a different pin head but a certain pin head would also work to make it distinctive. You could also notch the fabric or mark with a pencil. What ever works best for you.
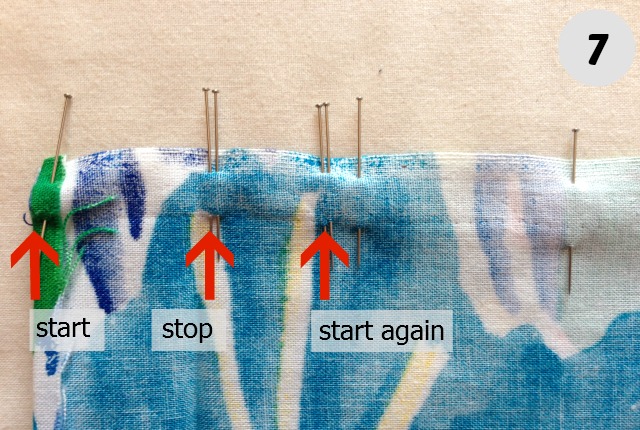
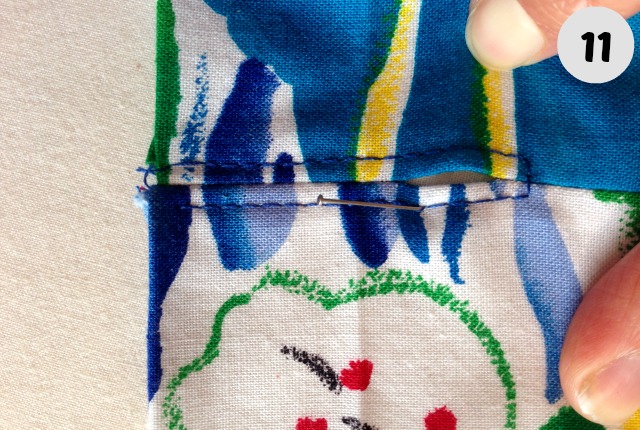
When sewing the side seam you will insert the needle into the top edge and sew to the distinct mark (just below the crease). Then remove the needle out of the fabric and insert it back into your fabric at the second distinct mark. From there sew all the way down the side seam and turn 1/2″ above the bottom edge to sew the along the bottom edge.
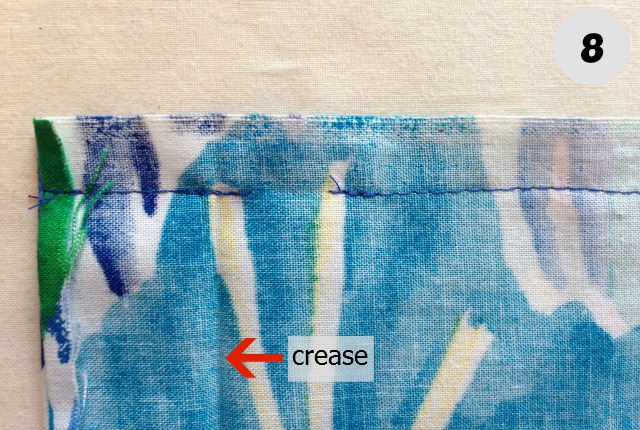
Here is how it will look when sewn. You now have a hole for the cord to go into and out of the casing. Press your newly stitched seams. Press them while the lay flat and if you want to press them open too.
Total bonus points on pressing the seams open for this project in this fabric. If I was making this out of Dupioni Silk or stiffer fabric I would press my seams open. Otherwise they will roll slightly inward and not look so crisp. However, my cotton fabric is not crisp to begin with. No one is keeping track of bonus points any way (well, we are secretly; in our own heads).
Open up the side seam just far enough down the side to include where the casing will be. Do press this part open. Fold the raw edge of the seam allowance under itself and press to hold in place. This is how I am finishing the seam allowance inside the casing. If you have a serger you may choose to serge the edges. If you do just press the seam open far enough down the side to include the casing.

Sew down this portion of the seam allowance. Be sure to catch the raw edge. (The pin is holding open the slit just for the photo.)
This is how the outside will appear. (Again, the pin is just there to hold open the slit for the photo.)

Fold the casing back down and press it again to reform that crease and make it sharp.
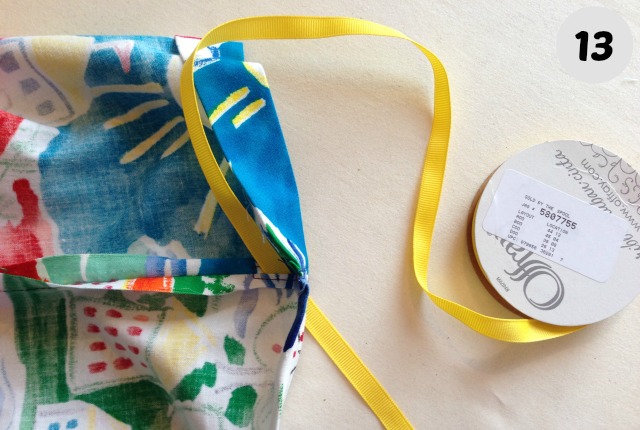
Slip one end of your cord (I’m using grosgrain ribbon) through the opening in the casing. Enter from the inside and leave the end hanging on the outside of the bag.
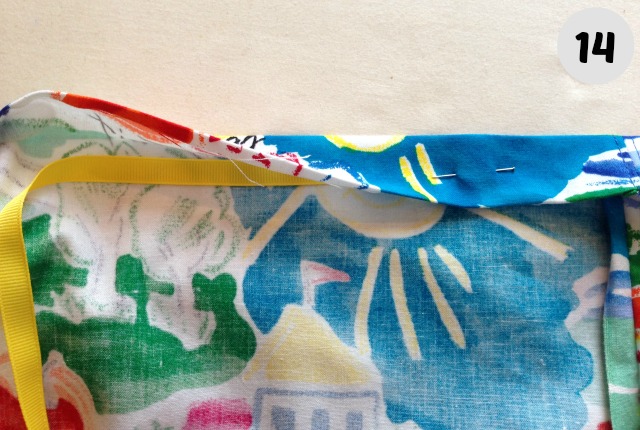
Lay the cord down along the bag where the casing will fold over it. Pin as you go to hold your cord in place pinning on the outside of the bag.
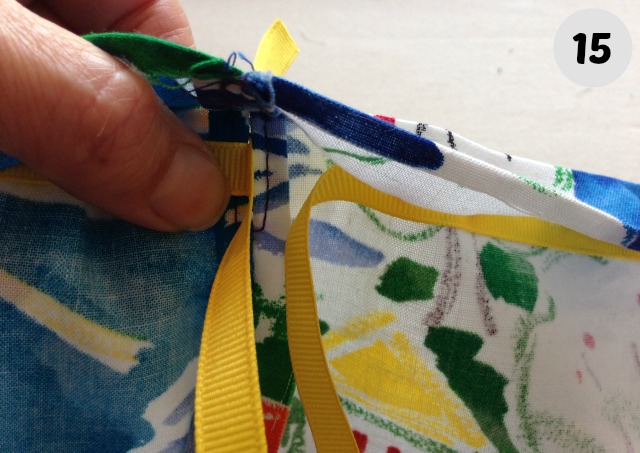
Once all the way around, cut the cord off the spool or card, leaving yourself six inches or so of cord. You want enough cord to feed it through to the outside and knot to its other end.
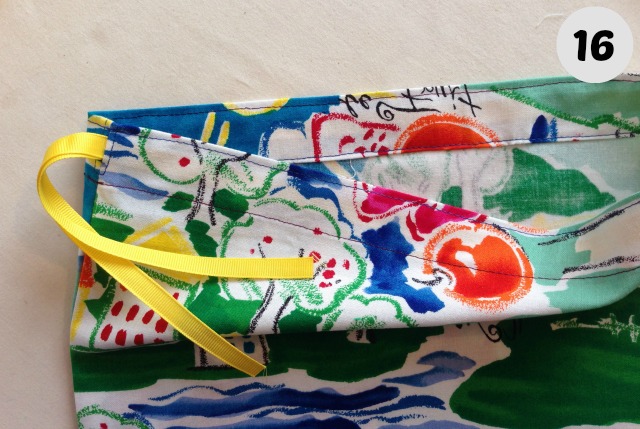
Sew the casing down close to the edge (to catch the 1/4″ hem) and also around the top edge of the bag. You could add more rows of stitches to make a narrower casing or just for decorative purposes.
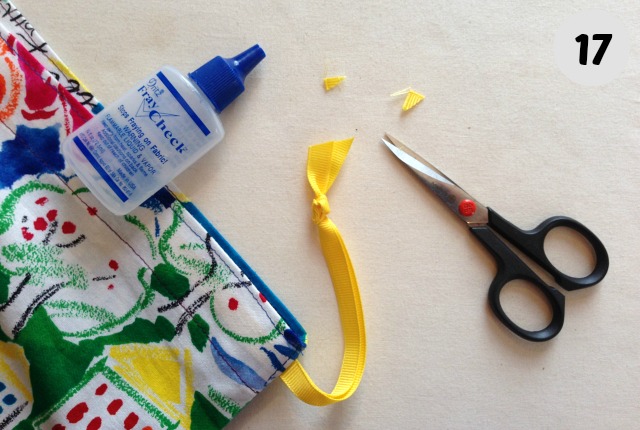
Tie the cord (ribbon) together so it’s now one continuous loop. Trim the ends of the ribbon or cord and add a dab of Fray Check to them. Ribbon and cords can unravel by just looking at them. Fray Check keeps them from doing so.
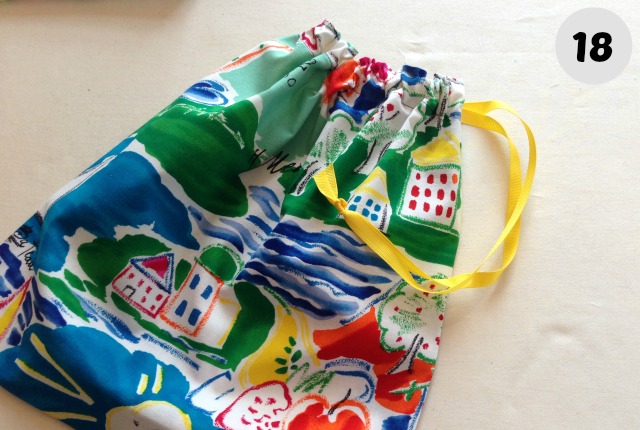
Pull the cord. You’re done.
I love my draw string bags. Good for traveling… underwear all in one place (and maybe away from TSA hands); shoes; dirty clothes to name a few uses.