

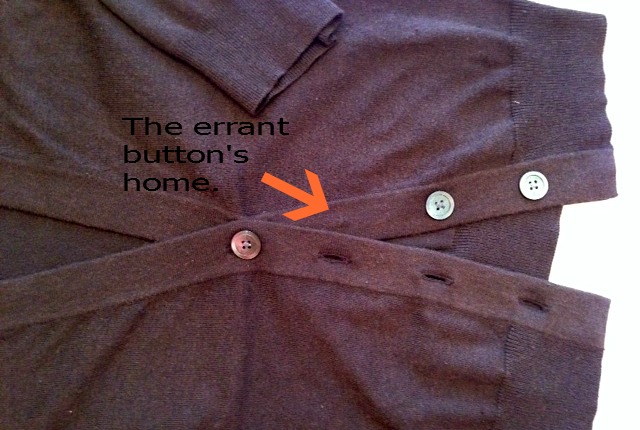
My button fell off, again. Not the same button, but a button from a dearly loved garment. Luckily it fell off in my presence and I was able to catch it.
Buttons fall off store bought garments because they are sewn on by machines and machines can’t knot a thread properly. Sorry, robots, that’s just the way it is. However you can knot a thread and you can sew that button back on and if you don’t have the button or you can’t find a match for the missing button, you have now been given the opportunity to change the look of your garment (if you want) by changing all the buttons to something new.
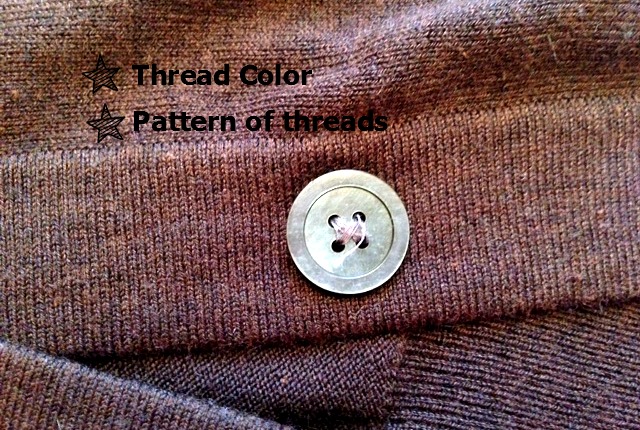
When you are sewing on a missing button it has to match the other buttons in how it looks and how it’s sewn on to the garment. Check to see what color thread the other buttons are sewn on with and how it is sewn. Are the threads forming an “X” or two parallel bars of thread. (Hey this button looks suspiciously loose, too)
Supplies needed; scissors, needle, thread, the button and I like to use Fray Check but that’s optional. When deciding on what thread to use try to match the color of the thread the manufacturer used, which isn’t always the same as matching the color of the button or the color of the fabric.
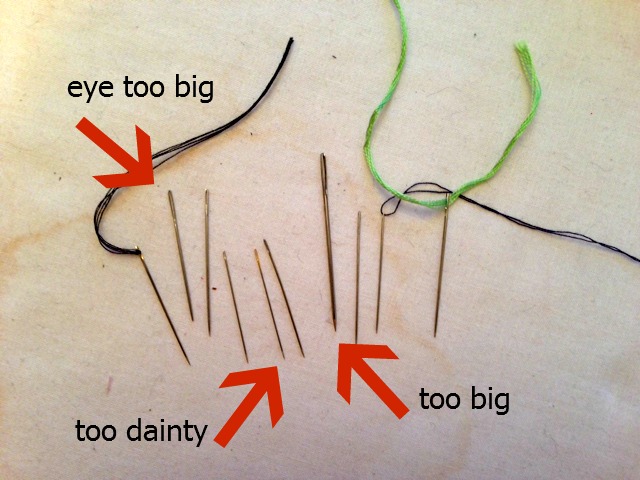
When deciding on what needle to use pick one that matches the weight of the fabric. For a heavy wool coat you will use a bigger needle then say for a fine cotton shirt. Ultimately, though, you must be comfortable with the needle you choose. However it’s better to err on the smaller side. Wielding a harpoon is never easy.
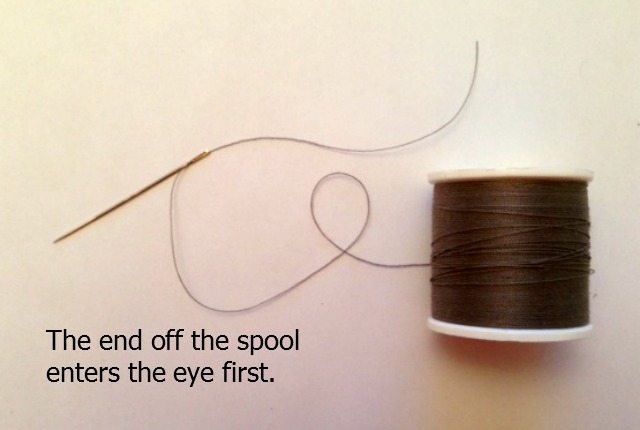
As I’ve said before, the end of the thread that comes off the spool first is the end that is inserted through the needle’s eye. One of my professor told me that this helps the thread from tangling badly and I’ve never threaded my needle any other way since.
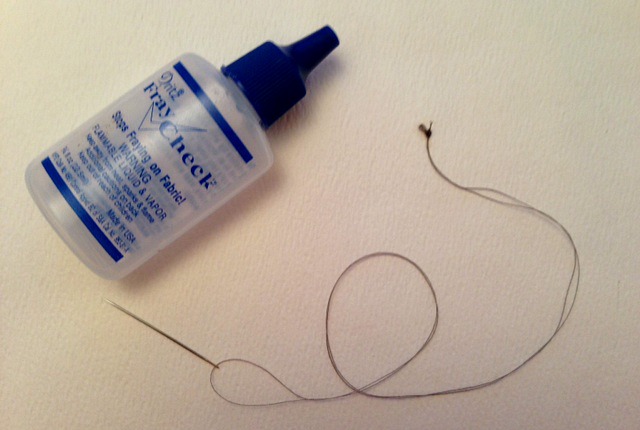
Cutting thread a manageable length helps it to stay tangle free too. What’s manageable? less that 30 inches for sure, maybe no more than 20. In this case I’m sewing one button so I need about 12 inches (a generous amount) but I need that on the double. I always double my thread when sewing buttons for the extra strength it adds.
After tying a knot at the end I like to add a drop of Fray Check to the knot to elevate it from knot to super knot. I mean, why not? I don’t want to keep losing buttons.
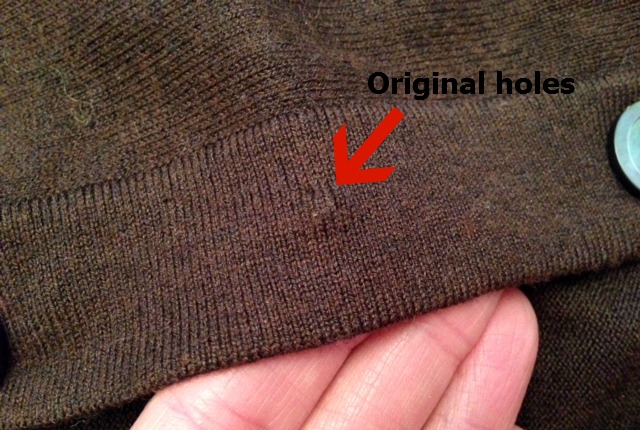
The garment almost always leaves a sign of where the button was originally. If it doesn’t, button all of the existing buttons and mark, by placing a pin through the button hole (the one missing a button) in line vertically (as in a sweater, jacket or shirt) with the existing buttons. Leave the pin sticking up in the garment and unbutton the garment. The pin is marking where to start sewing on the button.
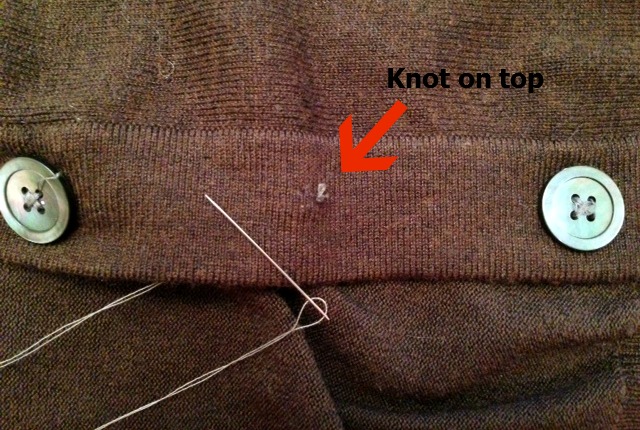
To begin sewing the button on to the garment, insert the needle from the top of the garment through to the inside of the garment before you put the button in place. Why? Because we need to hide that strong knot and the best place to hide it is under the button.
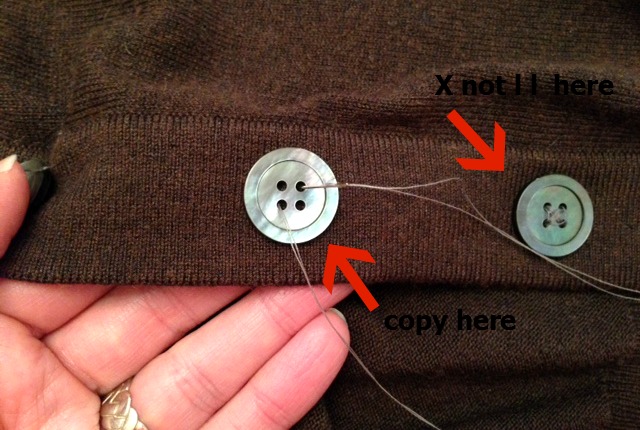
When you bring the thread back up from the inside of the garment place the button down in its proper place and have the needle and thread pass through one of the button’s holes. Copy the same stitch pattern the other buttons have.
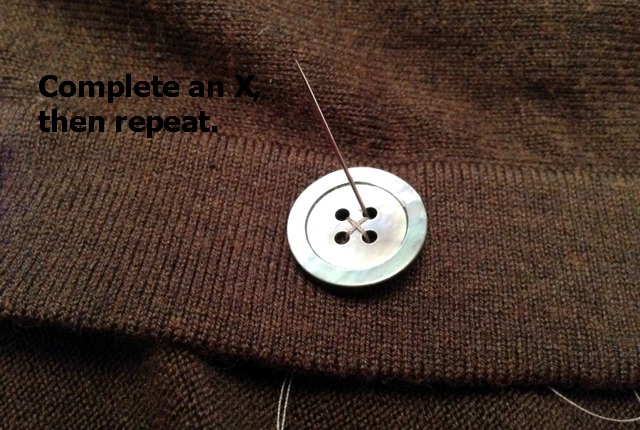
When sewing a cross or an “x”, make one complete “x” before making another. In other words, if you start bottom right to upper left then the second stitch is not a repeat but the opposite, bottom left to upper right.
I make three “x”s or three bars each if the four holes are sewn with parallel stitches or if it’s a two hole or shank button. Three just seems like a good amount. Any fewer and it’s not strong and any more the stitches look bulky.
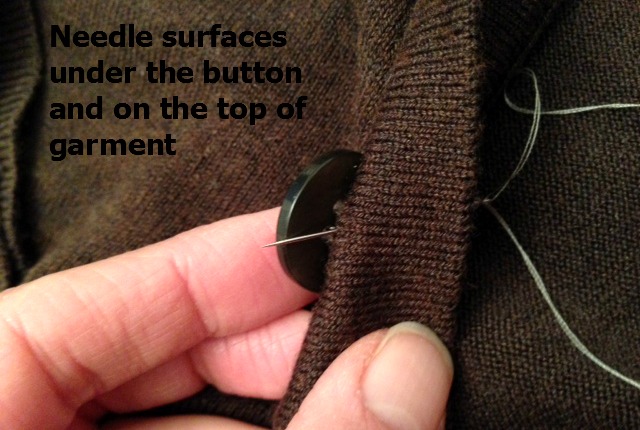
After the button is “on” bring the thread up from the inside but not through the button’s holes. Instead the needle should be close to the center of the button and between the fabric and the button. Again, I’m going to hide the knot under the button. (I’m good at hiding Easter eggs too.)
Knot the thread and add a drop of trusty ol’ Fray Check to the knot to make it extra strong.
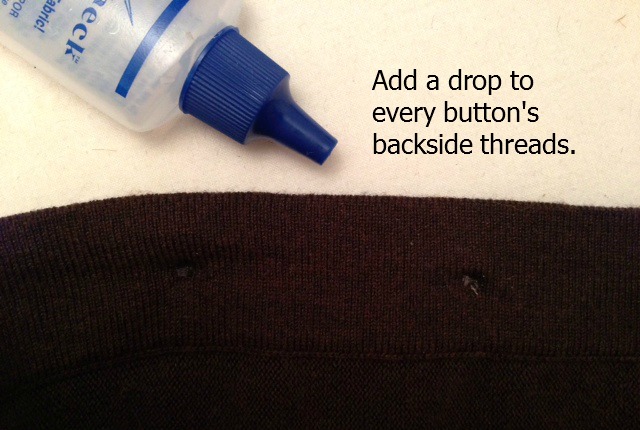
And because of that loose looking button I saw earlier, I’m adding a drop of Fray Check to the underside of all the buttons. One can’t be too careful when it comes to rebellious buttons.
If you enjoyed this article please like our Facebook page:
Oh my gosh! Hide the knot under the button!! I’ve sewn on hundreds of buttons. I’ve taught dozens of people to sew on buttons. How is it that I’ve never thought of this? You are a genius and I can see that I will be a devoted follower of your blog. I will read every word!
Thank you!!!
~ Doreen