

Downloadable patterns are pretty common. They’re convenient and easy, if not impulsive, to purchase. Just pay and click. However when you go to use the pattern there are a few steps or tricks to remember. We all know how one little inaccuracy at the beginning of a project can snowball into a big frustrating mess.
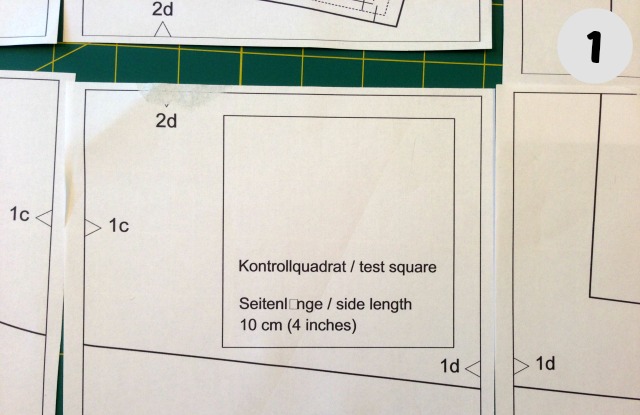
A PDF pattern should include a test square or test line on it. When your test square or line is the same measurement the pattern company specifies on your print out then your pattern is printing correctly. I recommend, after having printed off entire patterns at the wrong scale (we’re talking pages of paper) that you first print only the page which the test square hides on. Measure it, once, twice, three times and be sure it measures what it should. If it does, print all the other pages of the pattern PDF file knowing your print settings are adjusted correctly.
If the box you just printed did not measure to what it should, adjust your print settings and reprint just the page with the test square and check again. This really will save some aggravation and some ink.
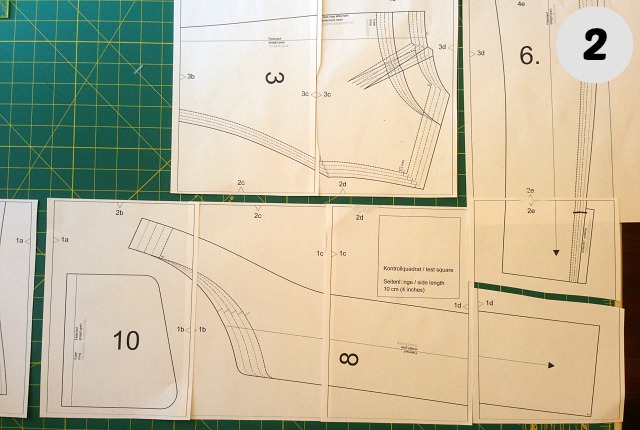
For someone who enjoys puzzles, I find taping the pattern sheets together to sometimes be frustrating. Each little line slightly off compounds until the last page is hopelessly off. To avoid this, simply focus on taping together the pattern pieces and not the pages. Don’t even bother taping pages together that do not share a pattern piece. And don’t hesitate cutting a page to separate two different pieces like I did with the bottom right page in the picture above.
I start by laying out all of the pages (with no tape) in their grid to see which sheets of paper share a pattern piece. If there are two different pattern pieces sharing one sheet of paper, I will cut the paper to separate the two pattern pieces. (Again, see bottom right page in photo above where I cut across the page to separate piece 8 from piece 6).
Now the taping can begin with out that unwieldy grid of 20 sheets that’s too big for anyone’s table anyway. Line up the pages, or parts of pages, which make up the individual pattern piece, two pieces of paper at at time, (I find holding them flat up against a window an easy way to see that they are lined up) and tape the paper together to form your pattern piece. Repeat until you have all the pieces.
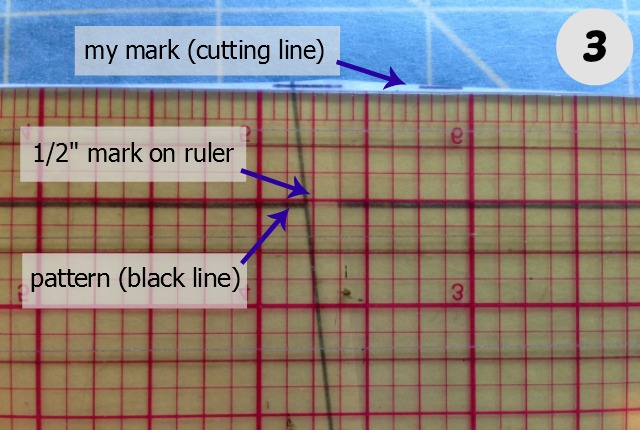
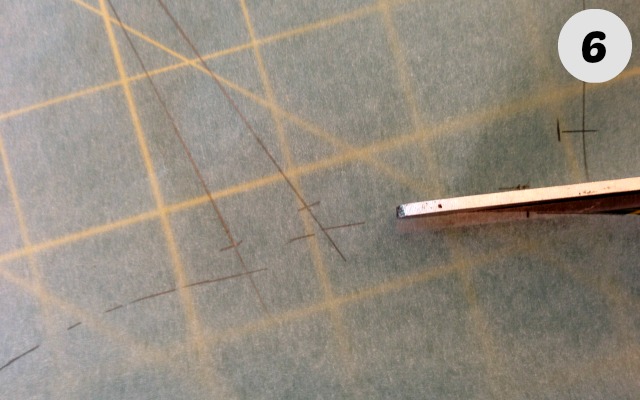
Some downloadable patterns come with seam allowance and Burda does not, so read and see if you need to add seam allowance to your pattern. If so, I find a gridded ruler, a roll of tracing paper and a hard surface to be just the tools for the job.
Adding seam allowance is super easy, it’s just tedious. However, you can really throw your pattern off in this step if you are not consistent about where you place your ruler when adding the seam allowance. You have two choices; place your ruler’s mark, for however much seam allowance you are adding, above the pattern outline or below the pattern outline (I place mine sitting on top of the line). Which ever you choose, once you choose, that’s it. You can not go back and forth with your decision; not within the pattern piece or within all the pieces for this garment. That printed line is almost 1/16″ thick so not being consistent where you measure from can affect how well the pattern pieces match up when it’s time to sew them together.
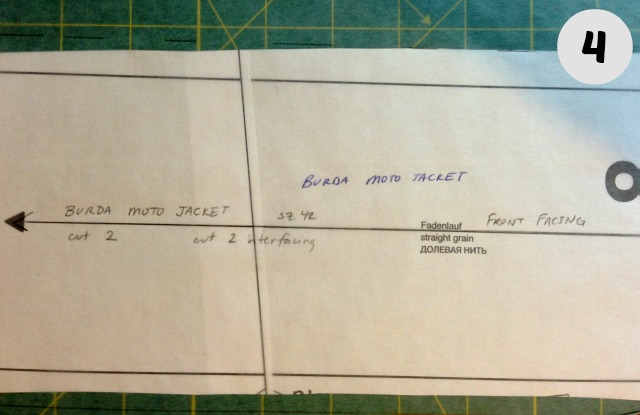
No matter how you got this pattern, downloaded it or drafted it yourself, add the pattern information to your pattern. This helps later, when you have amassed a collection of patterns and they all start to look alike or if you didn’t put the last pattern completely away before you started this new project (I’m talking to me).
I write on the printed out pattern the designer/company and the type of garment. On my trace off, with the seam allowance, I write this same information, as well as, the size I’m tracing off, which piece it is (front facing, side front, pocket, etc.) and how many times to cut the piece in which fabric. For cutting in the garment fabric I just write how many to cut but if it’s lining or interfacing, or a contrasting fabric I will note what fabric I need to cut it from.
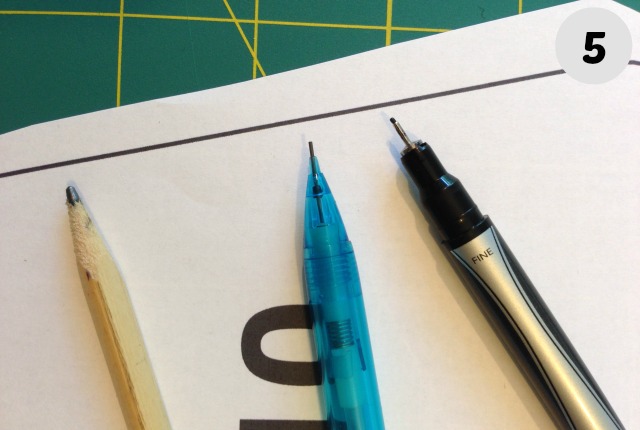
This tip seems trivial but really it’s just good practice when tracing off patterns. Pick a writing instrument with a nip or point which will remain the same width during use. For example, I prefer pencil but a pencil point will dull, making it’s mark wider, and a smudge further from the ruler. I use a mechanical pencil which stays the same width or I use a hard nib, fine point pen.
When it comes to cutting out your pattern pieces you are so ready to be done with all this pattern prep but please take a little time and cut consistently. Either cut right on your line, always to the left of your line or always to the right of your line.
I had a boss who believed we got a better cut line if we always had the scissors to the left of the pattern (if you were right handed). Over the years I have just kept to cutting on the left of any pattern because he seemed so sure of this and, I find, it works for me.
Oh, you still wait to cut your pattern pieces out exactly when they are pinned down to your fabric and you are cutting into the fabric as well? Don’t do that. That tissue is bad for your shears.
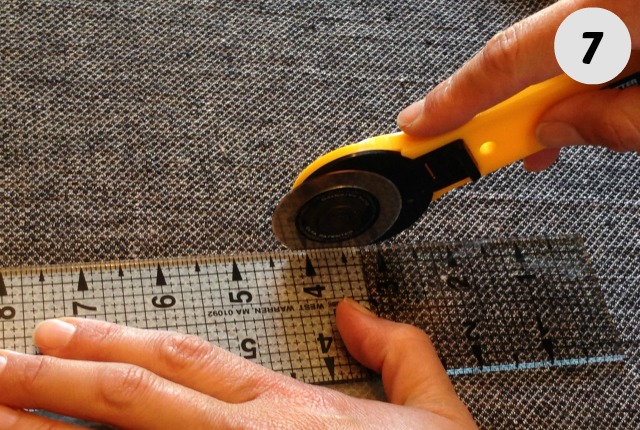
Alright, finally we get to the fabric. I love my cutting shears but with some fabrics I have found a rotary cutter and a ruler to work better. In school our professors had us cut only one thickness of fabric at a time to get the most accurate cut. Sometimes this makes a difference (slippery fabric, matching plaids, or prints) but other times it’s a waste of time.
My advice is that it has taken an investment of time to get this far and you still have a ways to go so don’t rush through the cutting only to make a mistake that can’t be reversed. Have good lighting, the best height you can get for your back, be mindful of those blades, relax, and remember, it’s all down hill from the cutting.