

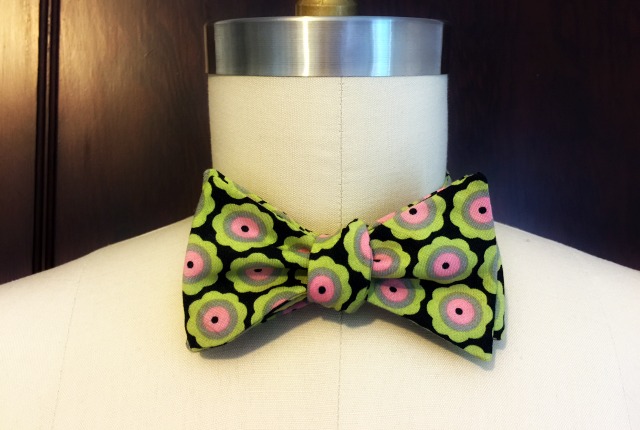
A bow tie was never something I thought I would make. I’m not against them, they simply aren’t on my radar. Besides, I view ties like undies; garments to be bought at a store. Yet, I’ve just made a bow tie and I liked it. It went so fast and so easy.
 Recently a friend was telling a story about how her lovingly eccentric husband got it in his head he was going to make himself a bow tie. After all he had just finished making a quilt (hand pieced); he had this sewing down he figured. At the store he got carried away (as the best of us do) and bought enough fabric for at least a half a dozen bow ties. After a couple of years passed and the fabric still lay folded in the bag he asked his wife if she would sew the ties for him. She politely declined (probably with a sly, knowing, smile on her lips) and retreated to her glass blowing studio. Sewing was not on her to do list. With Father’s Day nearing I volunteer to make one, but only one, so I could post about it here.
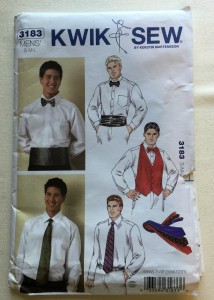
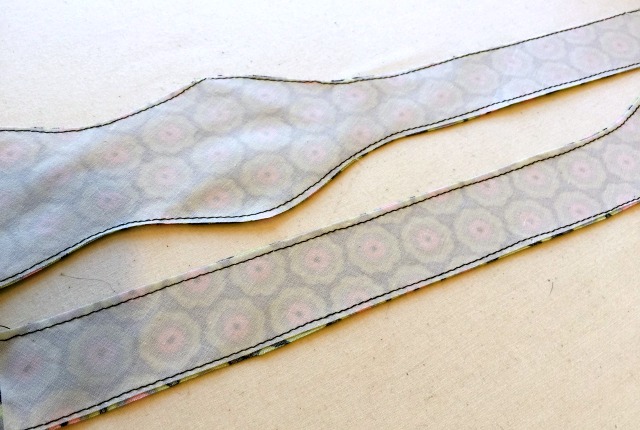
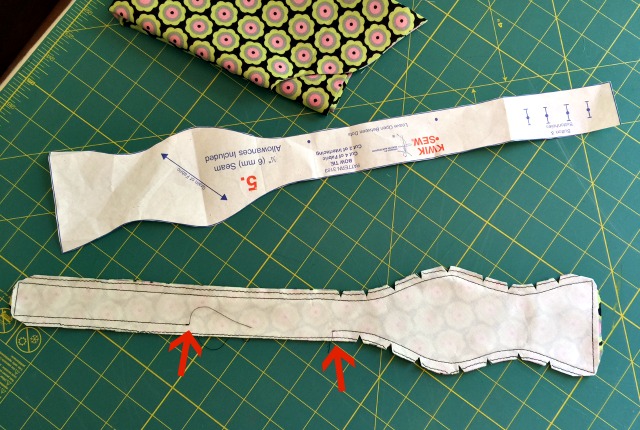
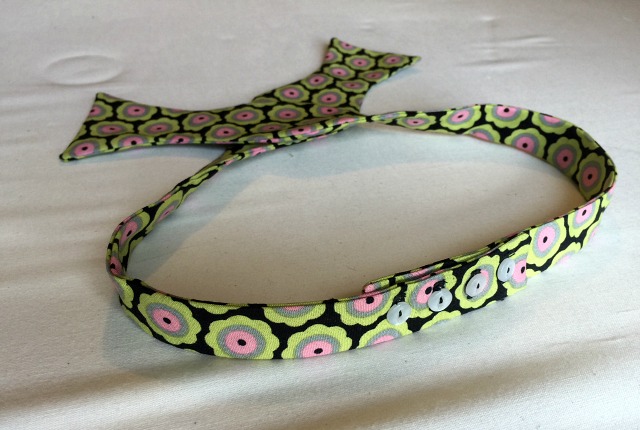
Mr. Mc C had bought Kwik Sew pattern 3183 and had cut out the one pattern piece needed for the tie. This tie is made of two shaped pieces that button at center back. There are four buttons and buttonholes to make the tie slightly adjustable. When a tie is tied either side can show. To finish the tie four pieces are cut then two are sewn together and turned right side out. Interfacing is needed for a slight crispness. The pattern suggest purchasing woven fusible interfacing.
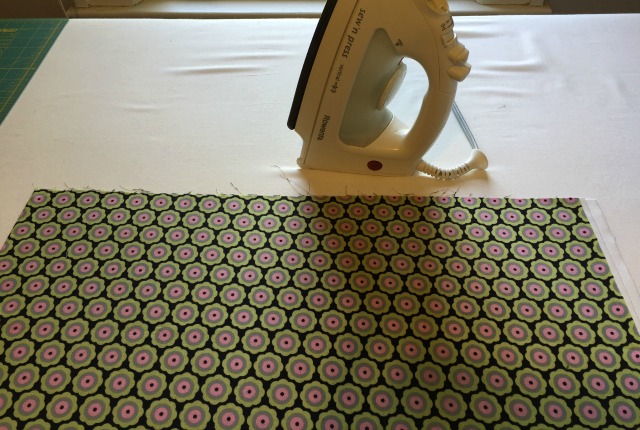
I did not wash the tie fabric. What? No, I broke a rule but I have good reason. I wanted the tie to keep it’s crisp look so I wanted to leave the fabric sizing in the fabric, not wash it out. However, in case Mr Mc C decides to one day wash his tie, I ironed and steamed the fabric quite a lot to sort of preshrink it. Will it work? It should. If I find out otherwise I’ll update this post and tell you to wash your fabric 😉
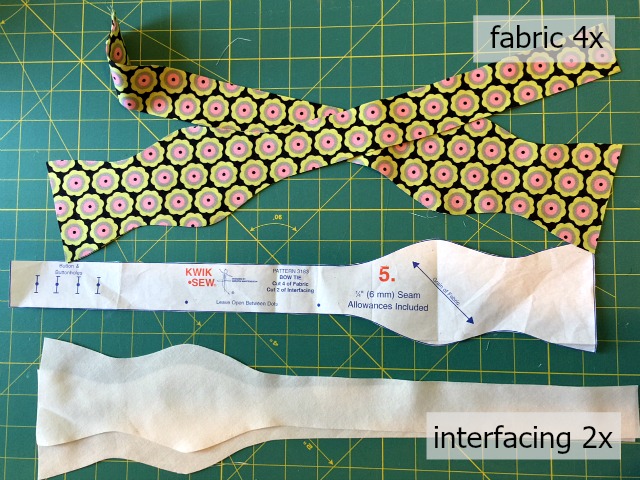
I cut the tie fabric out on the double twice to have four pieces. I turned my nose up at the fusible woven interfacing and cut the “interfacing” out of muslin. Muslin is a good stand in for woven interfacing when you need a little stability or weight. Again I had a good reason to break the rule; I had two in fact.
- The pattern instructions have you sew the interfacing to the fabric, not fuse it on. If they want me to sew it anyway I can use sew in interfacing.
- Fusible interfacing can (and usual does) cause puckering on the fabric it’s fused to. Not a problem for a facing that is never seen perhaps, but for a bow tie, both sides must be ready for the lime light.
The construction of the bow tie is pretty darn straight forward and simple. Start with basting your woven interfacing pieces to two different bow tie pieces. Kwik Sew allows a 1/4″ seam allowance on this pattern. Baste the interfacing inside the seam allowance; 1/8″ or so from the edge. It doesn’t have to be perfect so you can sew fast here.
Caution: I was tempted to not pin the interfacing to the tie to baste it on but all of the pieces are cut on the bias and bias will stretch out under the pressure foot so go ahead and pin the interfacing to the tie before sewing. Press when your done to get things back in shape.
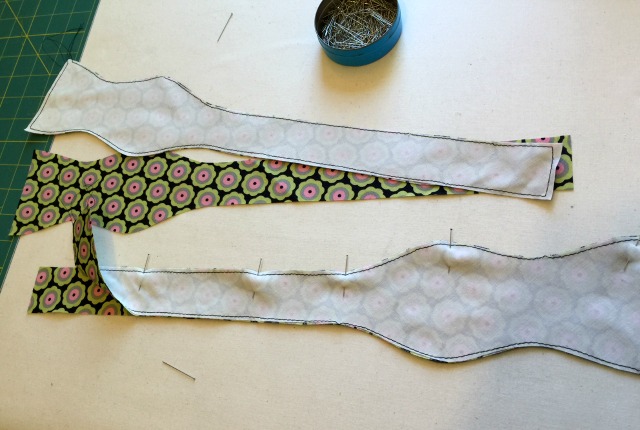
Lay one tie piece with interfacing over one tie piece with out interfacing, and repeat with the other two pieces. Pin together all the way around but note that you must leave an opening in order to turn the tie right side out.

I use two pins close together to mark where the stitches start and stop when I need to leave an opening. The arrows above point out my double pins. Two pins together isn’t something I would do otherwise so for me this easy to make mark stands out. Sew the tie pieces together using the 1/4″ seam allowance included. Back tack at the start and finish since you will be pulling on these stitches when you are turning the tie out. You may want to use a smaller stitch on the curved areas to make the curves smoother.
Press. Clip the curves and corners. (The arrows are pointing out the opening.)
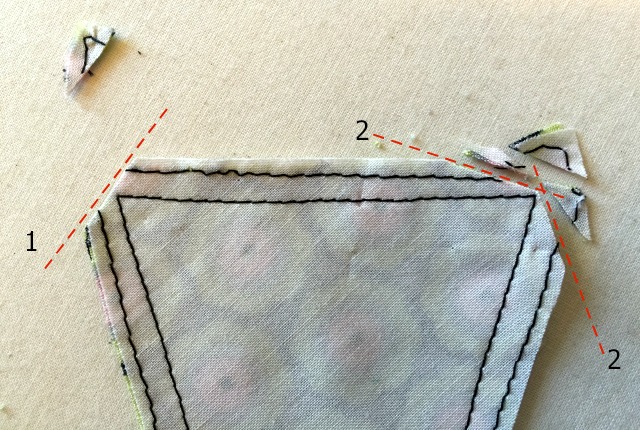
Clipping corners is actually a three snip process; especially for tight corners like these.
- Snip off the tip at a 45° angle.
- Snip from the corner of the stitch line down the seam allowance at about 20° or reverse the direction from the seam allowance to the corner; which ever is comfortable for you. (Yes, there are two number twos in the picture. That’s because you can cut either side first, they are interchangeable)
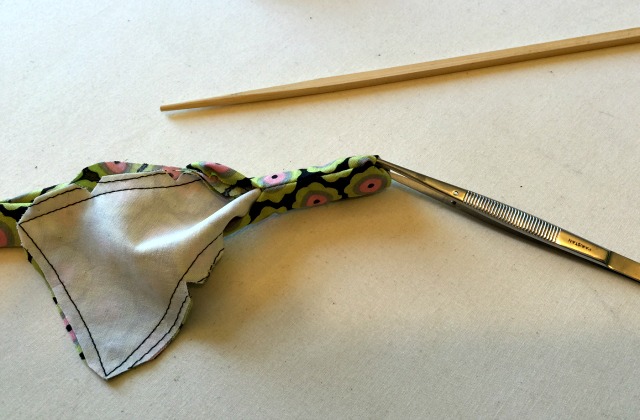
Turn the tie right side out. I found using a long pair of tweezers helpful in pulling out the shaped end. Both ends required the assistance of a chopstick to poke the corners out.
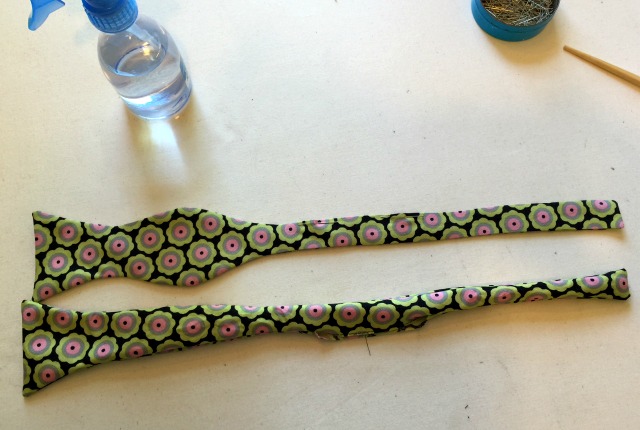
If turning out the tie didn’t take away all of your patience then this step might. Getting the seam to lay perfectly on the edge takes patience and, I find, water. The fabric can be rolled under you thumb and for finger easier when it’s damp to wet. When you’ve coax that seam to just where you want it, press it in place with an iron. Work your way around the edge of the tie. Leave the opening for last.
At the opening fold the edges in 1/4″. Line the up to each other as best you can and press. Using a hand slip stitch (or your favorite) sew the openings closed.
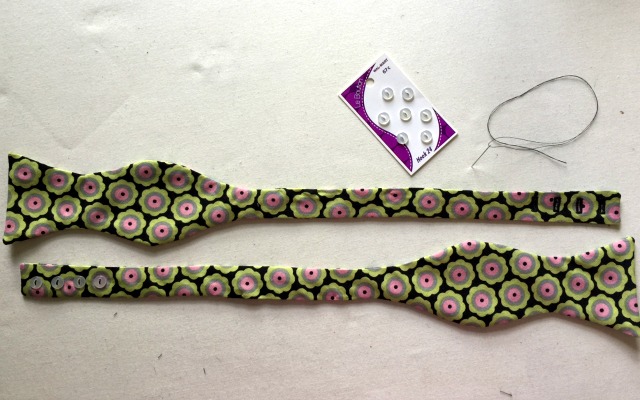
On one tie piece you will sew the four 3/8″ buttons. On the other piece sew four buttonholes; all in a row, close enough to each other to be glaringly obvious when they are not perfectly lined up (ugh). Kwik Sew does not specify which piece gets the buttons or buttonholes because it doesn’t matter.
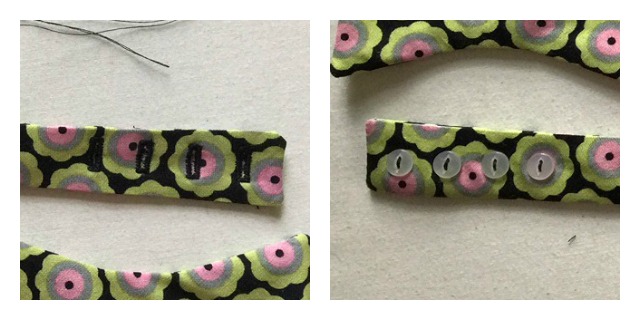
Buttons on one tie end and buttonholes on the other.
Done already? You bet. I will never wear this tie (hopefully Mr. Mc C will) but I was still pretty excited when I got it done and I’m sure it’s only because of the almost instant gratification the project gave me.
Would I make this again? Yes.
What would I do differently? Nothing, I think.
Do I recommend this pattern? Yes, if you want to make a cotton bow tie. In silk, I might choose an unshaped pattern.
Do I know how to tie a bow tie? No.
Mr. Mc C looks quite dashing in his bow tie. He continues to hold a desire to make his own. I’m sure he’ll feel empowered for the task after reading your instruction tips.
With his sewing skills he could make a pieced and quilted bow tie.
Thank you for this explanation. How much fabric did your I have to make 6 bow ties!
I think it required 1/2 of a yard because you cut the tie pieces on the bias. If you’re making 6 from the same fabric you will use less than 3 yards because you can get at least a half of a tie more across the width of the fabric. (The ties are made in 2 pieces which button together at center back and each piece of the tie requires a front and back.) For one tie you’ll cut 4 pieces but I think you could get 6 pieces across the width of the fabric.
Unfortunately, I don’t have the pattern to reference. (A friend gave me her pattern and her fabric to make the ties for her husband. – Yes, I owed her a favor 😉
(and sorry for the late reply I was down for the count with the stomach flu. yuck)
I made 3 handsome bows for my male bestie-one of denim. He’s loves fine clothing & the challenge of tying a tie. My fiancee, on the other hand, doesn’t possess the patience for dealing with anything that involves tedious handiwork. I guess I’ll have to make him a few pre-tied bows with matching pocket squares. He wants the pleasure of looking good without the rewarding efforts. LOL & smh
The pleasure of looking good without the rewarding effort. I like that. Sometimes, that’s how I feel. I especially want my hair to look good but I don’t want to put in that much effort.
Finally! Everywhere I looked I kept finding tutorials using fusible interfacing. I wanted to see how someone else did it before I cut into my pricey silk.
Fusible interfacing is not your friend. The glue will leave puckers and bubbles on the fabric you fuse it to (not right away but after time) so never apply it to the upper collar or to the cuff piece that goes on the outside of the garment. Actually, Fashion Sewing Supply https://www.fashionsewingsupply.com/ makes quality fusible interfacing. I have used a few of theirs with no bubbles after many washings.
You can use almost any fabric for an interfacing layer. You’ll want to test how much body your interfacing is going to add. Do that by slipping a piece of it or the corner of it between two layers of your silk (just fold the silk over part of your interfacing). Check that it has enough body to look how you want it to look. The tulle I used may make the tie too floppy for your preference but you could also use organza or any fabric that can be laundered in the same manner as you would launder your tie. (make sure shrinkage is similar or preshrink your “interface” fabric).
My professor used to tell us, “You gotta’ know the rules to break the rules” and interfacing, what you use for it, is a rule you can break