

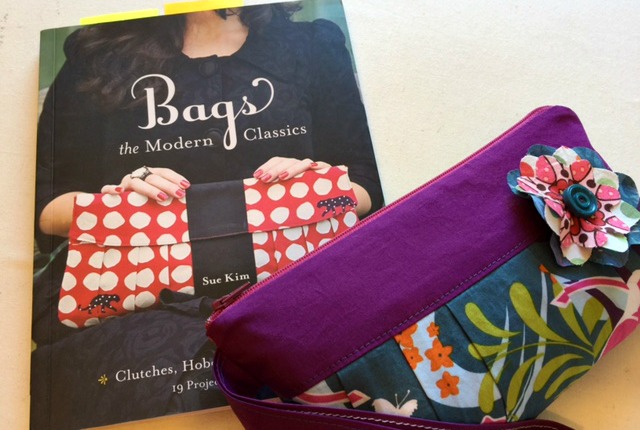
What I sewed: Wristlet Zipper Purse Pattern found in Bags the Modern Classics by Sue Kim and published by Stash Books
Bag sewer and pattern maker Sue Kim of ithinksew.com has been making bags since 2007. She published Bags the Modern Classics in 2011. I recently picked it up used. I liked a few of the projects included in it. They looked fairly easy yet stylish. I’ve been interested in making handbags for awhile now and thought I might learn a few handbag making tips by making some of these projects.
Ithinksew.com sells pdf sewing patterns for an array of bags and purses (as well as other items) I wonder now if the projects in the book are simpler versions of some of the online patterns. Bags the Modern Classics includes instructions for 19 different fabric bags with variations for some.
The wristlet zipper purse, was the first, and so far only, project I have made from this book.
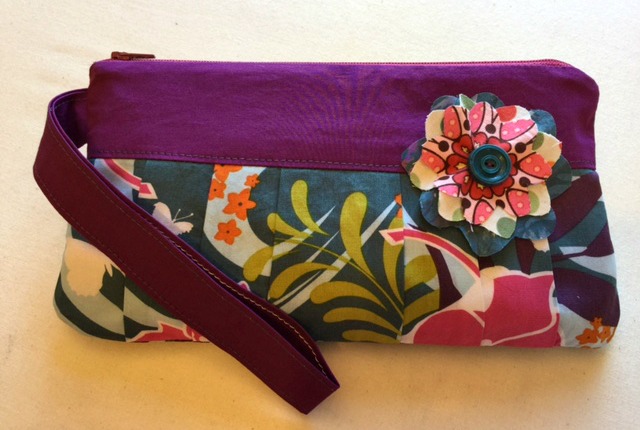
Style Details: The wristlet zipper purse can be sewn in two sizes. I choose to make the larger purse. The front of the purse is made of two pieces giving you the option to use contrasting fabrics or not. The front’s top piece is slightly curved and is a yoke for the pleated bottom piece. The front also features an optional fabric flower.The back is made of one piece and is not pleated. The purse is fully lined and has a zipper closer across the top and a wrist strap.
The finished bag measures 9 1/2″ wide and 5 1/2″ tall. Large enough to hold my keys, phone and large wallet but too small to carry my keys, phone, wallet and eye glass case. There are no inside pockets or divider to keep your keys separated from the front of your phone but a pocket could easily be added to the lining before sewing the purse together.
The Process: To start you measure and cut out rectangles of your fabric. The sizes you need to cut are written out in paragraph form. A list of pieces needed would have been much easier to refer back to (and thereby making the cutting out time quicker). After cutting the rectangles you then use the included templates (traced off a large pattern sheet) to round off the corners and shape the sides. This took me forever since there were three different templates I needed for the curves and the templates have the longest names that are all similar (again, a list and naming the templates 1, 2, 3 or A, B, C would have made the process so much quicker) When I was done cutting and trimming and second guessing I turned the page in the book for what to do next and there were diagrams of the different purse pieces and their trimmed corners. If only I had turned the page earlier and seen the pictures I would have saved a lot of time; operator error. (I wrote in my book to reference the next page for next time.)
In my book (there may be different editions) the front top piece is cut 1/2″ smaller than the back. Of course when it came time to sew the front and back together they didn’t line up and I had to trim down the back and lining pieces. The sewing instructions were clear and the bag went together quickly once I had all the pieces cut.
I thought the author had a very good point about fabric selection for your projects. She counseled not to overthink it. “Fabric always looks more beautiful in the finished product than it does folded on the table. So don’t be afraid to follow your instincts- just get started!” After a little indecisiveness over my fabric choice I remembered reading that and just committed. She was right, the fabric did look more beautiful in the finished bag. Now was that because it really did or because my brain convinced me that it looked good together to justify that time spent sewing?
What I Did Differently: I machine stitched the bottom of the lining closed (yes, you can see the stitches) instead of hand slip stitching the opening together. At that point in the bag making I was just wanting to finish. Besides the purse is for me and I’m okay with an exposed, machine stitched closure inside my bag.
I also sewed over the area where the strap is sandwiched into the seam a few times for reinforcement.

What I Would Do Differently:
- I would add a stiff interfacing to the strap. When I used the purse the handle seemed super flimsy for the weight of my phone and wallet (so many coins ;-).
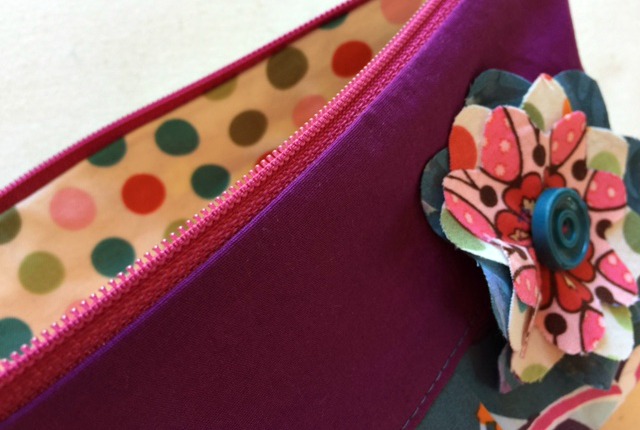
- I have seen other zipper pouches put pieces of fabric on the ends of the zipper. I would learn how they do this and add it to this bag. I think that would bring this bag up a notch.
- I would use a heavier weight fabric for the bag. The fabric suggestion was for quilting cotton or upholstery fabric but my cotton wasn’t stiff enough.
- I would add a pocket so my phone doesn’t get scratched up by my keys and I might add a key lanyard.
- I would cut the top piece out large enough to match the back piece. I might even make the entire bag a little bigger.
Will I Make This Pattern Again: Yes. It was easy. It used up scraps (large scraps). I think it’s cute and sometimes I want to travel light. I could see making this as a gift for a girlfriend, sister or niece. I could see making it in wool or corduroy (with a velvet flower) or done up in a brocade or a metallic jacquard for an evening clutch (sans strap, or a daintier strap).
Please share. Let us know if you’ve made this wristlet purse and what you thought about it.
In my opinion… I think it turned out very cute! I loved your suggestions on what you would do next time; they are always helpful! As far as wrist purses? I have one I purchased a few years ago on sale. It has a front pocket; and little pockets inside that hold my cards. I cram quite a lot into this little dandy; and I always get compliments on it. The best I love about it? No one can snatch my purse or slyly lift my wallet unless they lift my arm. lol Now I know something about sewing a new one; which I will need soon. Thanks! 🙂
I like the idea of adding pockets for cards on the inside. Even a little zip pocket on the back would be cute. Make it in a solid, add metal zips (gold or silver) and studs (in the same metal) across that top front piece. That’s the ticket for New Year’s Eve – if I am going any where on New Year’s Eve 😉
I also am growing fonder of the wristlet style because I always know exactly where it is. I never take it off my wrist to accidently leave it some where (ok, except at restaurants). I know I’m going to make another one soon.