

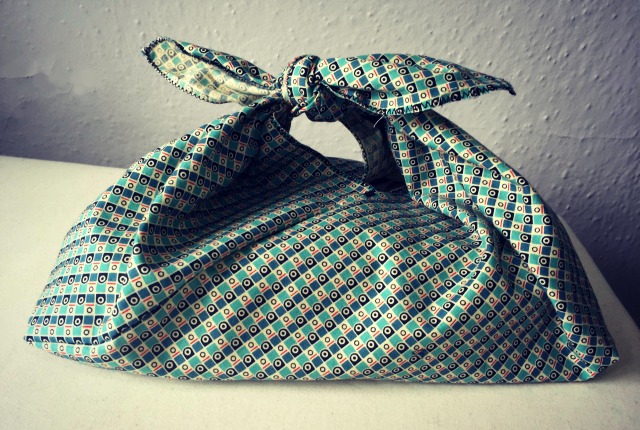
As a kid when I needed to transport small toys out to the back yard, I would place them in the center of a bandanna and tie the opposite corners together. I thought it was the perfect little tote and even used it high school (and beyond) as a purse. The bento bag is a sort of grown-up version of my bandanna tote. It’s similar in many ways; how you close the bag is also the bag’s handle (tying loose ends together), it’s simple to construct and it has a rustic aesthetic (especially in a natural linen). However, unlike my bandanna, no one is going to think you use your bento bag as head kerchief on other days or that you’re going to be wiping the sweat off your neck with it (but, you could, if you wanted to).
The bento bag starts as a rectangular piece of fabric*. By just sewing two seams and two corners, it becomes a little bag.  You can use any light to medium weight fabric; linen, cotton, a silk scarf no longer used. Heavyweight fabric would not tie with itself very well. Lightweight fabric needs to be strong enough to carry items (silk is strong).
What ever fabric you choose to use, the rectangle that you start with must be three times wider than it is high. You could piece together fabric to get this original rectangle.
The bento bag is not a bag you want to make too big since it has no structure other than the boxed corners. I have given the sizes you could make with 44″ wide fabric. Remember, what ever size you make, the width is three times the height. If the height is 14″ the width must be 3 x 14 or 42″
*there is actually a way to make the bag with two triangles and not a rectangle. I think this way is easier.
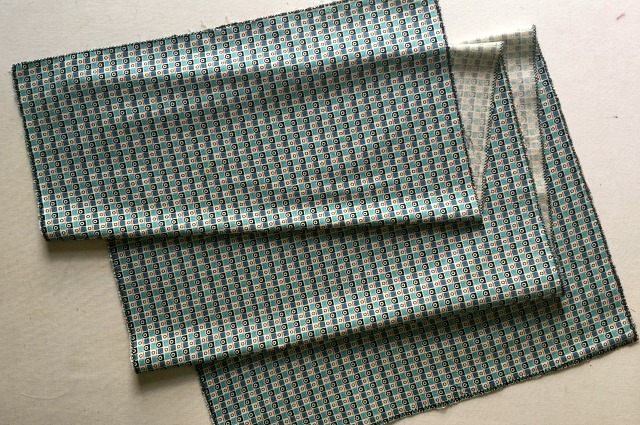
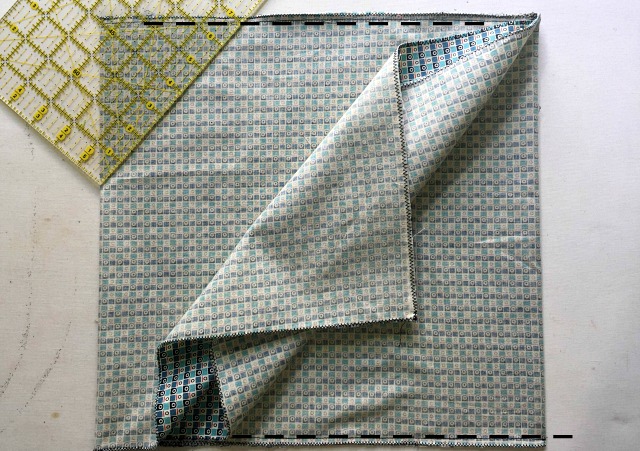
Finish the edges of the fabric with what ever method you wish.
- serge it
- turn it over on itself twice and hem it
- sew it, right sides together, to a second rectangle and turn it out (now it’s “lined” and has more heft to it)
- run a zig zag stitch all the way around (my lazy, I mean quick and efficient, method)
Which ever you choose to do, use the same seam allowance or stitch width on all sides so the rectangle retains it’s height x 3 = width ratio.
(I made a bento bag for my daughter’s beach trip earlier this summer and hemmed the sides. That was a pain, or I’m too impatient, so for this bag, not having a serger, I zig zagged the edges).
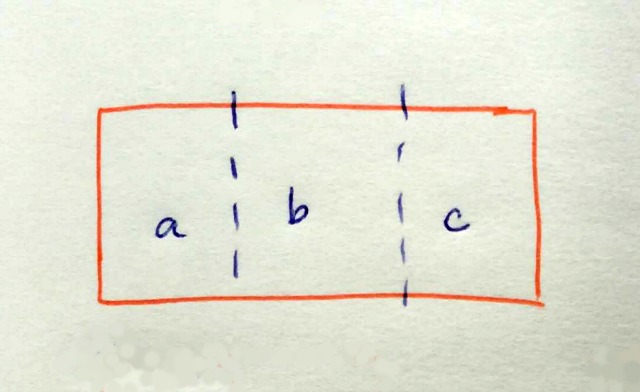
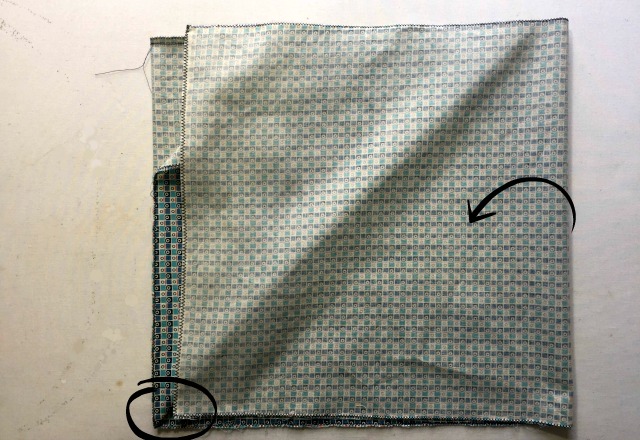
Lay the fabric right side up so it is horizontal. Mentally divide the rectangle into three squares (they are all equal because your width is 3x the height).The first square on your left is
The first square on your left is A, the center square is B and the square to your right is C.
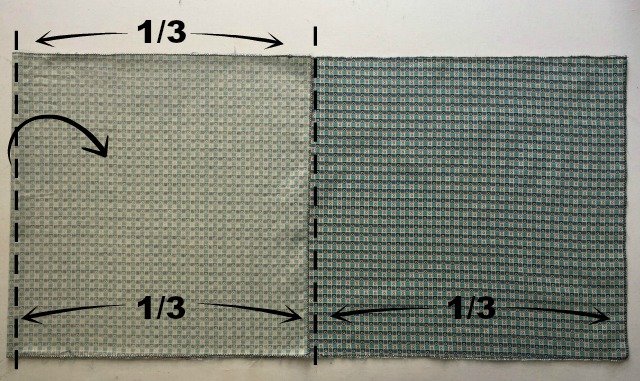
Fold square A to cover square B (the left short side of the fabric comes in one-third of the way).
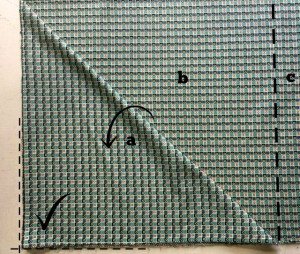
You can measure this to be sure you have brought the left edge in a third or check to see if the overlap is squared by folding back the top right corner of the fabric to meet the bottom left corner.
You want the width of the overlap to be one-third of the entire base. The height is already equal to one-third of the rectangle’s width. So when the corner lines up you know you have brought the edge in one-third of the way.
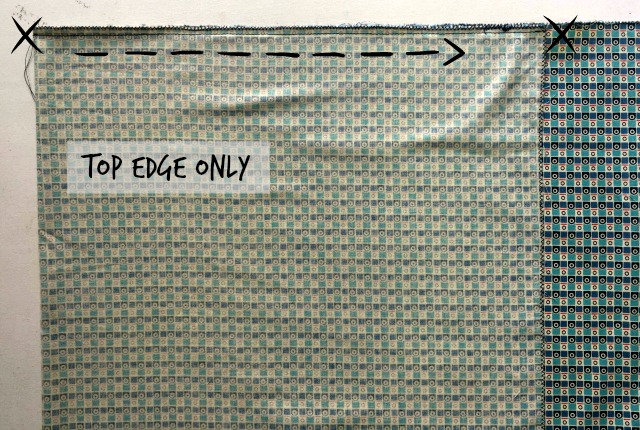
Sew only the top edge of square A to square B.Stop at the edge. Do not sew into square
Stop at the edge. Do not sew into square C.
(I used 1/4″ seam allowance.)
Move the bottom edge of square A up and out of the way but leave the left edge folded. This fold is the one-third mark, which you need for the next step.
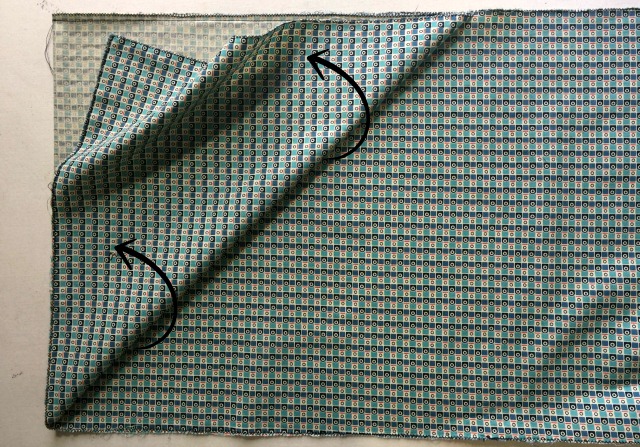
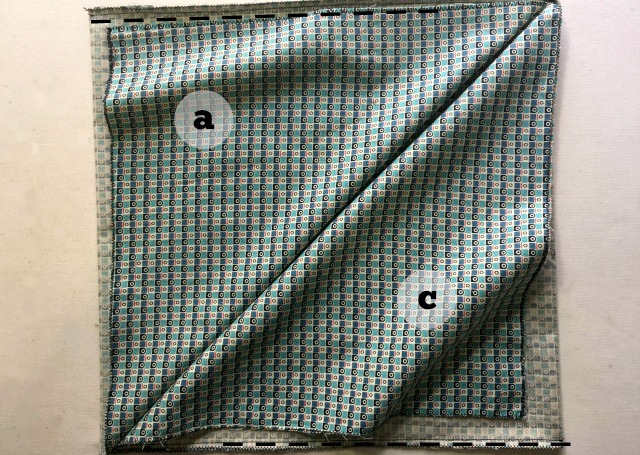
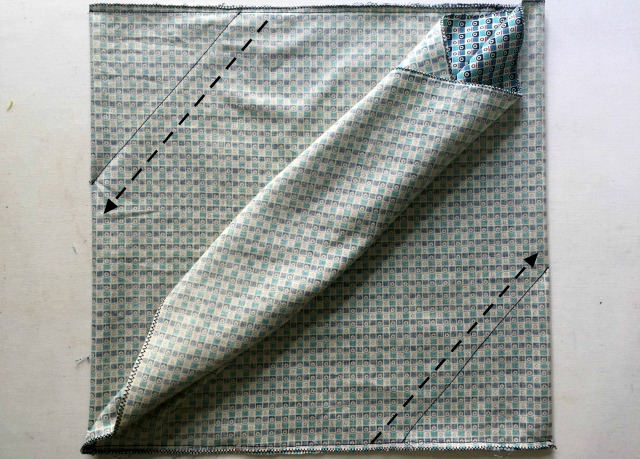
Now bring square C over on top of square A and B.
Like square A and the far left edge, you are bringing square C and the far right edge in one-third.
Line up the bottom corner of square C to the one-third mark made by the fold of square A. You may need to open that fold a little to place the corner exactly at the one third mark. (In the picture above the corner is not lined up only to show you all the layers.)
The bottom corner of square C must come in and overlap square B completely as square A did from the left side.

Sew square C to square B across the bottom edge only. Be sure square A stays loose and doesn’t get caught in the stitching.
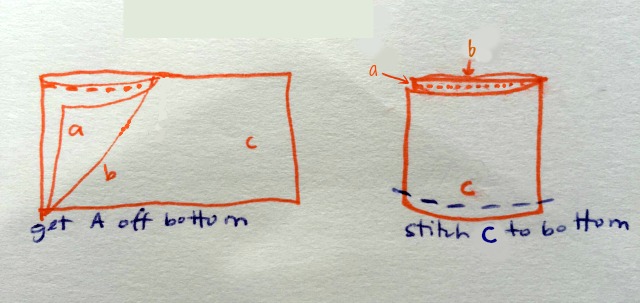
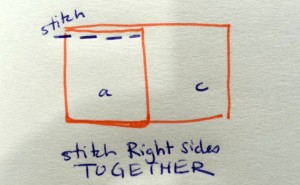
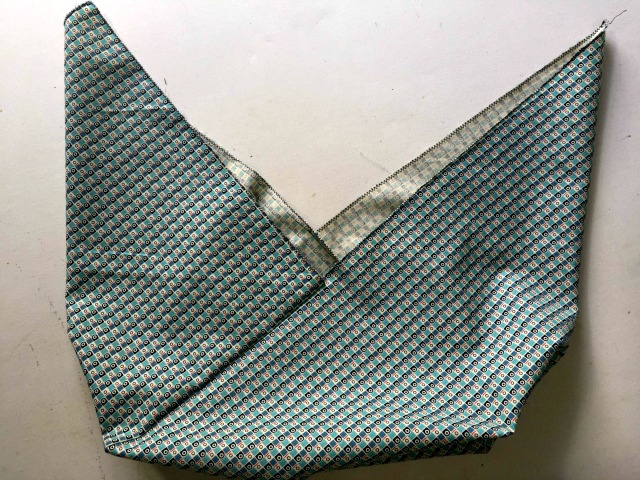
Another way to look at it.
Check in: intoThe top edge of square
The top edge of square A and square B are sewn together and the bottom edge of square C and square B are sewn together. The bottom edge of A and the top edge of C are loose.
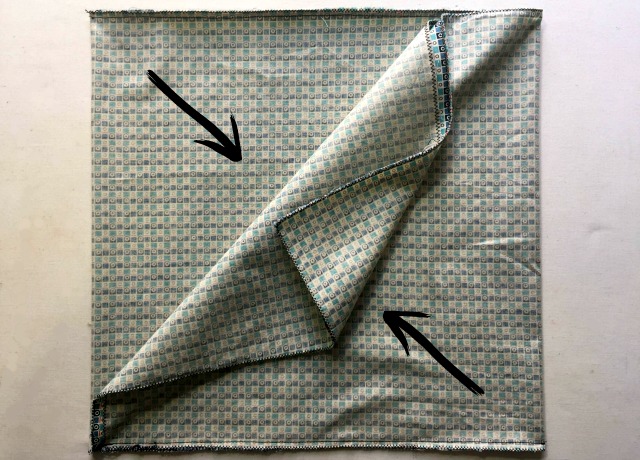
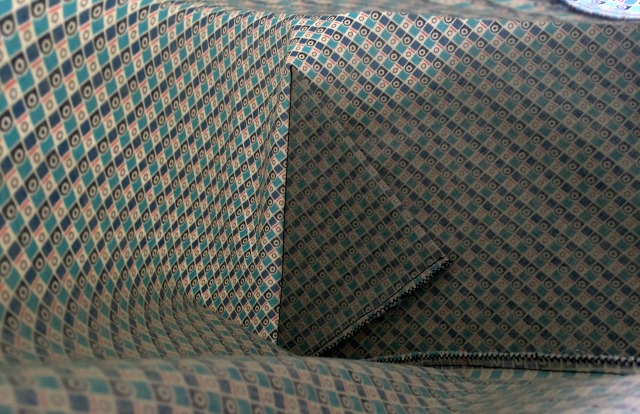
Move the loose fabric to the center of the square.
The corners of the bag are made by stitching across the top left corner and the bottom right corner at a 45° angle.
How large you make the corner changes the dimensions of the bag. A large corner will give the bag more width and take away from the height. A smaller corner makes a narrower but taller bag. If you are making the bag to carry something specific, like lunch containers, or yarn, think about how wide you need the bottom of the bag to be. For an all purpose bag decide if you want the finished bag to be more short and full or tall and narrow.
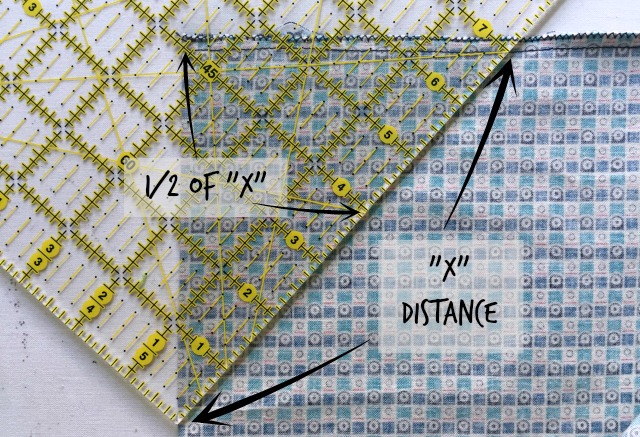
Which ever size you decide to make the corners you need to measure in two places; across the corner and down from the corner. I like a fat ruler for this task.
Measure across from fold to seam (not edge). In the photo above I want to sew across the corners 7″ (this is a big corner). What ever the number is across the corner, the distance from the corner will be half of that.Line up the 0 on one edge, the desired length
Line up the 0 on one edge, your desired length on the other edge (7″ here) and half of that desired length in the corner (3.5″ here). Measuring up to the corner insures you are marking and sewing at a 45° angle.
Note: measure from the stitche lines if there are any and do not include the seam allowance.
Mark your lines and sew across both corners.
Bring up the loose ends of square A and square C. Turn right side out.
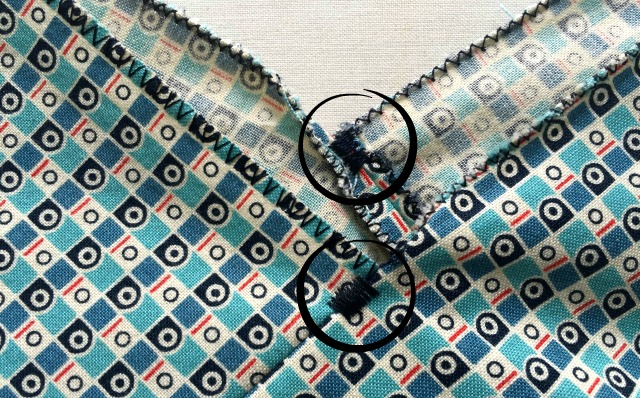
Add a little reinforcement to the seams at the edges. A simple tight zig zag does the trick.
I did not clip the corners off but you could. If you do, finish the raw edge (pinking shears, overlock stitch or zig zag stitch).
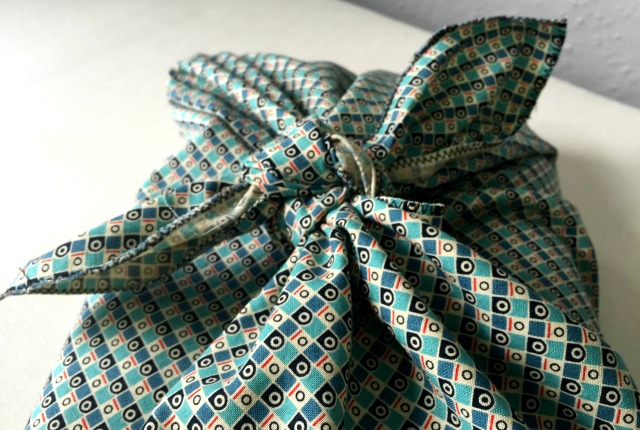
Stuff the bag and tie the loose ends. You’re done.
Now instead of taking toys to the back yard in a bandanna, I load up my bento bag with my book and phone or some hand sewing supplies and it’s off to the back porch to escape for an hour or so.
Variations:
- Use black silk for an evening bag.
- Patch together fabric for the bag and line the bag to hide all the seams (line it by sewing two rectangles, same size to each other, leaving an opening to turn it right side out and then close the opening)
- Add a button to one tip and a button hole to the other (the tips you tie together) instead of tying to give you a longer handle or at least the option to make it longer when needed
- Make it in a heavy weight canvas and sew the tips together permanently for a grocery tote (it will never tie close but can haul heavier things)
Now that was a really good tutorial! I’ve been having a hard time grasping exactly how these bags come together, until I saw your pictures. Well done!
Thank you. I try to make things super clear so I’m glad to hear you found it useful. (Big smile on my face)
😀
I’m considering doing a french seam on the gussets, have you tried that?
No, I haven’t. Would you do this for the first seams or when you sew across the bottom corners? I like the idea, either way. Nice clean finish. I wonder how much seam allowance you could take from the square without causing distortion to the bag’s shape…It may not matter at all. I think I’m going to try this. Let me know if you do.
Nice tutorial, thank you for this! Have you tried making a lined version? Any suggestions?
Thank you. I’m glad you liked the tutorial.
I haven’t tried making a lined version but, now that you got me thinking, I think I would make two separate bags. Then I would place one inside the other, right sides touching, wrong sides showing, and line up all the edges. Sew around the edges, leaving a small opening, 3 to 4 inches?. Turn right side out through the opening. Fold the seam allowance of the opening in and press. Then topstitch around the entire edge which will seal the opening shut.
Sounds feasible 😉 Let me know if you try and it doesn’t work.
In fact, now I want to try a lined version. It would look more finished and have a nice weight to it. Good idea, Susan. Thanks
This was an amazing tutorial!!! I first saw one of these bags on a different website and tried to follow their directions. I was hopelessly lost. After finding your directions, I had no problem at all! Thank you!
Thank you. I’m happy you had success (and thrilled you told me). I had trouble with a tutorial too which is why I made this one.
I’m finding my bag handy this summer. The best thing is I can throw it into the washing machine.
I finished my bag by sliding a small fabric tube over one of the corner flaps, sewing the two corner flaps together, and finally, sliding the tube over where I had sewn the corners together. I got this idea from another website.
I really like the strap that it makes. I want to be able to use the bags as a shoulder bag, but the strap is a bit too short. I want to adjust the beginning pieces to make the strap longer, but I have no idea where to start. Any ideas?
So, I was looking at my bag and I think, you could make that sliding tube longer and make it so it attaches to the points/corners that tie together which would extend the ties instead of covering them.
Sew a button at each tip of the bag (the tips being the points that tie together). Place the button about an inch in from the corners. Then on the tube of fabric sew two buttonholes on each short end, parallel to the short ends. The button holes would line up with each other when the tube is flat. The tube can now be fixed in place with the buttons to give you a longer opening, or you could unbutton it and use it to cover the ties. (It’s convertible – extend or conceal)
Of course, you can’t tie it closed if you attach the tube to the ends. It would be an open bag. Also, you could sew a tube flat to be a strap that buttons on and off (put the buttons on the strap and buttonholes in the tips of the bag)
Or you could button one tip to the other and then slide the tube over the ties as per original purpose. That would give you more space to wear it on your shoulder and easier then sewing 4 buttonholes.
Obviously, I’m thinking this through more as I write. If I can think of a way to close the bag AND extend the opening I’ll let you know. If you come up with a solution, please let me know. It’s a good idea to be able to sling this bag onto the shoulder.