

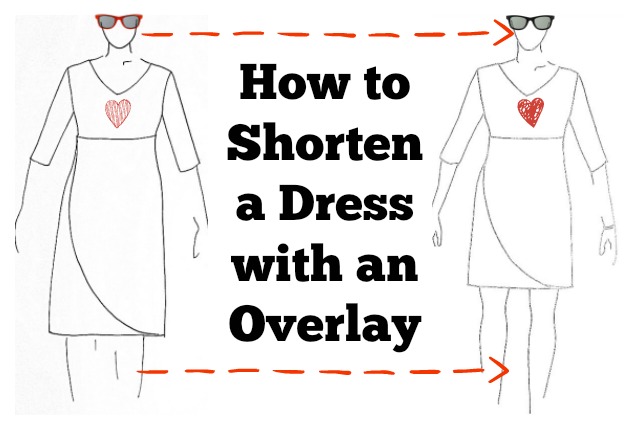
Once in awhile, someone will ask me a sewing question and sometimes I get to turn their question into a blog post. Such is the case with Rosemary’s question.
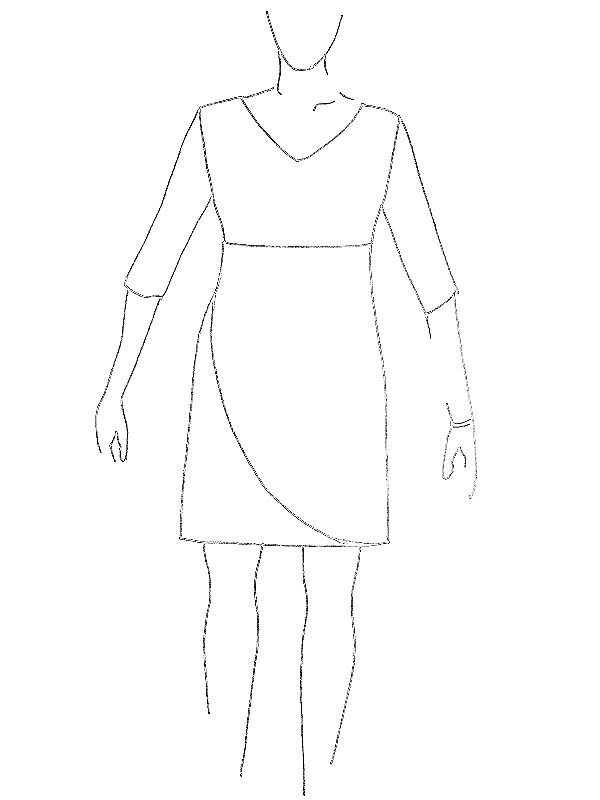
Rosemary asked how to shorten a dress that has an overlay which is attached in the left side seam.
What to Know Before We Go (aka; The Fine Print)
I do not have a dress or a skirt with an overlay to make the alteration and photograph it. I thought of making one just for this post but realized it would be next year before I answered Rosemary’s question if I did so I have illustrated the steps.
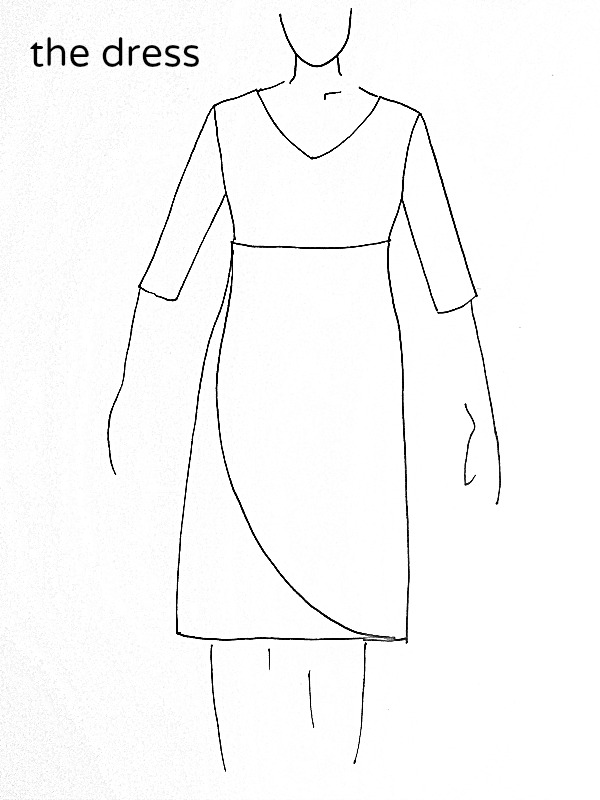
I have not seen the dress that Rosemary wants to shorten so I made some assumptions:
- The overlay is lined
- The overlay is shaped
- The overlay is only on the front of the dress
- The overlay hangs from a waist seam and not the shoulders (this wouldn’t change how to shorten it)
An unlined, straight overlay would be the easiest to alter and I’ll include written directions for such an overlay.
This method will work for a skirt with on overlay too. Most skirt overlays are attached in the right side seam so when following the directions just swap out the left side seam for the right side seam.
Also not having an actual garment to test this, I’m only 98% sure this is the best way to do this alteration. (eek)
Here’s How We Do It
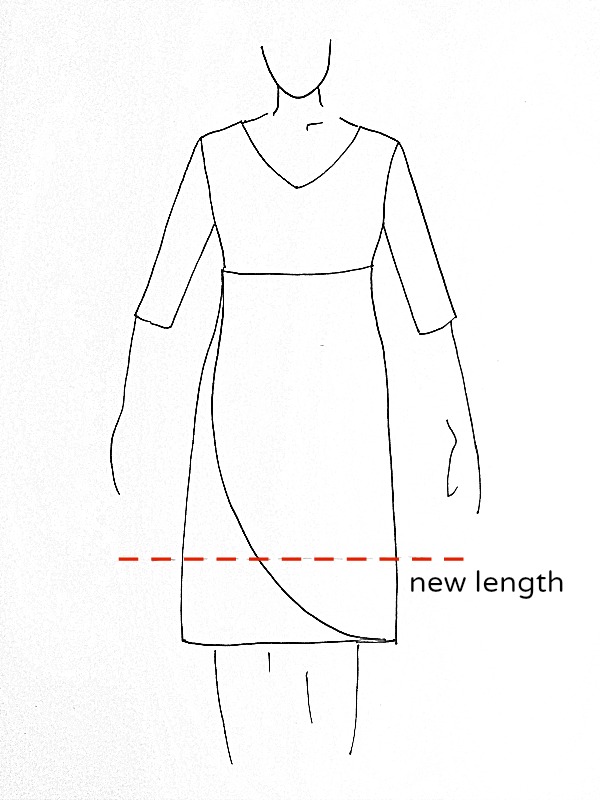
Mark where you want the new length to be with pins, chalk or a chalk marker. Mark on top of the overlay and under it on the skirt.
Mark all the way around if the back length is different from the front. If it’s the same you can use the front cut (when you cut it) as a guide for the back cut.
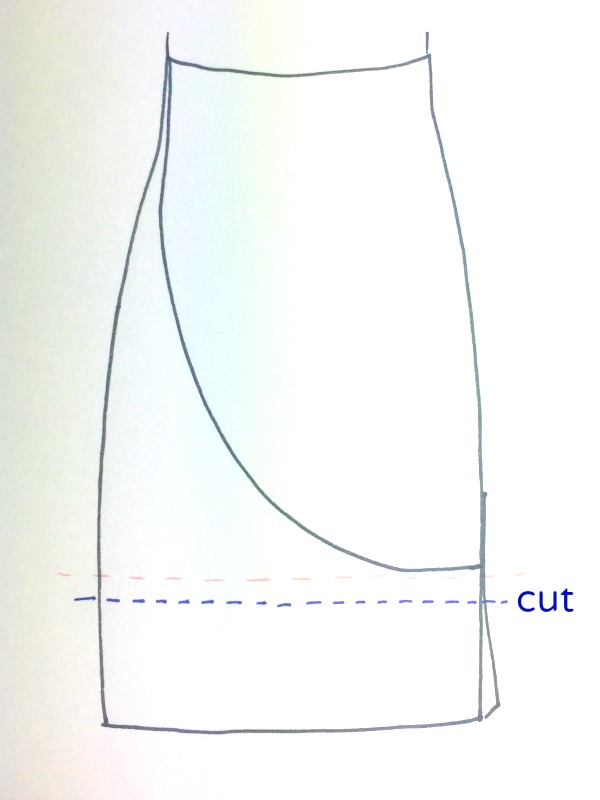
If the overlay is shaped draw it’s new shape on the overlay with pins, chalk or a chalk marker. This line is called the design line and the decision of how it will look is all yours. If you like the original shape follow that. If you think it will look better another way, do that.
After marking, take a step back and check the new design line is pleasing to your eye and fits the garment.
If the overlay is straight, not curved, simply mark on the overlay it’s new length.
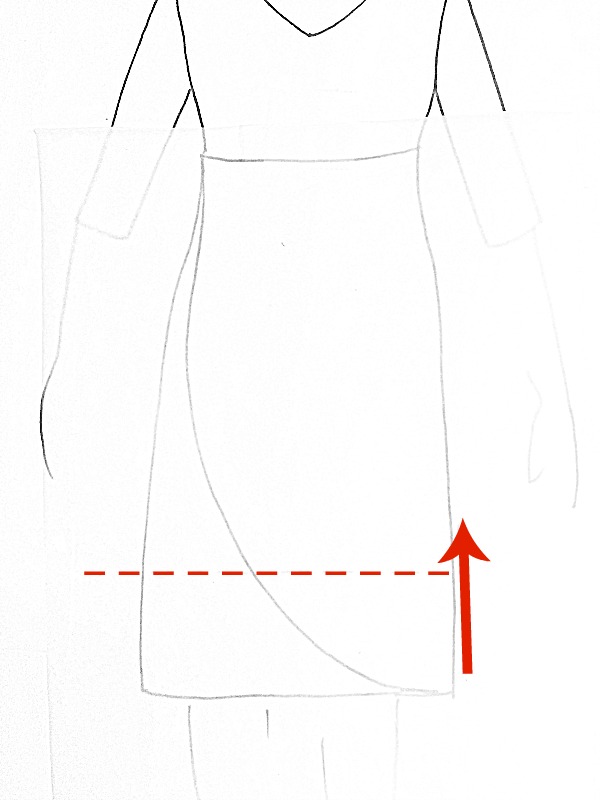
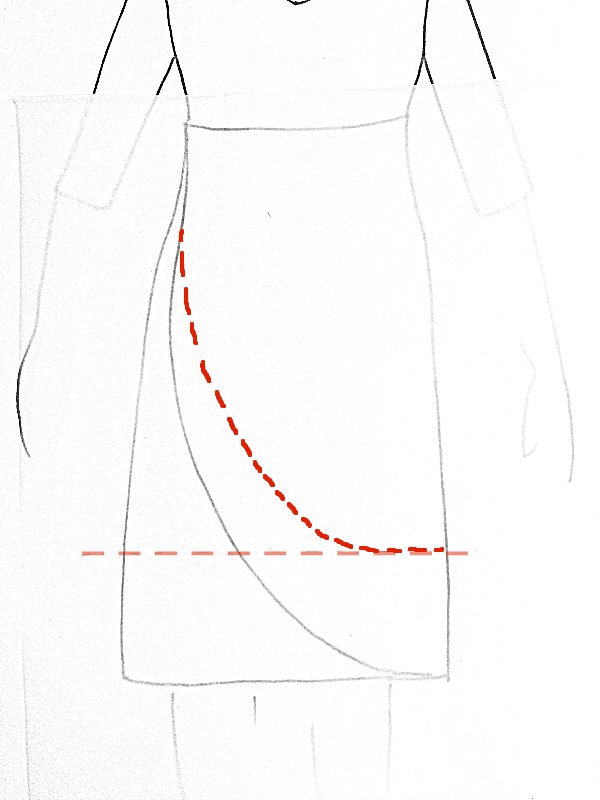
Take out the side seam in which the overlay is attached in up past the new hemline a couple of inches.

Cut the overlay, and its lining, beyond the new design line, the width of your seam allowance. The new cut edge of the lining and overlay will be folded in toward the wrong side of the fabric on the design line to finish it so you’ll need some seam allowance.
Where there is not enough of the overlay to cut and still have seam allowance, as in where the new design line blends into the original line, you will need to take out stitches of the overlay (lined or hemmed) to get your seam allowance.
Fold in the raw edges, if lined, and sew the overlay and lining together (and closed) in the same manner as it originally was sewn (topstitch or hand sew if you see no stitches) in order to blend in with any part of the overlay which was left unchanged.
If the overlay is simply hemmed and not lined, as in a sheer overlay, cut beyond the new design line leaving enough seam allowance to hem the overlay. After cutting, hem to finish the raw edge in the same manner as it was originally sewn in order to blend in with any part of the overlay left unchanged.
Cut the excess length off the dress or skirt
Restitch the left side seam closed, reattaching the overlay into it.
Hem the dress or skirt.
Enjoy wearing your dress or skirt now that it suits you better. Isn’t it nice to change what you already own and like instead of having to shop and buy something else? (that’s more money to spend on fabric, or dinner out, or boots 😉
Please send me your sewing questions. You can either use the Ask Me form or email me directly at mary@thedailysew.com
I need to hem a beaded sheer overlay that just has a raw cut hem, can I just secure to beads then cut it?
Are you thinking of folding back the overlay to the wrong side and tacking it down where the beads are placed? I think that would work especially since the garment will probably be hand washed or dry cleaned.
If the sheer fabric is netting, like a fine tulle, it won’t unravel so you could cut off what you don’t want and leave it unhemmed. For an overlay made from chiffon or other delicate sheer fabric, it would be normal to hem it with a narrow hem either by hand or on a machine with a narrow hem foot. (See how to here: http://www.thedailysew.com/2018/05/sew-a-narrow-hem-by-hand-and-by-machine/). However, you are allowed to break the rules sometimes 😉