

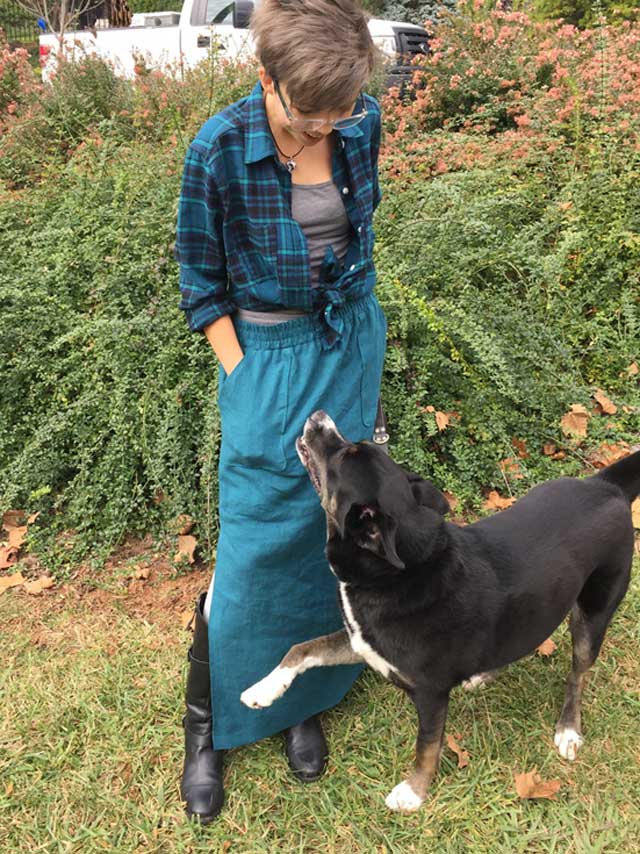
Let’s Make This Skirt
(Part 1 of this post showed how to draft your maxi skirt pattern. You can find that post here)
This skirt is a straightforward kind of sewing project. The pattern is made for woven fabric, such as linen, twill, denim, basically most any bottom weight fabric. However, because it does gather at the waist the fabric should not be too stiff or too thick. You want the skirt to flow down from the waist not stick out sideways.
Supplies needed:
- Fabric: exact yardage will depend on your size but here’s the guide
-If your fabric wide enough to cut the skirt front and back out beside each other you will need enough fabric for one length of skirt plus 3/4 yard for the waistband, pockets and a little extra for shrinkage before you cut.
-If your fabric is 45″ wide you will need enough for two lengths of the skirt plus 1/2 yard for the waistband and shrinkage. If the pockets will not fit next to the skirt pieces you will need an additional 12″ in length for the pockets. - 2″ wide elastic, enough to go around your body where the skirt will sit minus an inch. Some people cut the elastic even shorter than an inch smaller than their measurement but I prefer it not so tight.
- Matching thread
- Serger if you have one
Prep your fabric
Wash it, dry it, whichever way you will clean the garment after it’s made. Lay out the fabric to check the grain. Press the fabric -because cutting wrinkled fabric distorts the shape of the garment pieces.
I made a video all about this. You can see it here.
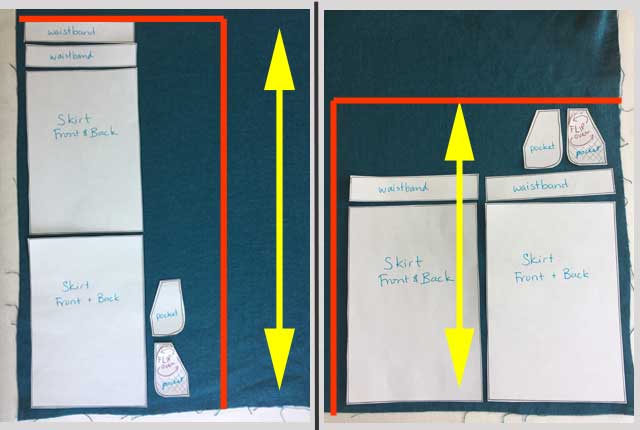
Cutting Out
The seam allowance (1/2″ or 1 cm) is included in the pattern you drafted in Part 1.
Above shows the layout for narrow fabric and wide fabric. The red lines represent the cut edge (horizontal line) and selvedge edge (vertical line) of your fabric. (Pretend there is no teal fabric beyond the red lines).
The yellow arrows show the lengthwise grain.
If your fabric is printed or has a definite right and wrong side to it, be sure to flip your pocket pattern over to cut your second pocket.
If using corduroy or other fabric with a nap, be sure to have the top of every pattern piece laying in the same direction.
Remember: with this pattern you may simply measure and cut your fabric for the skirt and waistband; no paper pattern needed.
Let’s Start Sewing
Stay stitch the opening edge of the pockets. The seam allowance is 1/2″. Stay stitch in the seam allowance, about 3/8″ in from the edge. This bias edge will stretch like silly putty if you don’t stay stitch it now.
Serge all the edges of your pieces. This isn’t necessary but it does make sewing the skirt faster in the end because all your edges are now finished.
No serger?
- If your fabric unravels easily, like the linen used in this post, zig-zag the edges with a conventional sewing machine.
- If your fabric is a tight weave and unlikely to unravel you’re okay for some of the edges. You’ll want to finish, with a zig-zag stitch or another preferred method, the pocket opening edge, the pocket curved edge, and the skirt side seam allowances below the slit notch.
Make the Pockets
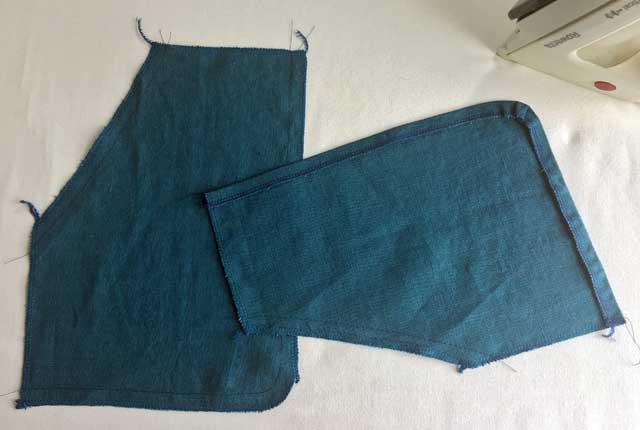
Run a line of machine basting stitches 1/2″ in from the curved edge of the pocket. Fold the right side of the fabric to the back using the stitches as your fold line. Try to fold the fabric so the stitches are just on the folded side, unseen from the front of the pocket.
To help form a gentle curve, pull on the bobbin thread so the fabric gathers slightly at the curved corner. Straighten out the fabric on the straight edges.
Press the fold to form the pocket. If you can see basting stitches on the front pick them out now (easier than when the pocket is sewn to the skirt)
Run a basting stitch 1/2″ in from the pocket opening edge. Fold the right side of the fabric to the back on this edge and press.
Topstitch 3/8″ in from the fold on the side, bottom and opening edges of the pocket. Add a second row of topstitching 1/4″ in from the opening edge. You now have two rows of stitching along the pocket opening and one row along the long side and bottom. Press.
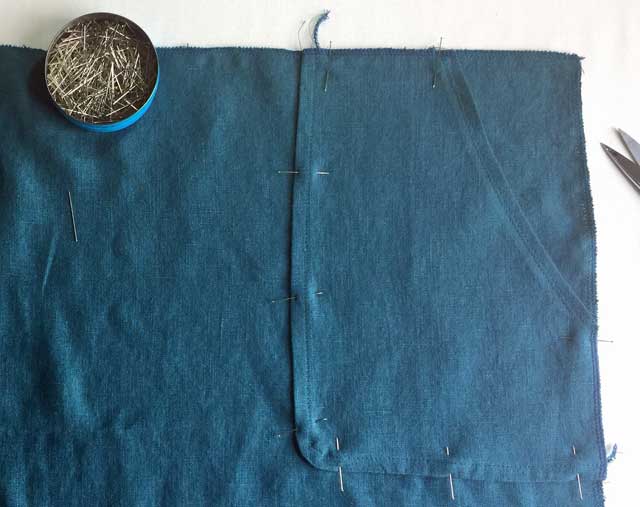
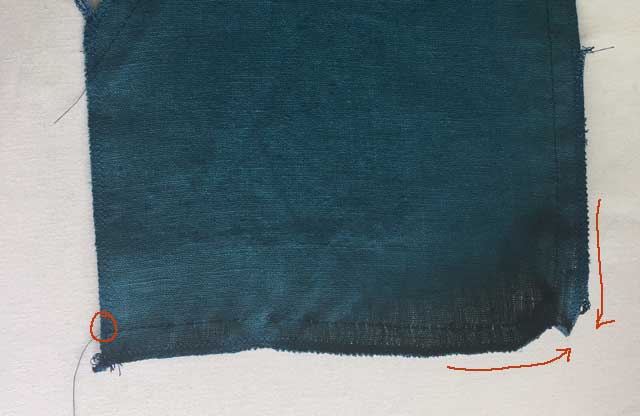
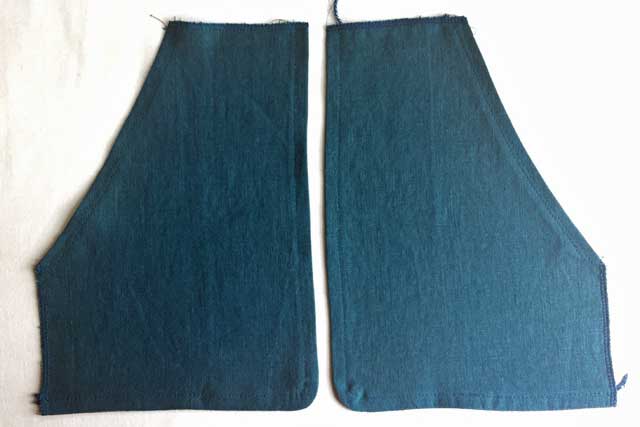
Lay the pockets on top of the skirt front. The top edge of the pocket will line up with the top edge of the skirt front and the short side of the pocket will line up with the side of the skirt front. Pin in place.

Stitch the pocket down 1/4″ in from the folded edge down the long side, around the curved corner, and across the bottom edge (or in the reverse direction).
Baste the top edge and short side of the pocket on to the skirt. Press the pockets.
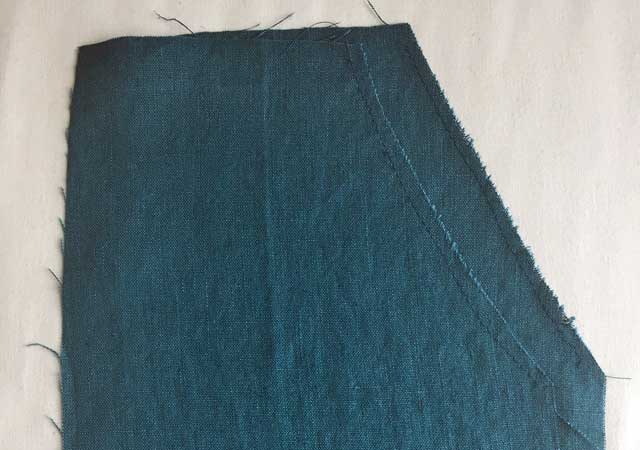
Sew the Slits
Technical Tid-Bit: When you have a straight skirt that goes below your knees, you best have a slit if you want to be able to walk. Maxi skirts designed with a flared hem may not need a slit depending on how much the skirt flares and at what height it starts to flare.
 Lay the front and back of the skirt together, right sides together, matching up all the edges (top with top, sides with sides). Pin the sides.
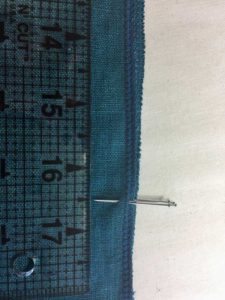
Place a couple of pins, close together, at your mark, or notch. You want to mark it in a way so you will remember this spot when you are sewing the side seam.
If you didn’t mark where the top of the slit is now is the time to take measurement #4 from Part 1 and measure from the top edge of the skirt down that same distance. Place a mark or pin.
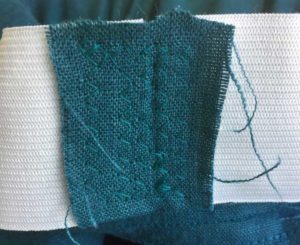
Sew the side seams together from the top of the skirt down to your double pins or notch. Backstitch a couple stitches. Raise the needle.
You can clip the threads here, or not, but whichever you choose, leave the skirt on the machine. Move the skirt so the needle is now about an inch further down the side seam. Adjust your stitch setting to a basting stitch.
Place the needle back into the fabric and baste from here down to the hem. No backstitches when basting. (It’s a habit, that backstitch)
You will have a little gap in the side seam between the regular stitch and the basting stitch. Everything below the regular stitch, where your mark was, is part of the slit.
Repeat on the other side.
Press the side seams then press the seam allowances open.
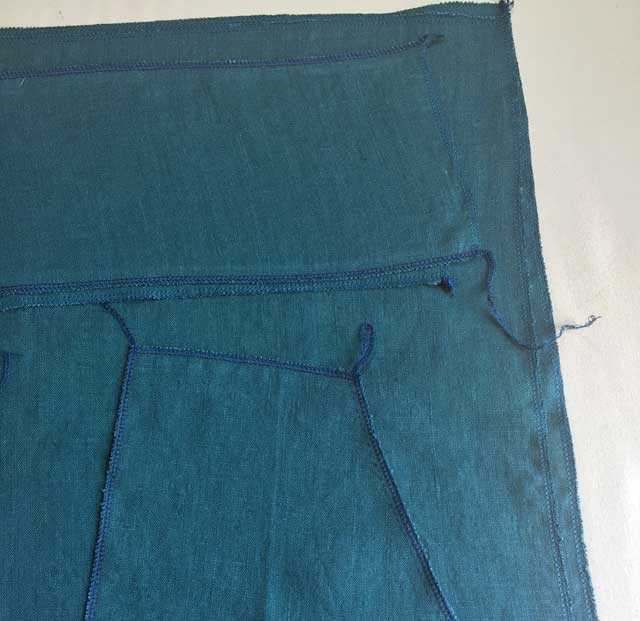
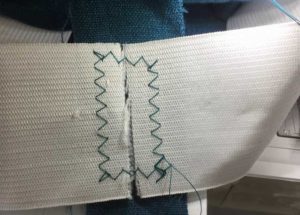
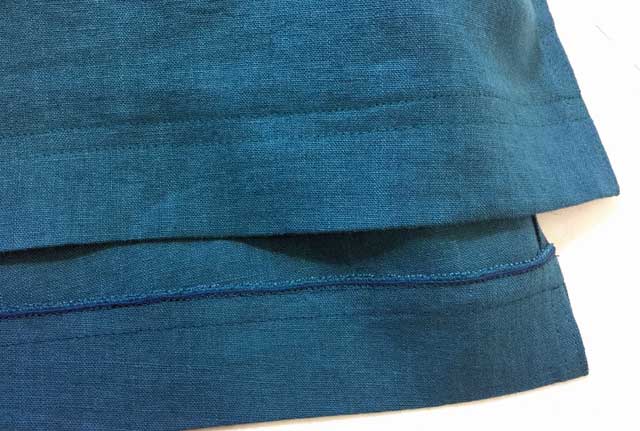
Topstitch Around the Slit
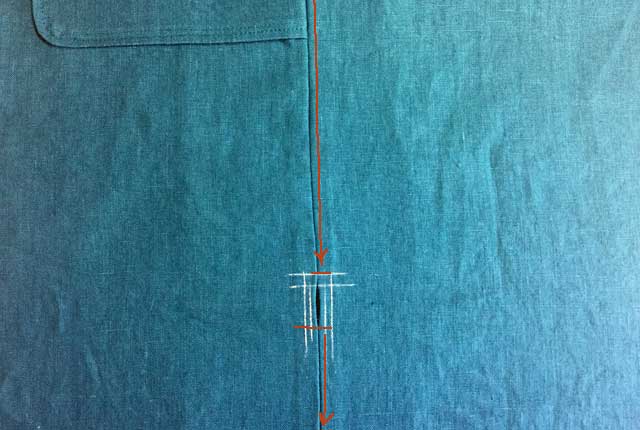
Mark with a marking tool a line across the side seam where you stopped stitching the side seam. This is just above the gap and where your double pins or notch was.
Draw another line about 1/4″ above the first line. These are guides for topstitching. If it helps you to turn the corner, as it does me, also draw in the vertical topstitching guidelines a little before approaching the horizontal guide and a little after the horizontal guide.
The guide for the verticle stitch lines will be the basted seam.
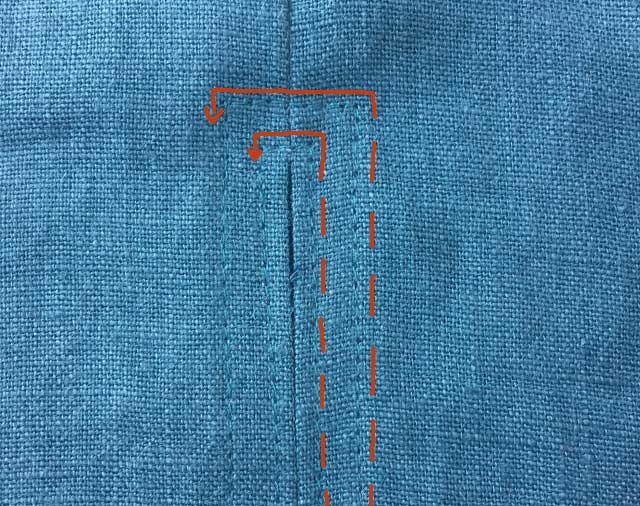
Top stitch around the slit. Remember to leave your needle down in the fabric and only raise your pressure foot to turn the corners.
You may want to go back over the stitches that run across the top of the slit. This is where the garment will get strained the most; when the wearer takes too big of a step, gets up from a reclined position, or other possible situations.
I chose to add two lines of stitching. The first line is 1/8″ away from the side seam, the second is 3/8″ away. The main point of the topstitch here is to stitch down the seam allowance around the slit.
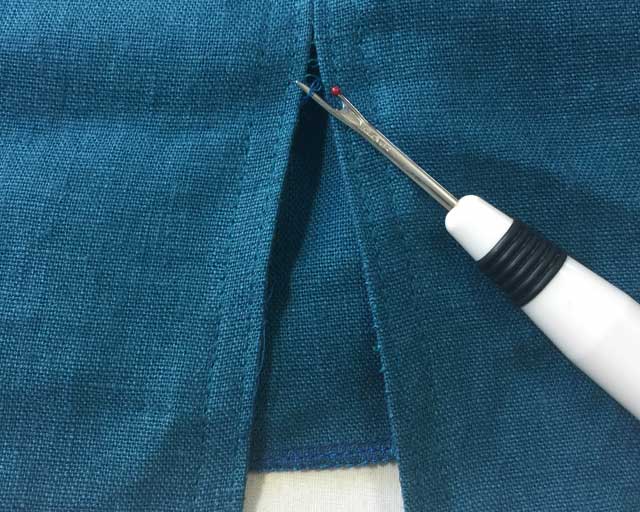
Remove the basting stitches. Press the stitching along the side slits.
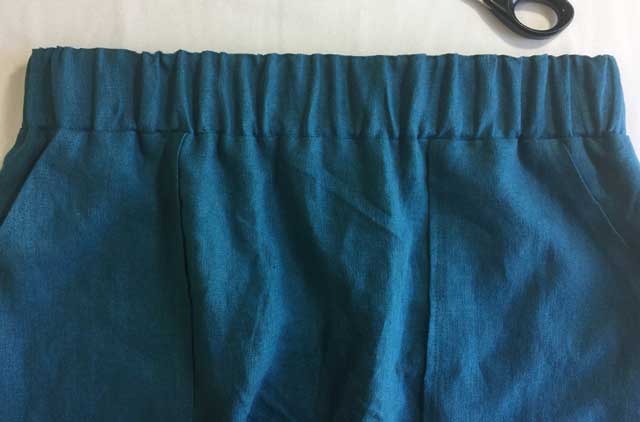
Attach the Waistband
The Casing
Sew the two waistband pieces together along the short sides, the side seams, together, right sides together. Press and then press open the seam allowances.
Pin the bottom edge of the waistband to the top edge of the skirt, right sides together. Sew and press. Press open the seam allowance to get a clear definition at the seam on the front of the skirt. Then press both seam allowances down, toward the skirt.
Fold the waistband in half, wrong sides together so the top raw edge of the waistband piece is lined up with the bottom edge of the waistband piece (which is now seam allowance). Press this fold.
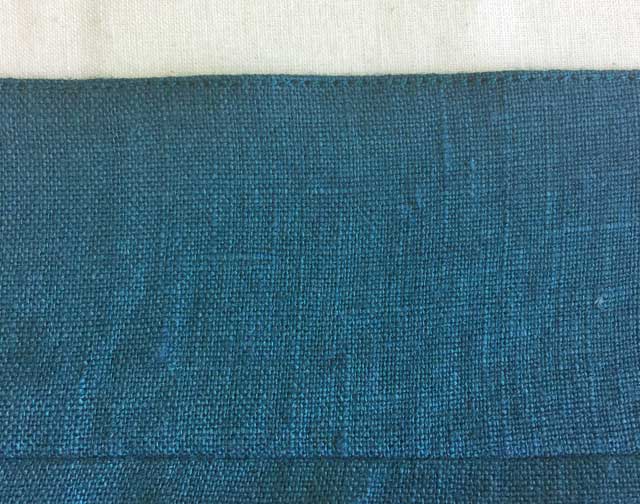
Edge stitch along the fold of the waistband. This gives the waistband a nice finished look. It’s something you see on most ready-to-wear clothes that have an elastic waistband. Press the stitches.
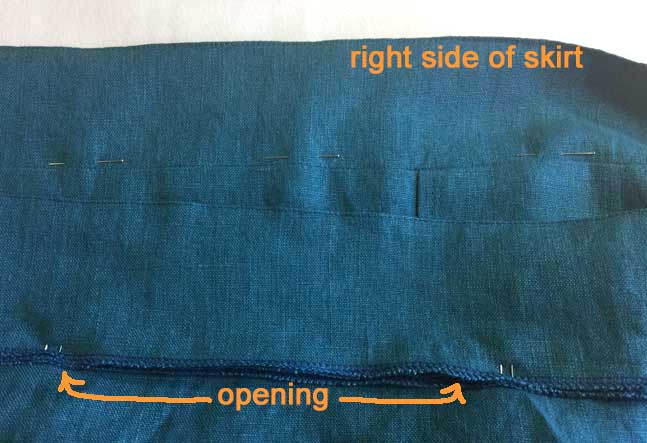
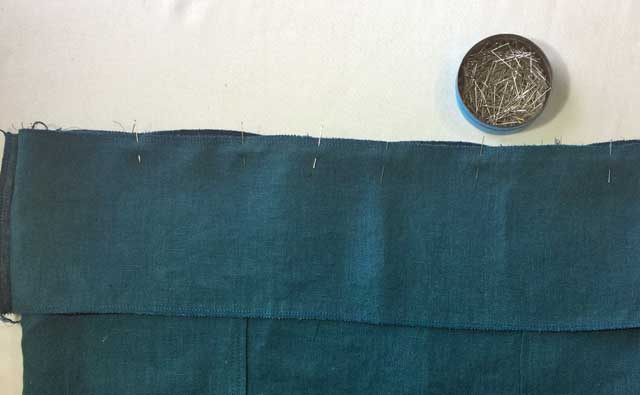
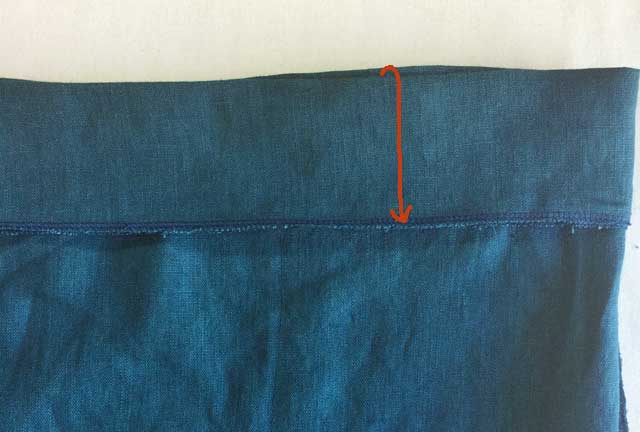
Pin the top edge of the waistband in place. You’ll want to pin on the on the front side of the skirt, where you don’t see the waistband because you will be sewing on the front side of the skirt. So periodically check that you are catching both layers of the waistband and the skirt in the pins.
You will sew the top edge of the waistband down all the way around the skirt but you need to leave an opening for now, at center back. Give yourself a visual reminder of where to start and stop the stitching. I like to do this with two pins placed very close together. You could use pins that are different from your regular pins or put a chalk mark where you need to start and stop. Leave about a 5 to 6-inch area across the back for the opening.
At the machine, the right side of the skirt facing up, run a straight stitch in the waist seam (this is where the bottom edge of the waistband was sewn to the top edge of the skirt). This way of stitching is called “stitch-in-the-ditch”. You are stitching, as best you can, in the ditch the seam creates. Stitches sewn in the ditch disappear into the ditch making them almost invisible.
The Elastic
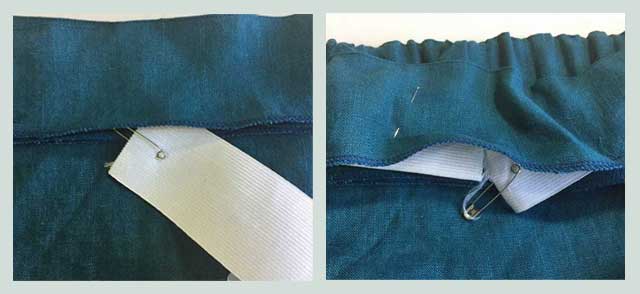
Insert the elastic into the casing. Two-inch wide elastic is too wide for any bodkin I own so a large safety pin inserted into the lead end, gives me something to feel and guide through the casing.
Usually, directions will have you overlap the elastic and sew the ends on top of each other to form the loop.
This alternative method of securing the elastic creates no bulk which can sometimes be uncomfortable especially for those who are sensitive to textures.
Butt the ends of the elastic together on top of a scrap of fabric. The scrap should be double the elastic’s width in length and about an inch wide.
Sew the elastic down to the scrap. Fold over the rest of the scrap to the topside of the elastic and sew through all three layers (the scrap, the elastic, the scrap).
Trim off any excess scrap fabric that may be hanging over the edge.
Close the opening in the waistband casing by stitching-in-the-ditch on the front side of the skirt as you did for the rest of the casing.
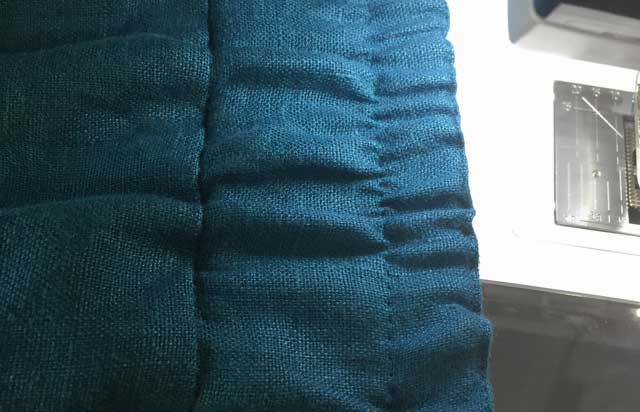
Topstitching through the casing and elastic in one or more rows gives a nice detail to the waistband. It’s a treatment you see frequently on ready-to-wear garments with elastic waistbands. Besides, elastic, especially wide elastic, has a tendency to flip and turn inside a casing. That won’t happen with this finish.
The video shows how to sew this “designer” waistband.
Sewing through the casing and elastic is pretty easy as you can see in the video but there are a couple things to remember:
- Lengthen your stitch. Not as long as a basting stitch but longer than your normal straight stitch.
- Pull evenly on the front and the back of the waistband as you sew. You are not concerned with stretching the elastic but with getting the woven casing, the waistband fabric, to lay flat as you sew over it. (The elastic, of course, does stretch)
- Sew a few inches while pulling the casing flat, stop (with the needle inserted into the fabric and elastic) and release the casing, repeat.
Hem the Skirt
Try the skirt on. Move around to see where the skirt wants to sit on your torso, and then decided how much hem you need.
Because of the slits, the skirt has a separate front and back at the hem. If you need to slope the hem (making it longer in the front or back in order for it to look straight when it’s on) try to match the lengths at the side seams. This way when the skirt is seen from the side it will appear even.
Fold up the hem and press. Lay the side edges of hem in from the slit very slightly to keep the hem from poking out into the slit opening. Topstitch the hem down and press.
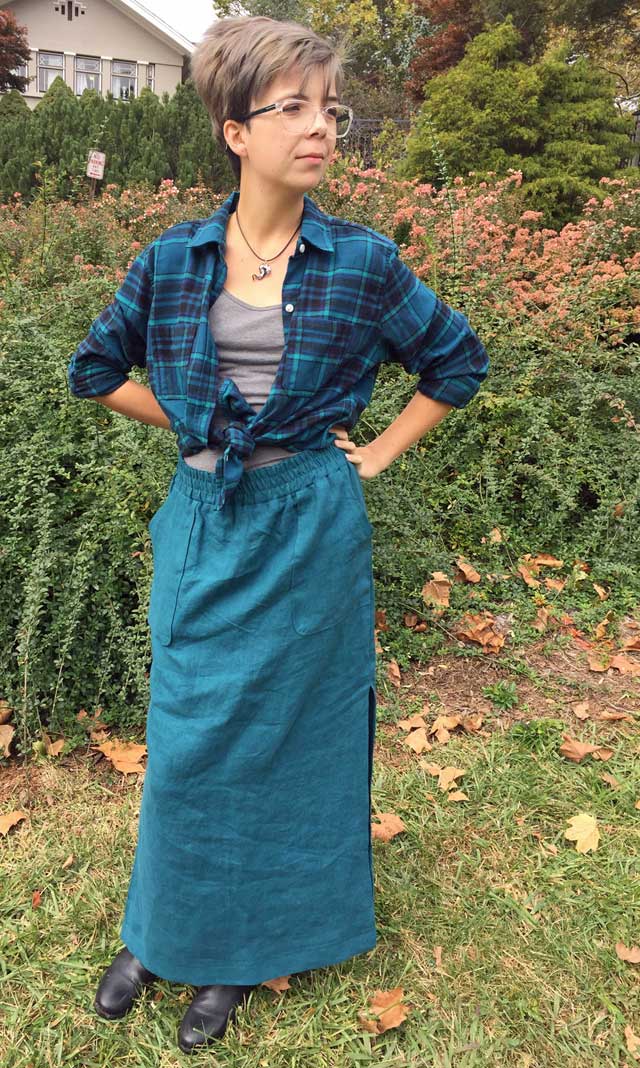
You’re Finished
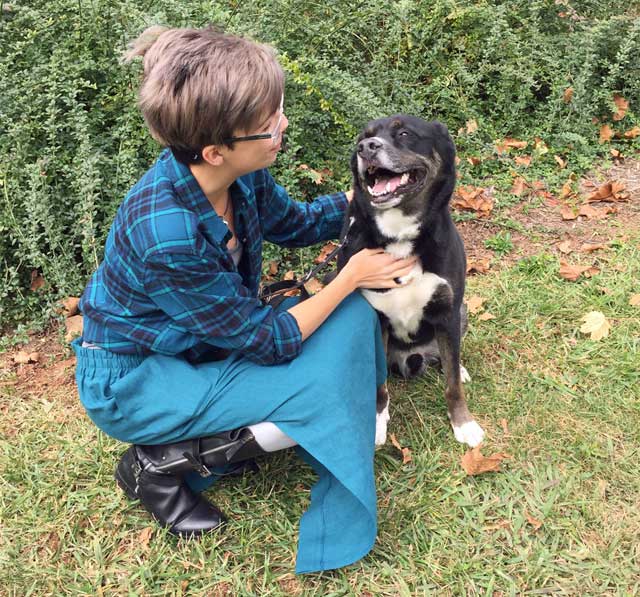
Congratulations, you’re skirt is made and ready to wear. Enjoy!
Let me know if you’ve tried this and how it went. Thanks
I haven’t made this but I enjoyed reading the post. The fabric colour looks great! so good to have pockets. These instructions could be used for a shorter knee length skirt too. I liked the way you did the waistband with that little row of top stitching at the top of the band – it does look more professional. I think with simple styles the fabric makes such a difference, too. Thanks for posting this. I hope someone makes it up soon.
Thank you so much. I forgot to say the fabric was ordered from Fabrics-Store.com The color is Sphinx. Lately, I’m in love with teal. And I did make this a short skirt too, so you’re right.
Oh you should post a picture!
Well, funny, that. The short skirt was a “muslin” for the long skirt. My daughter only wanted the long style so I made the muslin to fit me (why not?) and when I was done I didn’t like it. I don’t know if it was the print, the color, the quilting cotton stiffness (which would soften over time) or, more likely, the funk I was in 😉 So the short skirt was dismantled and the back panel was used to work out another project. Some days you just have to move forward.
One day I’ll be patient and take photos of all the steps to show and to remind myself, what’s not working.