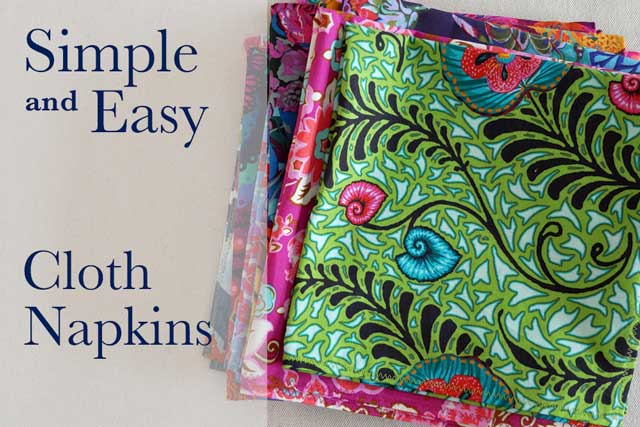
The Sewing Room

Taken from the doorway. Doesn't exactly say "welcome".

I know I’m lucky to have a room, with a door, just for my sewing. In previous years I sewed in a family room, a dining room, in my bedroom and in the basement. It truly is a luxury to be able to keep all my tools out where I can easily find them. To leave my half done project on the table and to have a table at a decent height for cutting on. And yet this “I’m so lucky” attitude is working against me.

I’ll explain. Many people have a home office. Even people who have an office outside their home have a home office. Do they think they’re so lucky to have that office?  No. They think; I need this office. It helps me make a living. It is my space to do my work. I’m a professional and I need a professional space.

Me? I’m thinking; I’m so lucky that I just need to accept this gift space as it is and just be grateful. Why? My husband didn’t live with the peach walls and orange plaid carpet in his office. We painted the walls, made desks, hung art work and laid neutral carpet over that mess.

My cutting table/ironing board. If it wasn't for the iron you wouldn't know that.

You know that broken window theory, right? Once one window in a house becomes broken than what does it matter if I break another. Or even a third. Before you know it the house is completely run down. By the way, this is also true for piles on the dining room table, dirty dishes in the sink and clothes on the bedroom floor. So my sewing room has become a mess. It has been my sewing room for five years now and still the walls are an awful shade of what I call “army hospital green” (the interiors of the army hospitals when I was growing up. Maybe once in fashion but never appealing and conjuring up only bad memories for me). Things are beginning to pile up; empty cardboard boxes, paints that belong upstairs, papers from work that belong at work, and things that actually belong in the sewing room but not in the space they currently occupy. Add to that the visual clutter no sewing room can escape and I find my space commanding no respect, definitely not inspiring, and sometimes depressing. What I find amazing is that I was okay with working around and in all this mess but not really because I kept avoiding going in there. I found other things to do that I rationalized as more important. However, deep down, very little is more important than the work you were meant to do and although I may not save the planet with my needle and thread I will be a happier and a better person if I can create.

I tried to organize by color but it's still a mess.

So this is it. I’m clearing it out. I’m painting the walls and figuring out what I already have in the house that I can steal for use in my sewing room to make the room more inspiring. To make it more functional. To make me take it more seriously. To stop giving me an excuse to stay away from it.

At first I thought this was too self indulgent of a subject to write about but if you sew you need to make that sewing space a place of your own and a place of respect so everyone you live with knows when you’re there, you’re busy doing something important and it’s not a play room or a junk room. It isn’t just, “that’s sweet, she has a domestic hobby.” Sew-ers, grab your scissors and take charge!


Posted in Sewing Room | Tagged | Leave a comment

Fabric Mart, Honolulu, Hawaii

These prints were calling my name, very clearly and very loudly.

When you go on vacation, even just a weekend away, do you do what you love to do. If you love sewing do you bring your mending pile with you? I will pack a knitting project, and I’m no knitter, but I don’t see my sewing as portable. This is a bummer because aren’t you suppose to do things you love on vacation?

Large scale border print on charcoal back ground.

This past summer my daughter and I were able to visit dear friends who live in Honolulu. I know you’re thinking that any friend who lives in Hawaii would be considered a dear friend at least until you were invited to stay with them. However this particular family really are dear friends. My friend asked me what would we want to do while visiting HI. I got an Oahu book from the library, flipped through it, noticed on practically every other page a paragraph about how strong the undertow is on Oahu beaches and all the drownings that happen. Not being a confident swimmer I closed the book and put beaches out of my mind. What did I really want to do? This chance to go to Hawaii was not going to come around often. The thing I really love to do… go to fabric stores, of course. I Googled “Fabric Stores, Honolulu” and saw what I thought looked like the place to go and told my friend. Now she is not a sewer or even a craft person but she asked some women she knew about the store I scouted out and they said it was good but I really should visit Fabric Mart instead. “Really?” she asked because she had driven by Fabric Mart and it didn’t look so great. In fact it looked kinda junky. But they all said the same thing so she passed on the information to me.

The sharpie is going with the weft

One morning, with all the kids busy with activities, I figured it was the perfect time for me to walk to Fabric Mart (Bonus: it was only a mile from her house). Honolulu, I must tell you has blissfully predictable weather. Every morning I woke up it was a little cloudy yet clear skies could be seen at Waikiki. It was 70, slightly breezy. I donned on sunglasses while walking through the drizzling, misty rain. Sunglasses and rain; this was cool. This was vacation.

Fabric Mart was easy to find. It was packed to capacity with rolls and rolls of bright Hawaiian print fabric; traditional Aloha prints, contemporary Aloha prints, new Aloha prints with a conservative home dec bent. Uh… did I want tourist looking fabric? I was there for something I couldn’t find at home in the Appalachian Mountains but I didn’t really want to make apparel that said I worked for Trader Joe’s either. However, I thought, I’m here. I’ll look. It took me a few minutes to see the individual fabrics from the sea of color and that’s when I realized this was some cool fabric. Soon I was planning everything I could do with what I was finding. The best part was the price. $4.99 a yard for cotton prints and $3.99 for 50/50 blend prints.

Two more traditional Aloha prints I just had to have. I love the large-scale.

When you vacation on Oahu, and really, everybody should, I recommend you take a break from the sun and over emphasized undertow and take a trip to Honolulu’s Fabric Mart. You will love it. If you don’t think you’ll make it in person you can visit them on-line but it pales in comparison to the real store.

I don’t travel too much any more but every city I go to I try to visit a fabric store. I have discovered that even the big chain stores will carry different prints at different locations but it’s so fun to visit a local independent fabric store. The stock reflects the people who shop there and gives you a real snapshot on the city you’re visiting. Plus you never know what you will find.

Have you discovered a great fabric store on your vacation? Do tell us about it.

Posted in Fabric | Tagged , , , | Leave a comment

No Sewing, just painting for The Daily Sew

I haven’t been sewing for the last week now but I have been in the sewing room overtime. I’m up to my eyeballs in hand painting silk scarves. My mother had a great idea. My mother, for as long as I can remember has always had great ideas. I’m not being sarcastic. I’m not saying every idea works out or even has follow through but she has crazy, creative, ideas all the time.

I wish I had pictures to share from my childhood. I would be showing you large floor cushions in the various pieces of a hamburger, a bathroom trash can with papier mache on it so it resemble a frog, macrame, stain glass projects, all kinds of Halloween costumes and I would have to say even some of her dinners were creative, (my favorite would have to be the chocolate pancakes). So her idea this time involved me and 30 hand painted silk scarves. I said yes and now it’s time to deliver.

I am unsure what project to take up after the sewing room is emptied of dye, stretching frames, newspapers and paint brushes. My son, who is into rock-a-billy, wants a 50′s style shirt. I want some fall weight skirts for work, and I’m thinking of a thank you gift I need to make and send. So, I will ponder that while I paint.

Until then, let me know what you’re sewing. What are you thinking for this fall season? I’m curious and I love to talk about clothes. Thanks for reading.

Posted in Uncategorized | Leave a comment

The Sundress is Done!

It’s done! Did I finish it in a week? No but I came close. I lost momentum when my daughter was never home for a fitting (I needed to fit the straps on her for the correct length) and on the day before our trip she said it was no big deal if she packed it or not. So I finished the day after our return. Actually with that time change I think it was the day after the day. I was messed up for a week.

What did I do differently from the pattern? I lined the pockets for better weight. I finished the pockets with two rows of top stitching, a design detail that saved me from slip stitching by hand the lining to the pocket hem.

I top stitched just about everything in the same contrasting color as the straps. Why? It gave it a finished, sporty look. I also top stitched the hem in place. The pattern wanted me to do that by hand but I was having none of that.

sundress strap detail

With so many colors in this fabric I matched the thread to the contrasting strap

sundress pocket

Detail of patch pocket. Two rows of topstitching for looks and avoiding slip stitching. Clever.


I also put the back zipper in by hand. Now, you know I’m crazy. I avoid a simple slip stitch but sew my zippers in by hand. I prefer the look of a zipper I put in with a prick stitch over the look of a zipper I put in by machine and I’ve gotten really fast at it. I always end up with a crooked machine stitch when I sew it in with my machine and it seems there is always some part I have to rip out and resew. When I do it by hand it’s a one time job.

sundress zipper

Detail of zipper put in by hand.

sundress side view


Thanks for reading. I’m on to next project; hand painted silk scarves for my mom.

sundress third view

Deep down she's excited for the new dress.

Posted in Garment Construction | 3 Comments

How to Prepare Fabric for Sewing Projects

This video shows you how to begin any garment project. Prepping your fabric correctly, dealing with a nap, and lining up the selvedges.

My favorite type of nap is the siesta kind, of course, but if you don’t know what a nap in the fabric is it means a one way design. The fabric I use for this project has an obvious nap. All the birds in the design orientate in the same direction. If I cut the bodice out in the opposite direction of the skirt you would tell me that one of those pieces was upside down. So I will be sure the pattern pieces are also laid out in the same direction as the birds.

Sometimes solid fabrics have a nap. The texture, pile, sheen will look one color one direction and reflect the light differently in the opposite direction. Think fake fur. The fur should lay down toward the ground. Well cordoroy is like fake fur (use your imagination, here) just a shorter “hair”. Make sure you cut all your garment pieces going the same direction.

And then there is plaid, my all time favorite pattern. Many traditional Scottish plaids are asymmetrical which makes them have, yes, a nap. So watch out for that too.

Buy a little extra fabric when you choose one with a nap just to be sure you can fit all your pieces in the same direction.

Please let me know if you have any questions or tips for prepping fabric or dealing with fabric naps. Thanks for reading.

Posted in Garment Construction | Tagged , , | Leave a comment

McCall’s Sun Dress Project Begins

Just a quick introduction to my one-week-until-she-needs-it sundress project.

I’m using a commercial pattern, McCalls 5313. My teenage daughter picked out both the fabric and the pattern and I promised to have it done before summer was over and before she moved out of the house. That basically meant this was my last summer to get this sewn. The pressure!

Why one week to get it done when I have already successfully put it off a year (or two)? Well, we’re headed to Honolulu in a week and she could really use it there. So I got one week. Here goes.

Posted in Garment Construction | Tagged , , | Leave a comment

How to Lay a Pattern on Fabric for Easy Cutting

Alright, I just started the project and already I have a tip, two actually, to share.

This little video shows you how to keep your pieces on grain when the directions request that you not line up your selvedges. The other tip just happens to be one of the best secrets ever; iron those wrinkly, crease-riddled, pattern pieces. You can’t cut a decent edge if your guide is mashed up. Just set your iron on the lowest setting and be sure you have absolutely no steam or moisture of any kind.

I learned that tip in college and it was such an “ah-ha” moment for me. Of course I can iron paper. Why didn’t I think of that?

PS. I filmed this video myself so it starts off with me not sure it started. I’ll get better.

Posted in Garment Construction | Tagged , , , | Leave a comment

Tips for Lining Print Fabric to Avoid Show-through

I’m half way through my week to get this project done but not necessarily half way done with the project. Funny how that happens. However, it’s Saturday and I don’t have to be at my day job so I believe I can get a lot done today.

I had a tiny set back. My bodice lining, which was cut from the fashion fabric as the pattern called for, was showing through the white fabric areas of the bodice. Yuck. Why go through all this work to have that mess across one’s chest? So I re-cut the bodice lining out of a similar weight muslin. The muslin, because it is a substitute for the fashion fabric, needs to have a similar weight as my fabric. I have used lighter weight fabrics for linings and facings but this time I kept it close to what the directions called for.

McCalls wanted me to fold back the seam allowance on the patch pockets and be done with them. Just sew them on. Well, I thought it won’t take much longer and I’ll have a much better looking pocket if I lined them. So I did. Perfectionist? No, but  there’s a reason I’m taking the time to sew a cotton sundress instead of going to Old Navy and buying one for $19.  (I already spent at least that on the pattern and fabric). I want those details I can’t find at Old Navy.

I plan to do a video on lining patch pockets but for now, any good sewing reference book will walk you through it.

One tip on this video that I use all the time is to use a machine basting stitch to mark your fold line. Many times the seam allowance of a pattern piece needs to be folded up and ironed. It’s really quick to use your machine to measure the correct seam allowance as you run a basting stitch on that edge. Then you just fold the fabric on that stitch line and press. Super easy and it will save you a lot of time.

Please let me know if you have any questions or tips on these topics and thanks for reading.

Posted in Garment Construction | Tagged , , | Leave a comment

How to Make a Simple Fabric Road Course for Hot Wheels

In this video I show you how I made this flat, foldaway, take along, road course for my nephew and I hope I explained it well enough that you can make it too.

It really is easy and you could add trees, buildings, a dirt/construction area, whatever you want. I kept it simple so my nephew could change it into a city or rural area or racetrack with his imagination. (I thought about adding handles and some kind of closing element so after it was folded you could throw the cars in it like a tote. Good idea, right? Then I remembered it was for a five year old and figured he’s gonna fold it however the way he wants).

Materials needed are minimal. I started with a yard of green twill that had a long fade spot on it. With that spot I knew I wouldn’t be using it for clothing or home dec but I was able to cover it up with “road”.  You will also need about a half yard of black felt for the roads and some paper if you don’t want to free-hand cut the curves. Scissors, pins, threads and a sewing machine round out the supplies needed.

Please comment if you have any questions on the construction. I don’t recommend gluing the road down. I tried that on my son’s road mat. The roads didn’t stay glued down long. Take the extra 15 mins and sew the roads down. Sew on the highest speed you can, zig-zag stitch. This isn’t couture.


Posted in Craft Projects | Tagged , , , , | 3 Comments