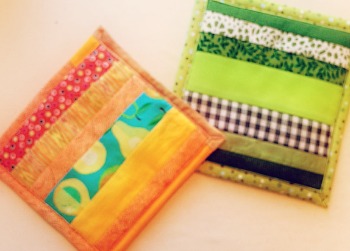
 After sewing the coat that turned out to be unflattering, I wanted to sew something fun, kinda’ easy, and where success is a pretty sure thing. Ah, pot holders.
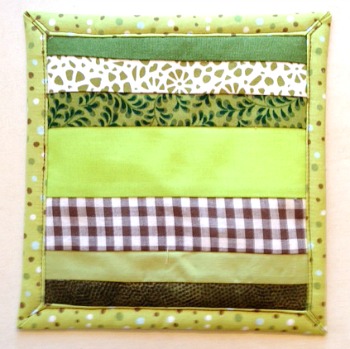
I’ve made pot holders as gifts with themed fabric picked just for the recipient. I’ve made them as a class fund raiser using muslin the students potato printed onto. My mom always made them from large scraps left from making our clothes. Lately though I’m making them from tiny scraps and this tutorial shows you how to do the piecing too. If you rather make your pot holder from one piece of fabric the instructions are the same and it will be even quicker.
Materials Needed:
- Fabric for the front or top piece cut to the finished size. I used scraps cut into 1 to 2 inch wide strips and sewn together. You could use one large piece of fabric. I find 7″ x 7″ (18 cm x 18 cm) or 7″ x 9″ (18 cm x 23 cm) good sizes for pot holders.
- Fabric for the back that is 2″ longer and wider than the finished size (the back can be pieced too). It is important to use fabrics that can handle the heat with out melting. Synthetics and blends containing synthetics can melt. Stick to cotton, wool and linen.
- Insulated batting like Insul Bright. Enough for two layers or one layer of Insul Bright and one layer of cotton batting for each potholder.
- Thread
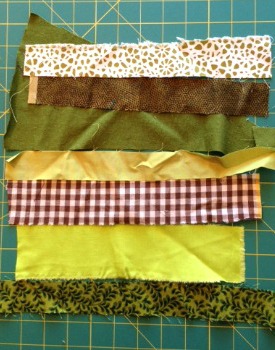
Step 1: If you are piecing the front like I did (a GREAT way to use up scraps) play with different strips of fabric until you are pleased with the arrangement. Remember seam allowances really take a lot away so I found that strips smaller than 1 inch wide were just too small once I sewed them together. Or what the heck, do use a skinny strip. It may look great.
If you are using a single piece of fabric hop on to Step 3.
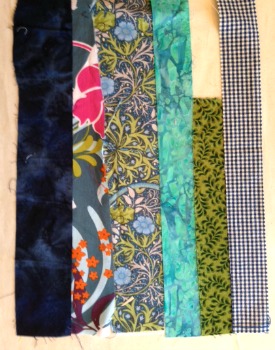
(Trying blues here) Keep in mind the balance of darks and lights when playing with placement of your pieces. One piece of a contrasting color will can add some “pop” if you want to go there. You can keep it monochromatic or go all warms or all cools. Remember your color wheel.
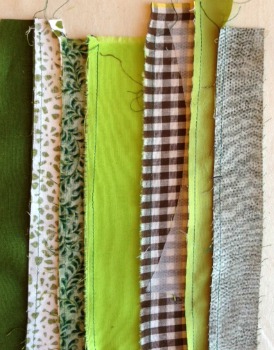
Step 2: Sew strips together using 1/4 inch seam allowance. Press all of the seam allowances to one side – the same side.
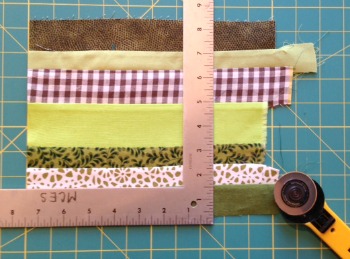
Step 3: After pressing the seam allowances, cut your pieced fabric (the top of the pot holder) or what ever fabric you are using for your top piece to the size you want the finished pot holder. I cut mine around seven and a half inches square. I also find 9″ x 7″ is a useful size.
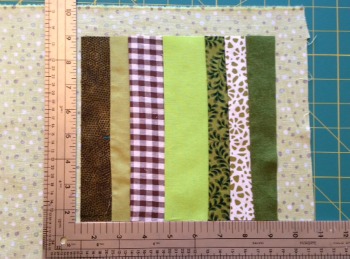
Step 4: Cut the backing about an inch larger than the top piece on all four sides. It doesn’t have to be a whole inch just large enough to fold over on itself.
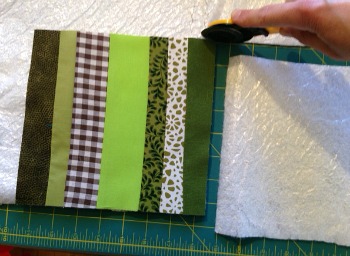
Step 5: Cut two pieces, the same size as the top, out of insulated batting. My mom use to cut up old cotton mattress pads for her pot holder innards but I don’t have any of those. However, where there’s a need there always seems to be someone who can sell you something. I use insulated batting (Insul bright is the brand I have) and it works well but you need more than one layer.
I have made pot holders with two layers of Insul Bright and I have made them with one layer of Insul Bright with one layer of 100% cotton batting. Both work fine. When using cotton batting I place the insulated batting on the top side which, for some reason I think is the side that touches the heat source and placed the cotton so it is on the back side. Does it matter? I really don’t know because I always do it that way so I cannot compare. And I always do it that way because it works.
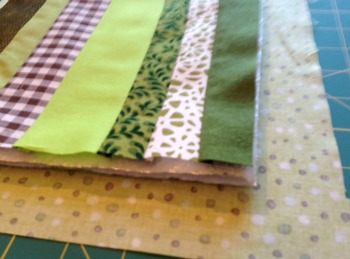
Step 6: Stack the top onto the two pieces of batting and center all three layers onto the wrong side of the backing. Just eyeball it so it’s centered.
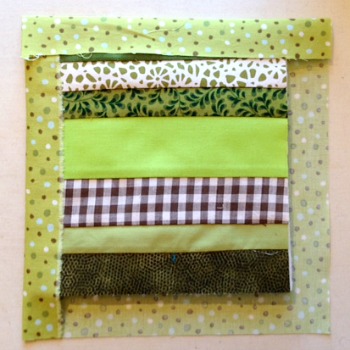
Step 7: Fold one edge of the backing fabric over and onto the top piece. Press the folded edge to form a crease which you will need as a guideline. Do the same to the other three sides. Take the top and batting off of the backing piece and press the folded edges again.
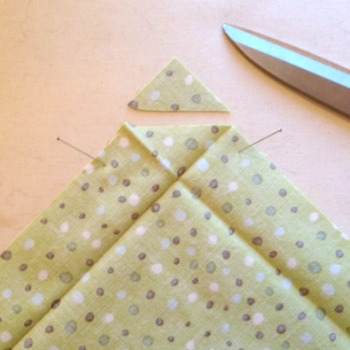
Step 8: Let’s miter the corners of the backing. Unfold the edges and clip the corner off at a 45 degree angle. Please notice the crease in the picture as to where to cut your corner. Do this to all four corners.
Step 8 Alternative: Don’t make mitered corners. Instead fold over and press 1/4″ or 3/8″ (1 cm) on all four sides of the backing fabric. Skip to Step 14 (see I just saved you a lot of time).
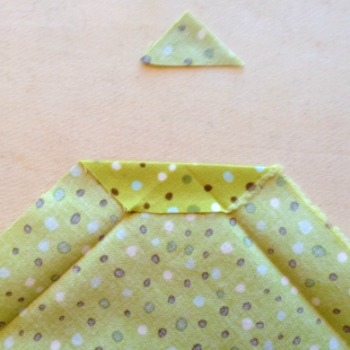
Step 9: Fold over the now clipped corner. You are folding over the seam allowance and no part of the back. The fold line is parallel to the clip and the creases will line up. Do this to all four corners.
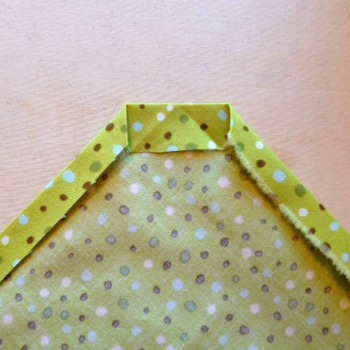
Step 10: Now fold the side edge of your seam allowance in half so the cut edge meets the crease. Press and repeat on all sides.
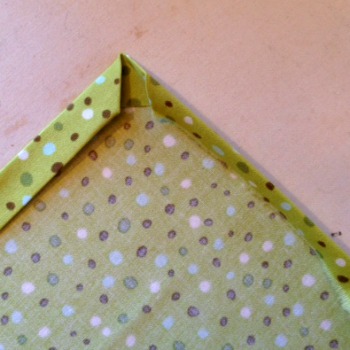
Step 11: Once again fold over the seam allowance on the original crease so that the raw edge of the backing piece is encased in itself and the corners are now beautifully mitered. Adjust and press the corners if necessary to have the meeting edges line up.
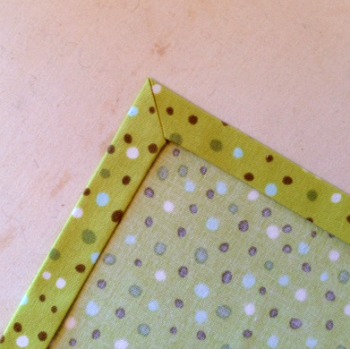
Step 12: Press – of course.
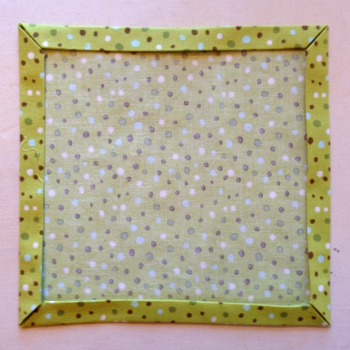
Step 13: Not a step really just a check in that your backing piece now looks like this. If so, carry on. If not, do what you want.
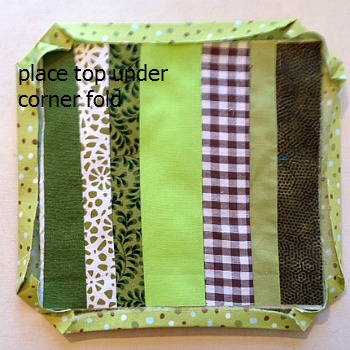
Step 14: Open up the edges and corners and place the top and batting on and in the backing piece.
Step 14 Alternative: (for those who are not dealing with mitered corners) Place the top and the two layers of batting back onto the center of the backing (the right side of the backing is on the work surface. The right side of the top piece is facing you and the batting is in between).
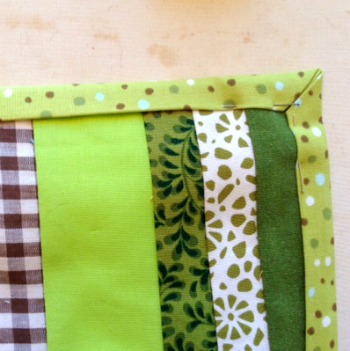
Step 15: Fold the backing edges back into place encasing the top and batting pieces. Pin in place.
Step 15 Alternative: Fold over, onto the top of the top piece of fabric, two opposite edges of the backing. Pin in place (step 2 in my illustration below) (You can leave the other two edges alone right now)
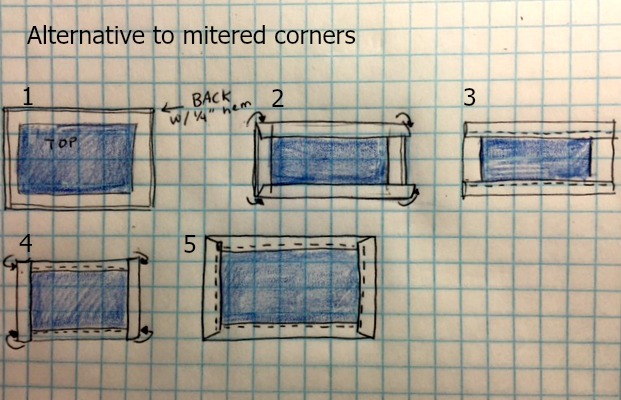
Step 16: Stitch down the folded edge close to the inside fold. You could use a zigzag stitch, a straight stitch, contrasting thread or matching thread. Make it how you would like it.
Just remember to press it when your done stitching.
Step 16 Alternative: Stitch down the folded edge close to the inside fold. (step 3 in my illustration above) You could use a zigzag stitch, a straight stitch, contrasting thread or matching thread. Press Fold over, onto the top of the top piece of fabric, the last two opposite edges of the backing. (step 4 in the illustration) Pin in place (especially the corners which I tuck in a little). Sew down these last edges (step 5 in the illustration).
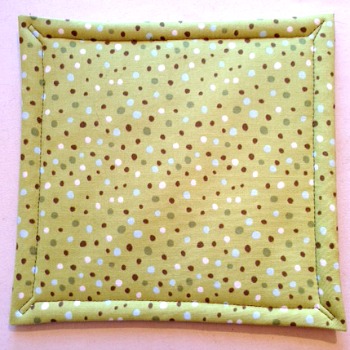
Step 16a: The back view of my finished pot holder. I sewed up the corner edge, following the edge of the mitered folds, about 4 stitches but that was just on a whim. It’s probably not necessary.
Well this project, for me, was fun and quick and successful. And even quicker when I didn’t miter the corners.
How could you do this differently?
- You could make place mats, table runners or coasters just adjust the size and use one layer of batting.
- You could piece the back too
- You could piece nothing and use single cut fabrics for the top and back.
- You could quilt this but keep in mind that where there is stitching there is a hole through your insulation.
- You could use binding instead of folding over the back
- You could add a loop to hang it to a hook (easy if you’re using binding for the edge)
- If you applique onto pot holders use cotton thread, not poly (all purpose thread is polyester).


2 Comments on How to Make Pot Holders