
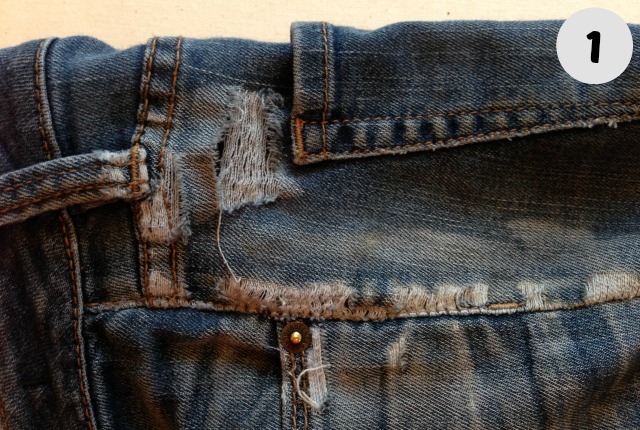
A favorite pair of jeans is hard to get rid of even when they are ripped or frayed. My daughter had such a dilemma and asked if I could patch her jeans. Much of the area where her book bag rubbed against her left hip was threadbare. I knew the fraying would spread if left alone, especially since she’ll continue to wearing her bag on that side.
We discussed patching the area with a printed cotton but after thinking more about it she wanted to keep her jeans denim. She also wanted the patch on the inside. A patch on the inside would mean cutting the thread bare areas out and turning the edge of the hole under to attach to the patch. There was just too much area to patch for that method. At this point in the life of these jeans they aren’t going to be around much longer. Really the important thing to do was to sew the loose threads of the frayed area down securely to keep them from spreading.

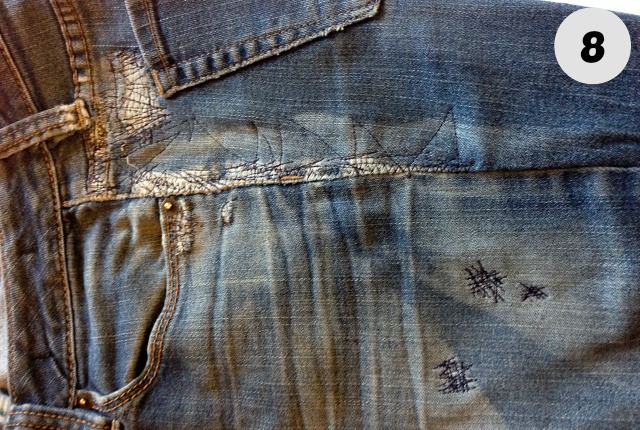
Much of the worn area goes down the top of the side seam allowance. The patches which were placed under the worn area came from cut off jean legs when we made shorts for her one year. I zigzagged around the edges of each patch/scrap denim and then attached the patch directly to the pant’s seam allowance with a zigzag stitch.
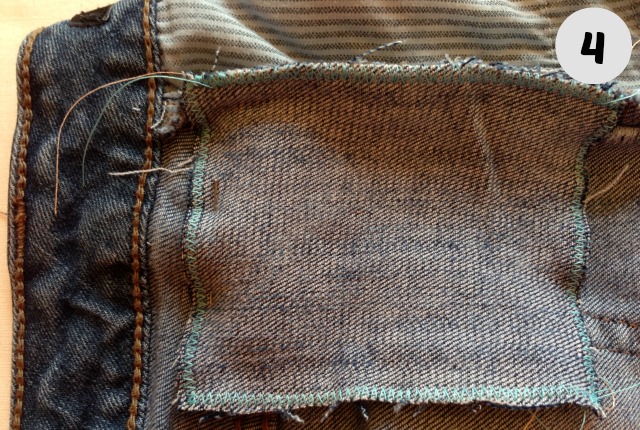
Normally the mending itself will secure the patch to the jeans and there is no need to sew it onto the pants separately. I did it for extra fabric reinforcement in the frayed seam allowance area.
I could have made one large patch but I thought two smaller patches would eliminate some bulk. However be sure to cut your patch larger than the hole. If it’s too large you can always trim down the patch when you are done attaching the it to the garment.
Place the patch under the frayed area and pin in place near the patch’s edges. Since the pins will be under the stitching area I use the fewest pins possible. I don’t want them getting caught in the feed dog holes. Update: You could forget the pins and use a few drops of fabric glue to hold the patch in place.
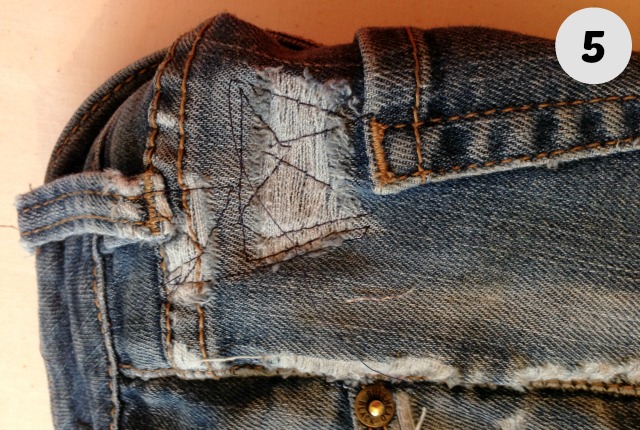
With a straight stitch start sewing down the patch on the outside of the garment. Start in any direction but be sure to go perpendicular to the loose threads a few times in the process. You can go back and forth or turn the garment around or a little of both. You can switch to a zigzag stitch too. I used both.
You could also have fun with a little color here by using a contrasting thread, like purple or green or what ever favorite color is yours at the moment. I thought about using the gold top stitch thread but my daughter wanted to keep it blue.
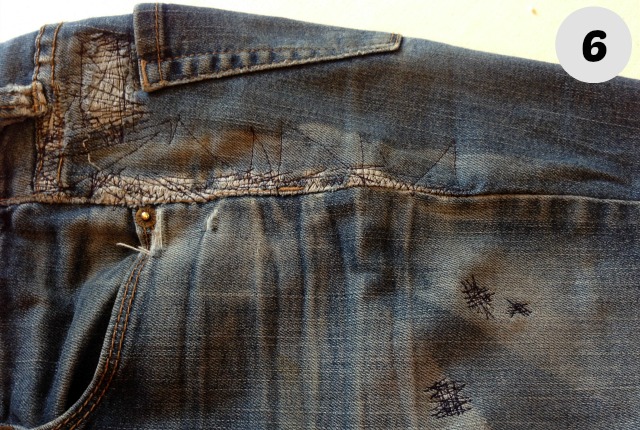
Continue stitching over the worn area(s) (under which a patch should lay) until you’re happy with the look and the security of the patch. The patch does not have to be securely stitched down around all of it’s edges or corners. It is not a pocket, just a patch; and on the inside to boot.
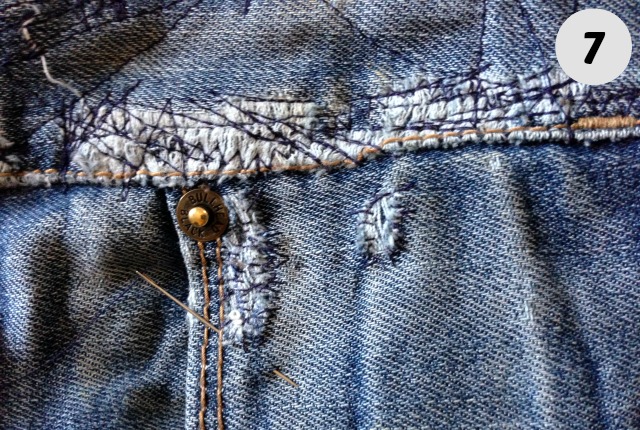
The frayed area on the pockets needed hand stitching or I would have sewn the pocket closed. I used small stitches and sort of randomly to mimic the machine stitching. I did place a small piece of denim between the pant and the upper pocket.
All done. I confess I may have talked my daughter into my solution but she did like the end result. I may have suggested she should just own the fact that she is wearing patched jeans and have fun with it. And another thing; she’s the president of her college’s Earth Club and now she can show that she walks her talk in her up-cycled jeans.
An inigeltlent answer – no BS – which makes a pleasant change