
Ever put on a garment and wish you had another one like it? Maybe in a different color or maybe just more in the same color. Maybe you want an exact replica or maybe you want a different sleeve length, or to alter the fit just slightly. This isn’t a problem if you sewed it to begin with and saved the pattern. But what if you didn’t make it, or don’t have the pattern? Still not a problem; you can make a pattern from your garment.
It’s as simple as tracing your garment. Sounds easy and yet a little daunting too. Here’s some tips I remembered (or was reminded of) last week when I traced off a simple top of my mom’s to make her some more in different colors.
I break projects up into steps so they fit into my schedule better and are not overwhelming. There are five steps to making a pattern from finished clothes:
- Gather
- Trace
- Smooth, true and alter
- Add seam allowance
- Make a test garment (muslin)
GATHER
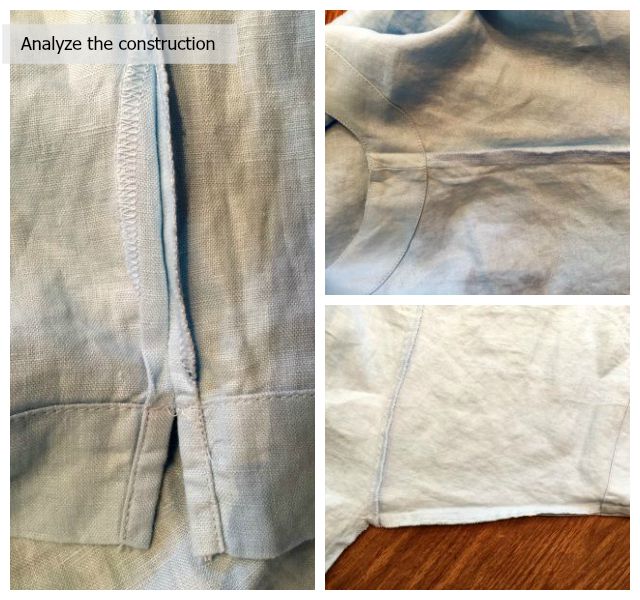
Pick a simple garment (Especially for your fist attempts.) Analyze the construction of the garment and be sure you know how you’re going to sew it up. If you are uncertain you can look at a sewing pattern for a similar shirt, pant, or skirt, etc and follow their order of steps. Or come up with ways to simplify the design and therefore the construction. (Eliminate some details; use a method of closure you know how to put in better.)
Gather supplies. Use pencil and tracing paper. Have a flat hard surface at a comfortable height to work on. A digital camera (ok, your phone) to take pictures of the garment if it isn’t yours to look at while you construct it.
TRACE
Lay the garment as flat as possible in such a way as to see the entire part (the sleeve, the peplum, the side front, etc.) that you need to trace. This may mean folding some pieces of the garment behind the part you want to trace off. You will need the garment inside out to see the facings.
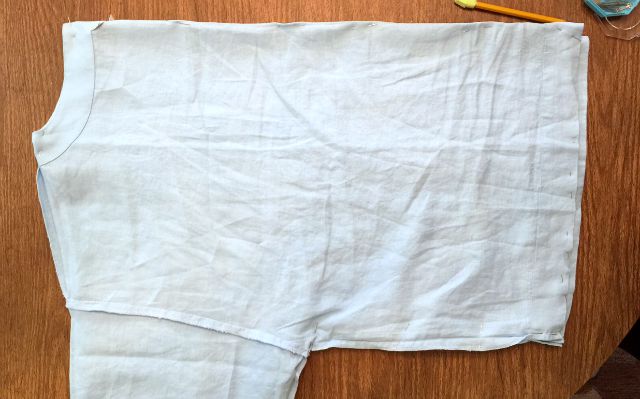
Trace off only half of any part if it’s symmetrical (the front, the sleeve, any piece cut on the fold). Because fabric moves and shifts while you trace, tracing both halves of a symmetric piece will not come out symmetrical. You will have to decide which half came out better so just trace half and save yourself time.
Pin the front and back together at the hem and/or neck to keep the garment lined up. Don’t line up the hems if you know the back and front are not equal in length.
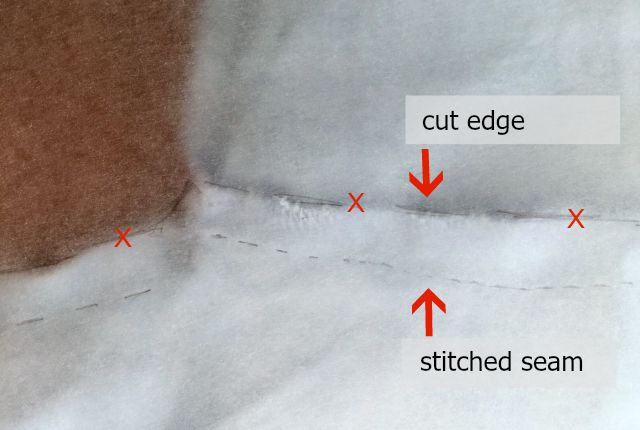
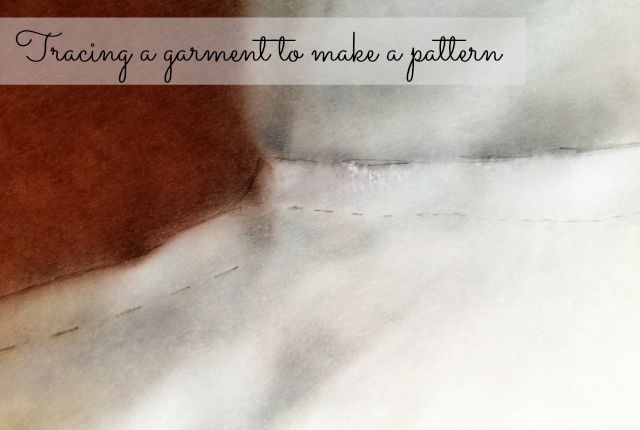
Trace the seams not the cut edge of the garment. The seam allowance doesn’t matter right now. To replicate the original fit you want to trace the seams.
Place pins along the seams of richly textured fabric. This helps you feel where the seam is when tracing lumpy/plush fabric.
Guess and fill in any seam lines that maybe obscured by the garment’s construction.
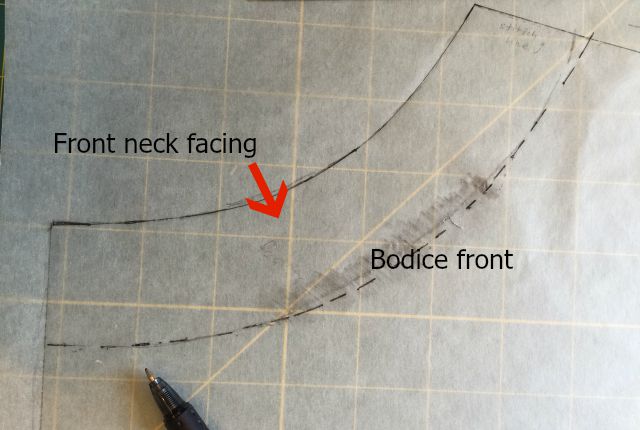
If possible, facings are traced off as part of the piece they are sewn to. When you can turn a garment inside out to trace, trace off the outer edge of the facing onto your tracing of the outer garment piece. Facings do not require a separate tracing if you can clearly see it while tracing the garment piece it is attached to. The outer garment fabric and the facing share at least one edge (the neck, the center front, the armscye) so you are already half way done with tracing the facing.
Note any construction details. Literally, scribble a note right there on your tracing. Also mark on your tracing where slits end, where gathers end and begin, and/or button placement.
Check that you’ve trace all the pieces of your garment.
SMOOTH, TRUE and ALTER
After you’ve trace all the pieces off your garment set it aside.
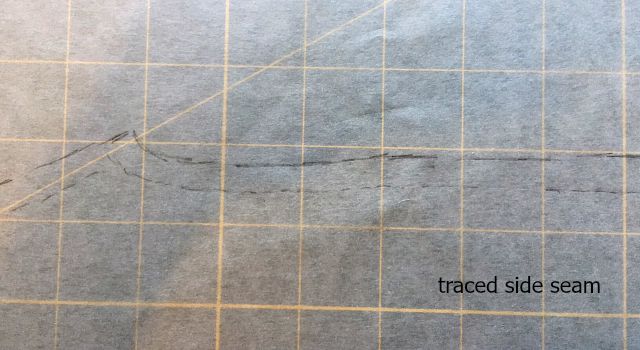
You will notice the lines of your tracings are probably a little wobbly -the more your fabric moved the more crooked the lines. Well, we’re about to take care of that so get your rulers, french curves, eraser, sharper pencil and good lighting.
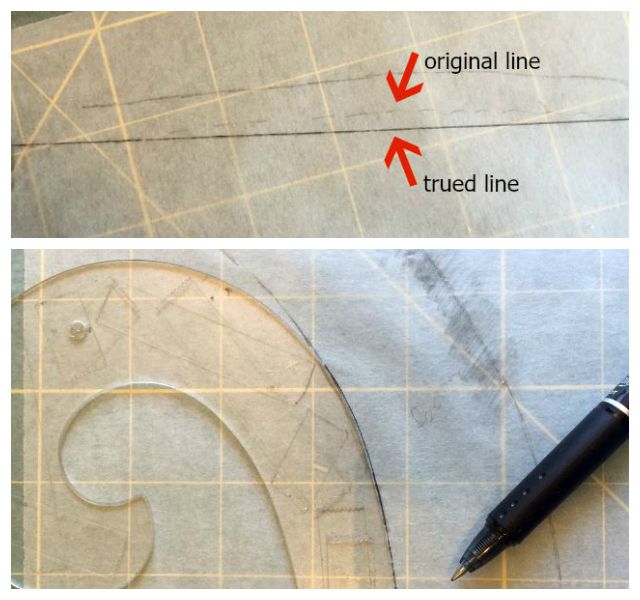
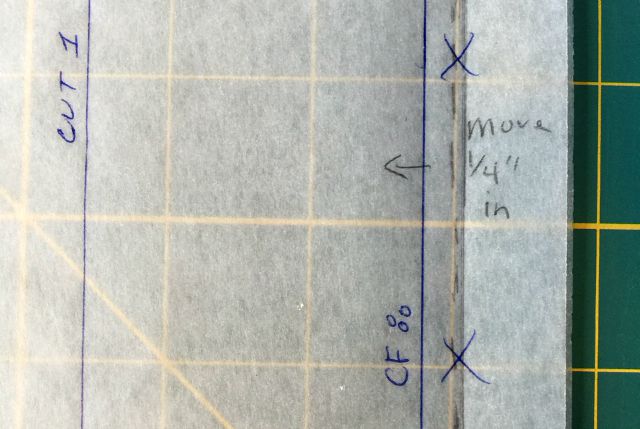
Smooth your traced off curves and straighten your lines with a ruler, hip curve or french curve and sharp pencil. Erase or put “x”s on old lines to remember which line you want to use and which line to ignore.
Make any alterations you know you need. Like adding or subtracting length between shoulder and bust apex or taking in at the side seam.
Mark notches or placement dots where needed for constructing the garment.
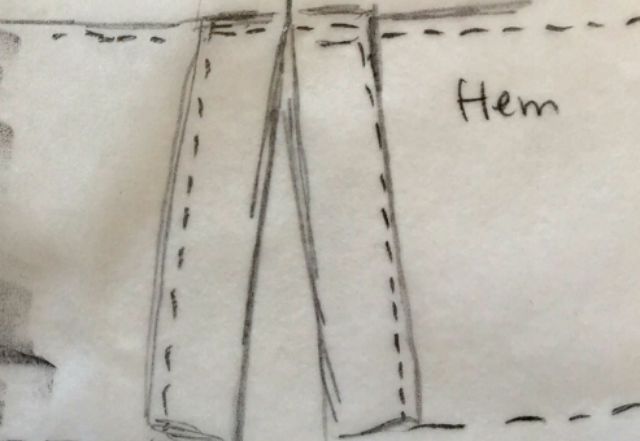
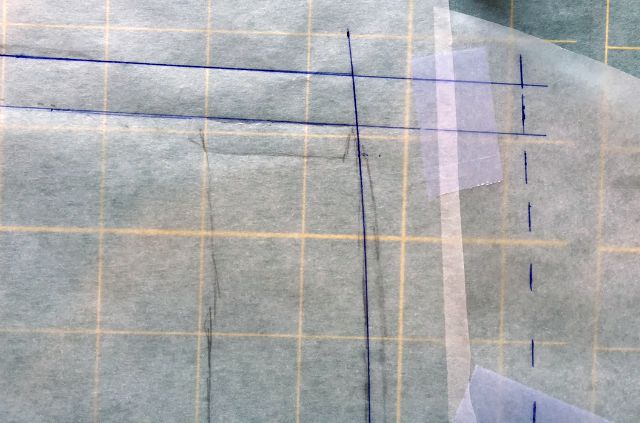
Cut along dart seam and spread open dart matching the dart width in the original garment. Tape down open dart to some paper placed under your tracing.
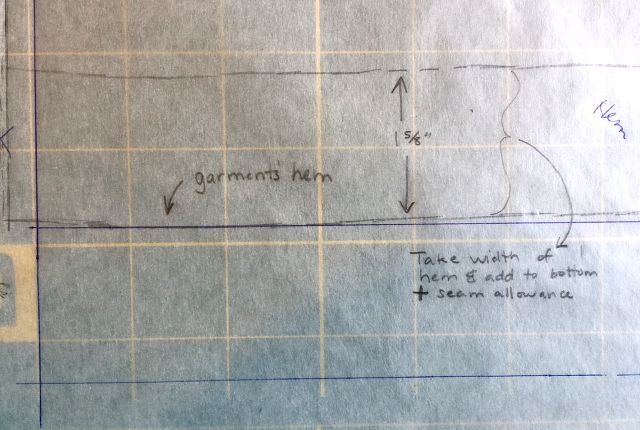
Add hems to pattern pieces if deeper than a mere seam allowance.
Add paper to your tracing if needed with tape. (I use Scotch Magic Tape because you can write on it and see through it.)
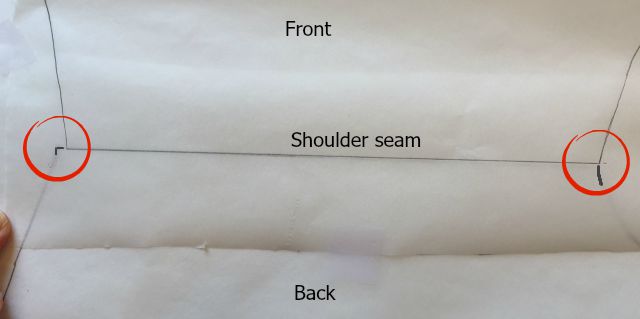
Walk the pattern pieces together as if you were sewing them together to see if the seams match. For instance, place the front bodice shoulder on top of the back bodice shoulder and line up the seam lines at the neck edge. one on top of the other, as if they are fabric and you’re sewing them together. Check that they are the same length.
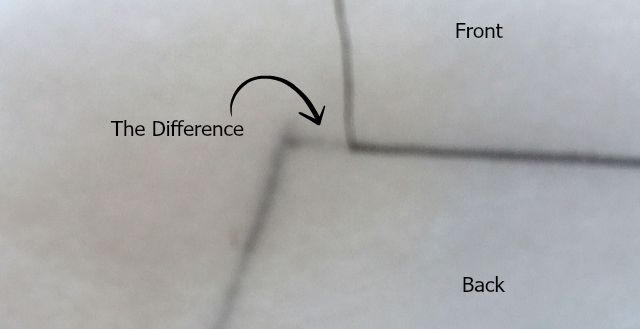
If seams match you’re good. If not, first exam the traced garment to see if one pieced was eased into the other piece. Then you will know the different lengths are on purpose. More than likely though it’s just a little off from tracing, and smoothing and all that. When they are off, anywhere, not just in the length, you split the difference; sometimes twice.
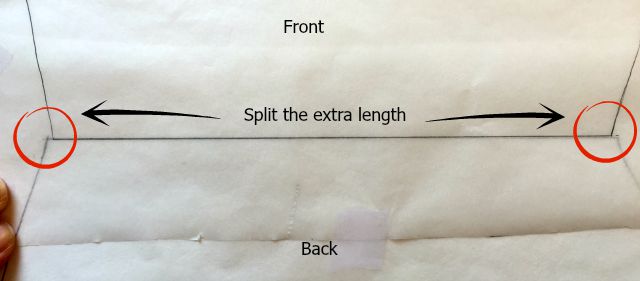

Above my shoulder seam was off about 1/4″. First I visually split the 1/4″ between the neck and the sleeve. Then at both the neck and the sleeve ends of the shoulder seam I redrew my curve to take a little off the side with extra and add a little to the side that was lacking. Having a difference in seams can happen anywhere. Splitting the difference (if it’s not a huge difference) is how to true up your seams.
Trace off any facings, yokes, pockets onto a new piece of paper from your original tracing. You trace off the facings after you have walked the pattern pieces together and trued any seams.
Slash and spread the pattern where the garment was gathered. Spread the gathered area to be equal to the width of the garment fabric before it was gathered. It’s hard to tell exactly what the original width was but you can make a good guess. Is it two inches of fabric gathered down to one inch? Or is it really full, more like four inches gathered to one? You can play with gathering a certain length of scrap fabric to the finished length you need and adjust from there.
Label the pattern pieces with a grain line, tittle, part name, how many to cut, size if you know it.
Add the seam allowances. Use what ever amount of seam allowance you like to work with. You know the garment fits so you may want only a 1/4″ seam allowance; eliminating any extra bulk or tedious trimming of the seam allowance.
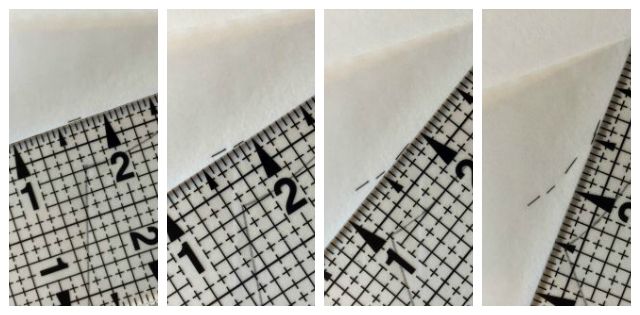
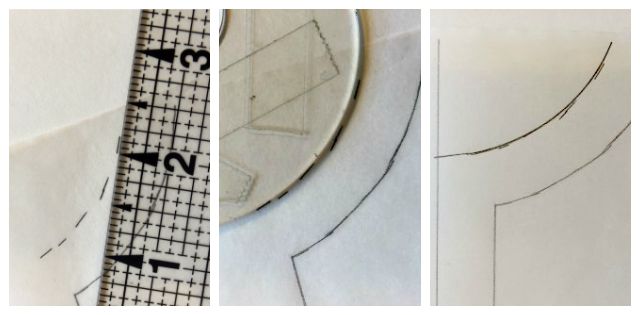
An easy way to add seam allowances to curves is to place your ruler on the seam line at the desired width you want and mark with dots or short dashes as you move down the seam. Then connect your dots or dashes.
TEST GARMENT
Make a test garment out of a cheaper but similar in drape/weight fabric to test your pattern. Try it on and make any alterations needed to the paper pattern.
At any point you can retrace your pattern onto a new sheet of tissue for a clean start.
TRY IT
Try tracing off one of your garments just for fun and the experience of doing it. Think of the money you’ll save on patterns when you master this copy cat method. (Just kidding because I still buy patterns; all the time.)

This is fantastically helpful and inspiring. I’ve been working on recreating a skirt and having a lot of troubles copying the pattern. This article, and your earlier one on recreating a favorite skirt, answer so many questions. Thank you!
Best news of my day. Sometimes you’re on the right track figuring out your project but just reading about it or watching a tutorial just makes it all click. I use to struggle with making patterns from garments, and some garments I still would, but finally, simple clothes I seem to be able to copy well enough. I’m happy that this post was a help.
I’ve been putting off making a jersey tunics from one I love because it has darts, and I didn’t know how to trace those off. Thanks so much for explaining, I also didn’t know what “trueing” a pattern was until I read your post. I didn’t quite understand the slashing and spreading part though, but I’ve got enough that I’m going to risk trying to replicate my much-loved but holey top! Thanks again!
Good Luck. Make a practice top to refine and fix anything before you cut into your good fabric. I recently bought a very good book on this topic, “Clone Your Clothes” by Claire-Louise Hardie. And, please don’t wait but the plan is to make some videos on this subject very soon.