
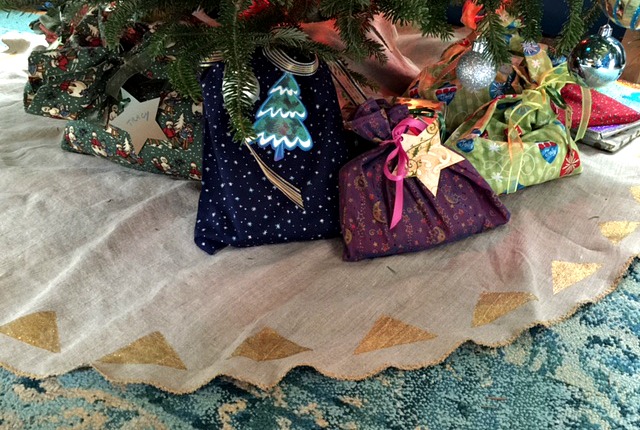
Oh Christmas tree, oh Christmas tree, I decorated your branches but I neglected to cover up your tree stand. Well, to the defense of my laziness the lower branches and the gifts, once wrapped and placed under the tree, hide the mammoth, green, plastic stand pretty well. How did I get so lackadaisical? Years ago I made a golden yellow color, felt, tree skirt with stylized, green felt holly leaves appliqued on to it only I never got around to making the holly leaves. The unadorned yellow felt wrapped the tree that Christmas and then was put away with the ornaments. I’ll add the holly leaves next year – or the year after that and so I went down my path to lackadaisical-land. Eventually mice decided the yellow felt would make a better nest than a tree skirt and they set forth to renovate it – and they, unlike myself, followed through with their project. The mouse house only confirmed that putting off the project (even for years) was the right thing to do – no extra work went into a tree skirt that was to be mice bedding anyway. By the way, I never, ever, need extra proof that procrastination is okay.
This holiday season, maybe it’s wisdom, I decided I was tired of stressing out over making gifts (because I always start too late) and I just wasn’t going to do it. Instead I recalled that what I had enjoyed so much about my childhood Christmases was making stuff just for fun, like popsicle stick stars and gum wrapper chain garland. So I made ornaments from plastic beads and pipe cleaners, and more ornaments from beads and wire found among my craft supplies and still found I had a little time to make something else. Ah, this was the year to make a skirt for the tree. Of course, Christmas is just one week away, not much time for the skirt to be under the tree but it will be made now and next year it can wrap the tree from the get go.
Tree skirts are simple in shape and easy to make. They need no zippers or buttons to close. The openings simply kiss or overlap each other (like a wrap skirt with out the ties). Fabric choices are almost endless from burlap to velvet. How you finish the edges will depend on your fabric choice and your style preference. See the variations I’ve listed out at the end of the post.
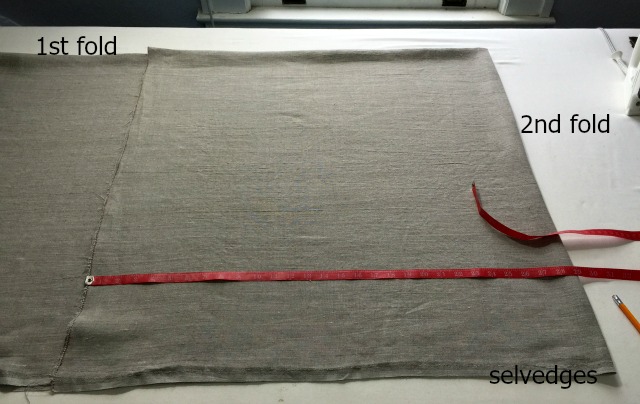
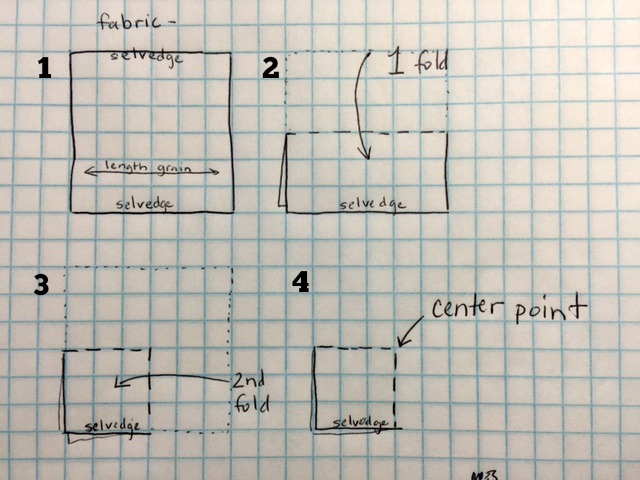
I went with a basic circle skirt shape but you could also make the tree skirt like a gored skirt, 4, 6, 8 or more panels. My fabric, a rustic linen, was about 2 yards long and 58″ wide. I wanted as large a skirt as I could get (I thought at least I would see what that was and then maybe go smaller). I started by folding the fabric into four equal squares. First I brought the selvedges together since the fabric width was shorter than the length. I measured what half the width was (29″) and folded the fabric over itself along the cross grain until it also equaled 29″.
(in the picture above, due to perspective, my square looks more like a rectangle)
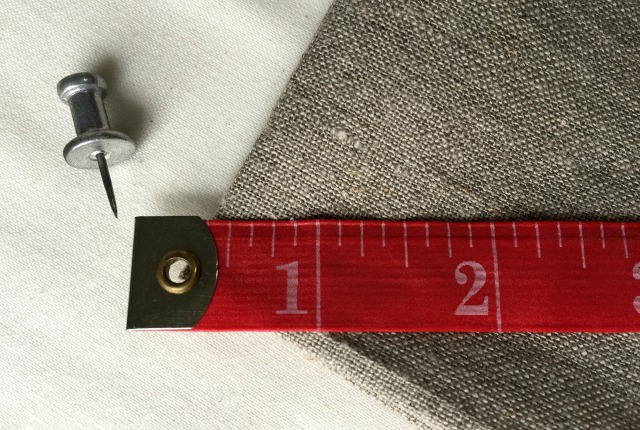
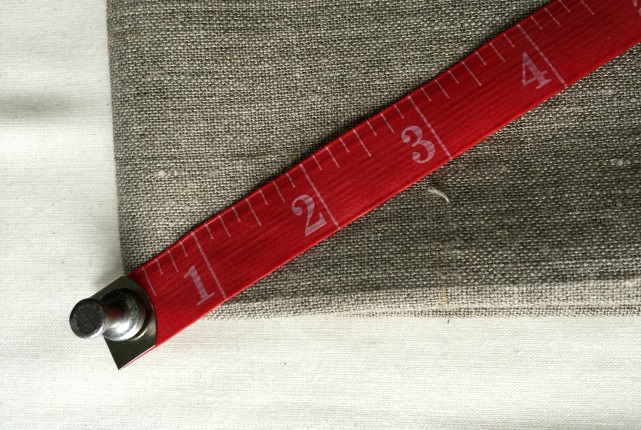
In that center corner, the corner that would be the center of the fabric if you unfolded the fabric, place a tape measure, a ruler or a strip of tag board marked with the length you want the radius of your skirt to be.
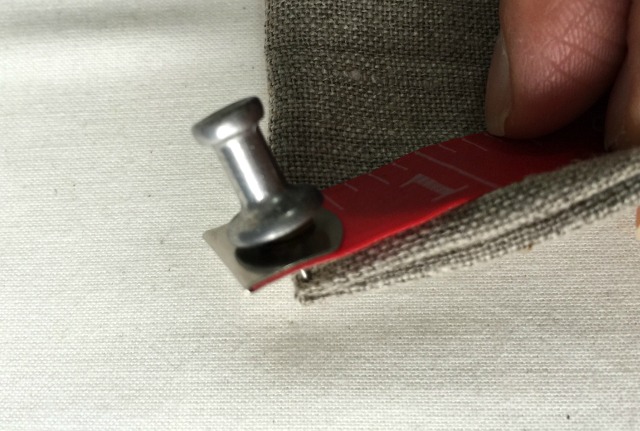
My work surface is padded so I placed a push pin through the eyelet in the measuring tape, through my linen and into the table. You could place a piece of cardboard or cork board under the fabric to place the pin into.
Having a way to stick the measuring tool in place, yet able to move side to side is very convenient for measuring.
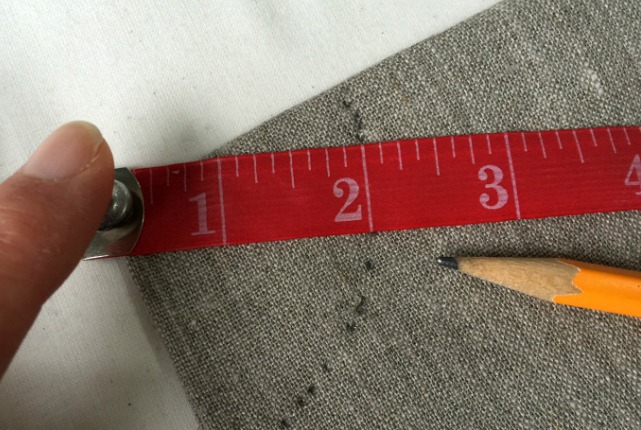
Mark a couple to a few inches down from the corner in enough places to mark a cutting line for you to follow. You may need to keep one finger on the push pin or the tape could shift around a bit. If you cannot stick the measuring device into the work surface you can still measure down from the corner the desired distance by picking up and replacing the ruler a little further over each time until you’ve marked a quarter circle.
What distance do you desire to mark? Well, a cut tree will require a larger circle because you need to periodically fill up the tree stand with water. An artificial tree may not have full lower branches so you will want the inner circle (the waist line of the tree skirt) tighter.
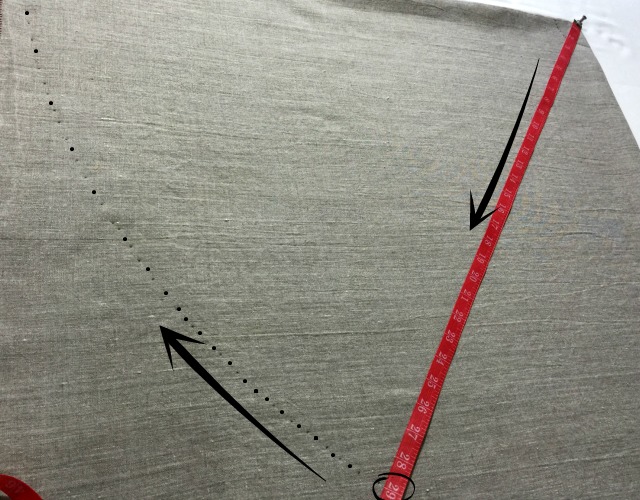
Keeping the measuring tape stuck into the center corner, measure down your desired radius of the skirt and mark like you did for the inner circle.
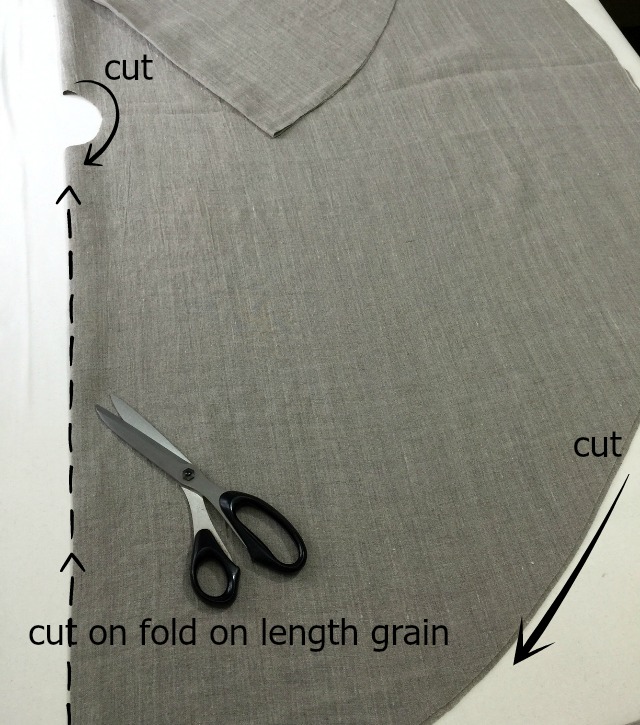
Cut through all four layers on your marked lines. You will now have a tire, or doughnut, shape. Since it would be hard to slip this skirt, as is, onto the trunk of the tree before putting the tree in the stand, you will want to cut along the length wise grain fold from the outer edge of the skirt to the inner circle. I say cut on the length grain because when you go to finish that cut edge it will move and shift at lot less than if you cut up through the circle anywhere else.
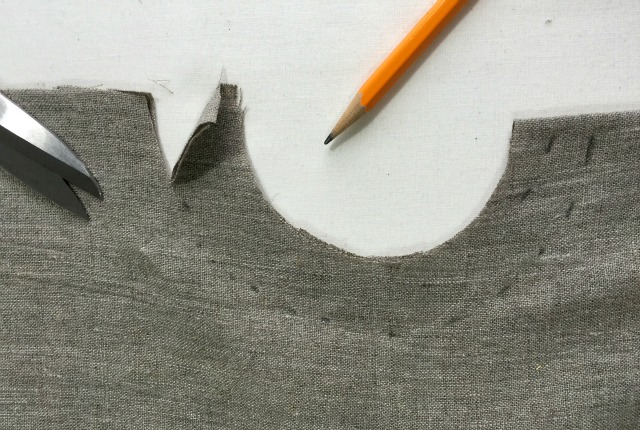
Oh the joy of not following a pattern is that sometimes I get it wrong. I decided my inner circle was too small. I measured down from the cut edge another inch and cut again. I knew to take off a little at a time until I got the size I wanted. In the end I had an eight inch diameter inner circle.
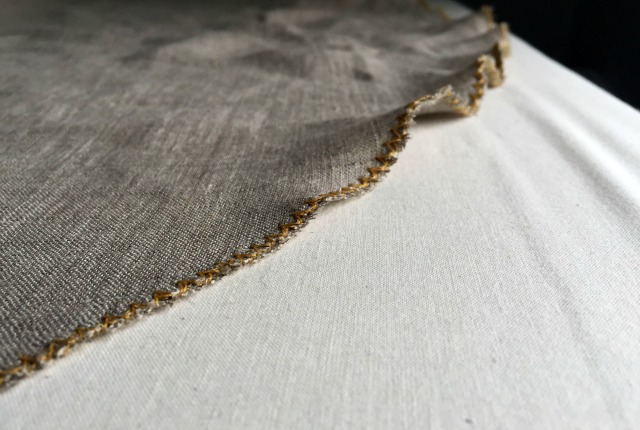
To finish all the raw edges I used a wide zig zag stitch with top stitching thread (I went around twice). That simple. I then ironed the edges to take the ruffled look away.
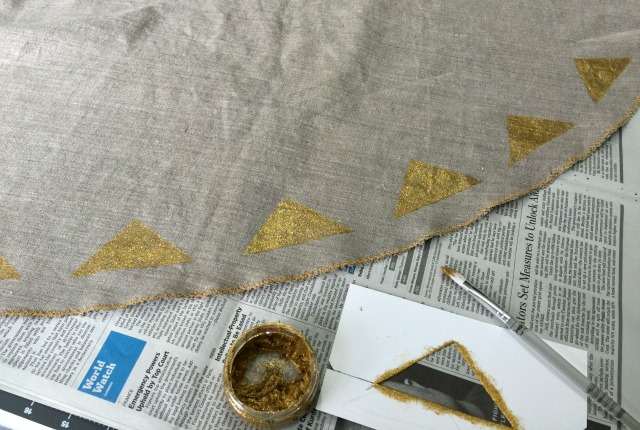
And now the fun part – embellishing. I knew I had to keep it simple in order to get it done. So I went with some gold glitter paint that I had recently rediscovered from cleaning out my craft supplies last month. That and a simple, simple stencil. But really the sky is the limit on how you want to embellish this skirt.
Variations on this tree skirt
- Other ways to finish the edges; serge, hem, bind with bias tape or pink.
- Make it reversible: cut out two circles, one print, one solid perhaps. Sew right sides together leaving an opening to turn it right side out. Press and close up the opening.
- Make a paneled circle skirt.
- Make a gored skirt using scraps of fabric, or coordinating fabrics
- Add a ruffle or pleated trim to the outer edge. (or pom poms or tassels)
- Sew ribbons, buttons, beads to the skirt for embellishment
- Applique any design onto the skirt.
- Embroidery a village scene, a train, a woodland scene or any design.
- If done up in burlap use yarn to cross stitch designs onto the skirt.
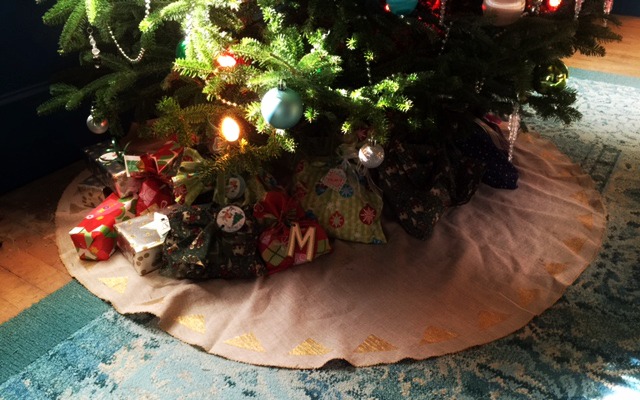
Tree skirt or no tree skirt, enjoy your holiday.