
You know that word “free”. So eye-catching. Free patterns are great except when they’re a horribly frustrating waste of your time and fabric. I’ve sworn off free patterns with their unclear instructions, haphazard construction methods and unflattering results.
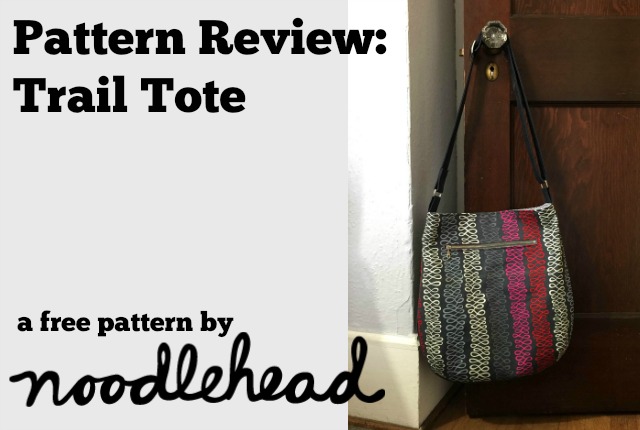
Oh, but this one is different 😉 The Trail Tote pattern by Noodlehead (for Robert Kaufman Fabrics) is quality all the way and free. Like green eggs and ham you’ll just have to try it and you will see. You will rejoice in the easy to understand instructions, simple construction and modern, relaxed design.
I was so impressed with my finished bag that I wanted to share this resource, this FREE resource, with everybody. Here it is: The Noodlehead and Robert Kaufman Fabrics Trail Tote Pattern
Style details
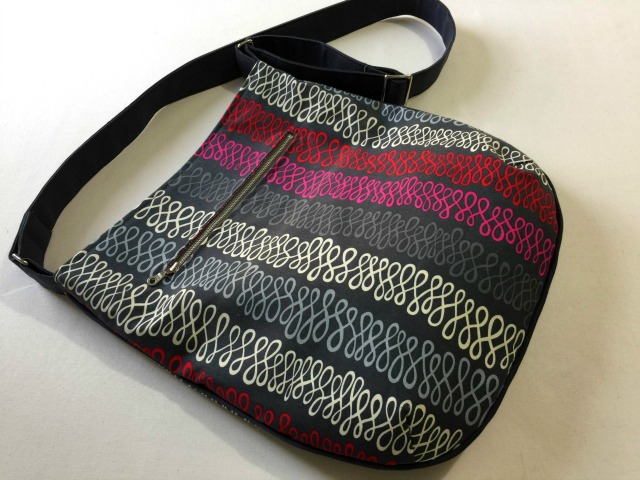
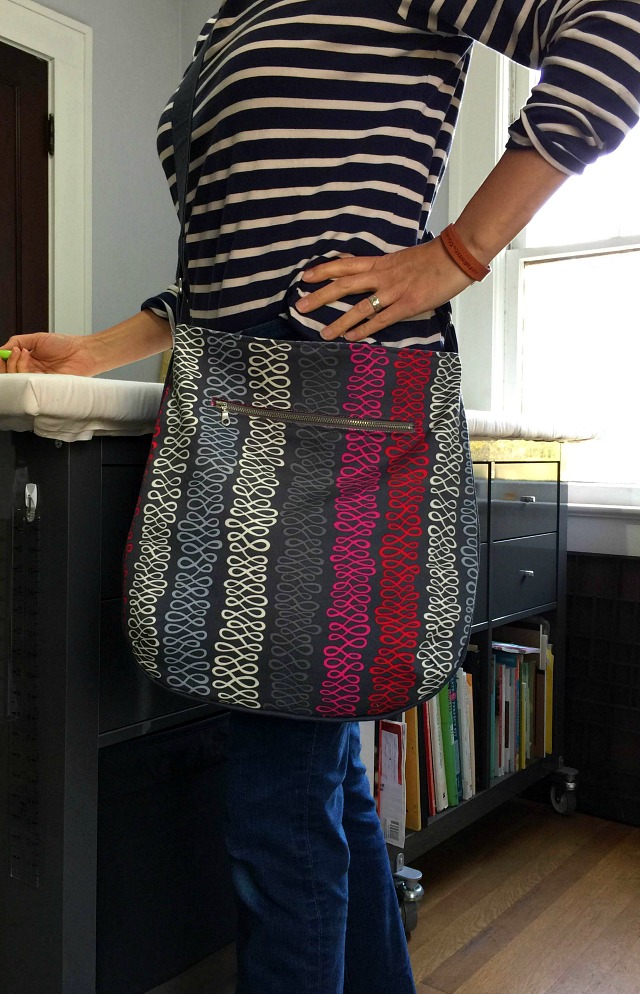
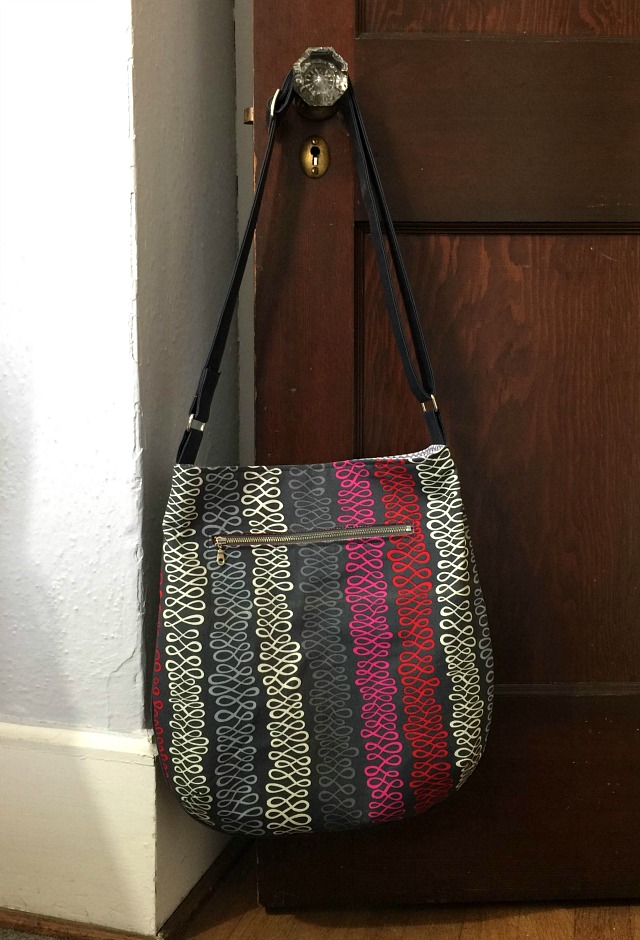
The Trail Tote comes in two sizes. I made the large tote (14″ wide across the top and 14 3/4″ inches deep). It’s a simple tote with nice details; an exterior zip pocket, and interior pocket, an adjustable strap and piping in the side seam. The unfussy shape can really showcase a great fabric.
The Trail Tote is designed to be made with four coordinating fabrics; 1, the bag exterior, 2, the lining, 3, the pockets, and 4, the strap and optional piping. This makes it a great pattern for using up small cuts of fabric in your stash but you could make the entire Trail Tote from one fabric. Try it in a solid or four different solid fabrics or four fabrics the same color but different textures… You get the idea; you really could have fun with this tote and use up some fabric from your stash like I did.
Interfacing, a magnetic snap, a metal zipper, two rectangular O-rings and a rectangular slide are also needed. I bought my zipper from Zip It, the hardware from Bagmaker Supply and the interfacing from Fashion Sewing Supply.
The Process
 I appreciate well-written instructions with lots of pictures and Noodlehead delivers. Read through the entire step first though just to be sure you got it before sewing anything. This is always a good idea and one that when I ignore I usually have to get out the seam ripper.
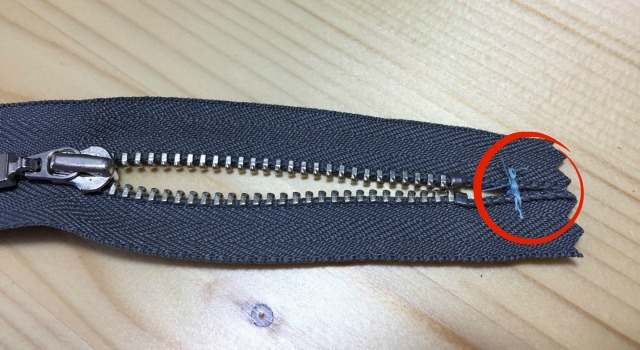
The construction was straight forward. As an experienced sewer I could see where she was going but I believe a beginner wouldn’t have any trouble following this pattern (but do move the zipper pull up or down the zipper as you sew it in place. You never want to sew right beside the pull. This isn’t mentioned because people who have sewn for awhile know this).
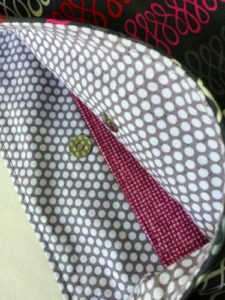
Instructions for installing the magnetic snap were really great. I have seen “follow package’s instructions” on other patterns but Noodlehead not only writes out how to install the snap but adds extra tips which I thought were very clever. I will use her technique for all the magnetic snaps I install in future projects.
There is an option to sew the straps centered on the side seams (as I did) or to sew one strap on the back, the other on the front each butted up next to a side seam. Sewing up against the side seams will reduce the amount of bulk you sew through when topstitching around the top of the bag.
Think about your strap placement and consider your machine’s capabilities. I found that placing the straps on the side seams did create a lot of bulk which was hard to sew through. I switched to a denim needle to help but my machine still groaned and I had to use the hand wheel to get through it all. However, my machine is old and not a Pfaff. Other machines may have no trouble sewing through the bulk.
What I Did Differently
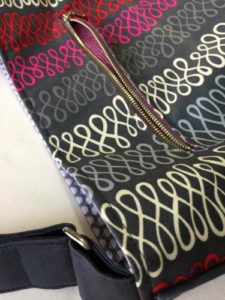
Other than sewing the zipper tape at the head end together so it would lay closer together under the opening (see photo above), I don’t think I did anything different from the instructions. I even tried using fusible tape to make the piping and apply the zipper because I had never tried it before. I can’t say I love the pressure sensitive fusible tape but I see how some people would.
What I Would do Differently
 Next time I would make the interior pocket sized for my mobile phone or make a second pocket just for my phone. Because this size bag is deep I also would add a key leash to the interior top. But now I put the keys in the exterior pocket and no problem.
I wonder if a flap could be added to give it a different look but that would hide the exposed exterior pocket which I like. I’ve also thought about using a zipper closure instead of the snap closure.
Would I Make This Again?
Yes. It’s a practical and good looking bag, I think. To glamor it up I would make it in a faux suede either a neutral color like tan or navy or very bold like orange suede with magenta suede piping and a print lining. In fact, suede fringe could be added in the side seam in place of the piping (but make the smaller size tote so it doesn’t look like a motorcycle saddle bag). This tote could also be made in a metallic fabric or light weight pleather.
The Trail Tote was easy enough to make that I would consider making it as a gift.
Why Should You Make The Trail Tote?
For a small investment; the hardware, some fabric from your stash and a little time, you could have a nice looking bag that you made. With it’s easy to follow instructions, sturdy, basic construction and nice design details the Trail Tote by Noodlehead (for Robert Kaufman Fabrics) is a winner.
Thank you, Noodlehead for another great free pattern. (I’ve made her Open Wide Zippered Pouch – 10 times now – and I just saw her Wool and Wax tote that I’ve got to try. How many totes do I need? Well, it’s not really a matter of need.)
Have you made the Trail Tote? If so how was your experience sewing it? Did you do anything different? Let us know.
I appreciated reading your review. I made the large tote as a gift and put multiple smaller patch pockets on the inside for a phone, wallet, etc., along with a clip on the strap ring for keys. These totes are a fun, easy, quick sew. Yours is adorable.
Multiple interior patch pockets! That’s exactly what I need to do next time. And, of course, a clip and strap for keys. Thanks for the great ideas. I really like the size of the large tote but things do tend to fall to the bottom (dang gravity 😉 I was just thinking yesterday about making the smaller size tote in ultra suede. That might be cool.
I love your bag, and I’m dying to know what fabric this is! It’s so cool. I’ve had this pattern cut out for years and might finally make one…
I love that fabric too. I bought it years ago but maybe you can find it on Etsy. It’s Robert Kaufman Fabric. Designed by Nancy Mims for Mod Green Pod. Enjoy making your bag