

These necklaces appeared in a half-awake, half-asleep dream one recent Saturday and on the following Monday, I saw them on someone else’s Instagram feed.
You can say great minds think alike or the collective consciousness or just simple timing but actually this simple tube necklace has been around in traditional craft and jewelry for a very long time. And they are so easy to make.
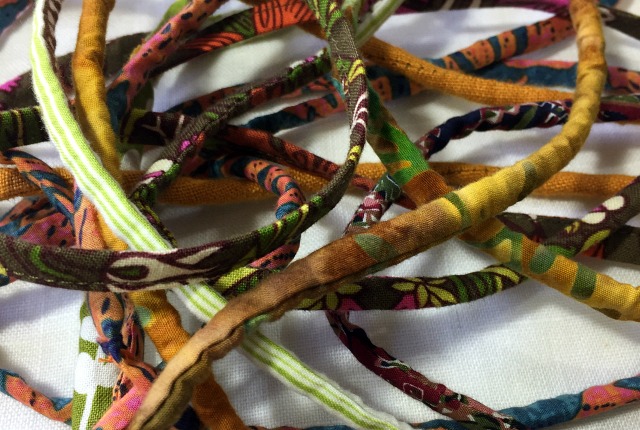
Maybe it’s because they are so simple that they are so adaptable to different styles. Depending on the fabric choice, print and weight and texture, the width of the tubes and the stiffness they can take on a boho, or ethnic, or rock-n-roll, or glam, or any number of different looks.
What You Need:
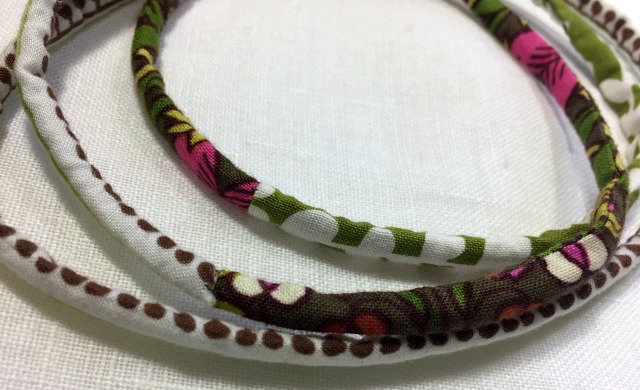
Fabric strips as long as you want the necklace to be plus an inch or 2 cm. The fabric can be one long strip or scraps of different fabrics pieced together (as shown above) or scraps of the same fabric pieced together. You only need one tube per necklace and it must be long enough to slip over your head once it is sewn into a loop.
Make the stripes as wide as you want and leave 1/4 ” or slightly less, seam allowance on both of the long sides.
The stiffer your fabric the wider you’ll want to make the tube. The narrowest tube of quilting cotton I could turn right side out without screaming was cut 1 1/4″ wide or just over 3 cm. Lightweight fabric, like cotton lawn, could be cut an inch or 2.5 cm wide and turn with no problem.
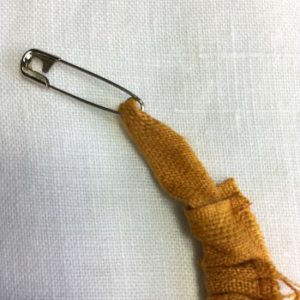
A safety pin or your preferred tool for loop turning. I have a loop turner but the tubes I made were so long they bunched up badly on the tool. For these long, narrow tubes, I found the safety pin to be the best tool.
Yarn or cord to stuff the tubes with. You can use multiple strands of yarn to fill a tube if your yarn is thin. (I used my daughter’s yarn scraps from her past knitting projects.) You could also leave the tubes unstuffed. They’ll still have their seam allowance inside the tube.
The stuffing material, or the lack of stuffing, affects the look of the necklace. How stiff or floppy the stuffing and how tightly the fit of the stuffing affects how the necklaces hang. Play around with different types and find what your like best; it all depends on the look you’re trying to achieve.
A bodkin, or a safety pin, to stuff the tube with the stuffing.
A sewing machine, thread, a hand needle, and a tv show or podcast to entertain you while you turn your tubes. (I enjoyed watching The Crown and Rebellion – not to say turning the tubes took that long. I also stuffed the tubes while I watched 😉
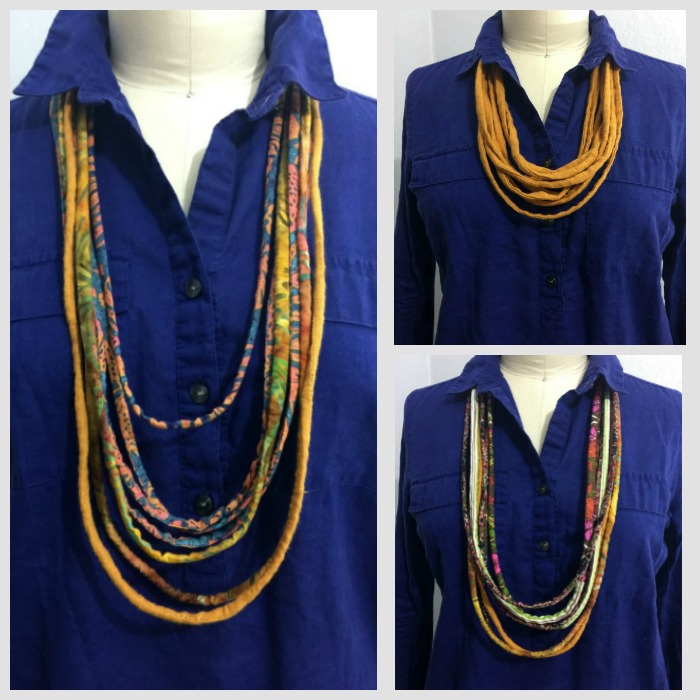
Do mix up your prints and lengths. Make some solids to break up a group of prints for a visual surprise. And make a bunch. The solid gold linen tubes above were made the entire width of the fabric, 58″. This length is perfect for wearing double looped.
Let’s Do This:
 Piece the strip together if you are using small scraps to make the long strip.
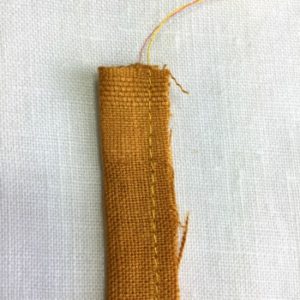
Sew the fabric strips in half down the long sides.
 Turn the tubes right side out. Patience is required to get the tube started.
(This is when the distraction of a show is sort of nice.)
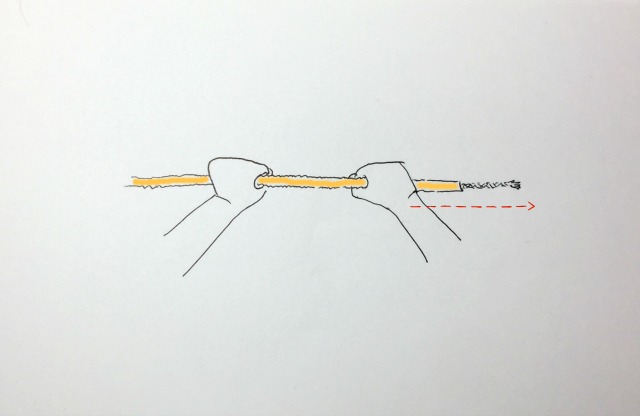
 Stuff the tube with your stuffing using a bodkin or safety pin*. Leave a few inches of overhanging stuffing on both ends.
* Attach one end of your stuffing to the safety pin, perhaps put the stuffing through the opening and tie it to the pin. Drop the head of the pin down the tube and work it through to the opposite end.
The fabric tube will lay slightly gathered over the stuffing. To work out the excess fabric grab the center of the stuffed tube with one hand and tug the fabric, working it out toward the end. Switch hands to get the other half smooth.
After working the fabric out to the ends if your tubes still seem too wrinkly you can iron them with the stuffing inside it.
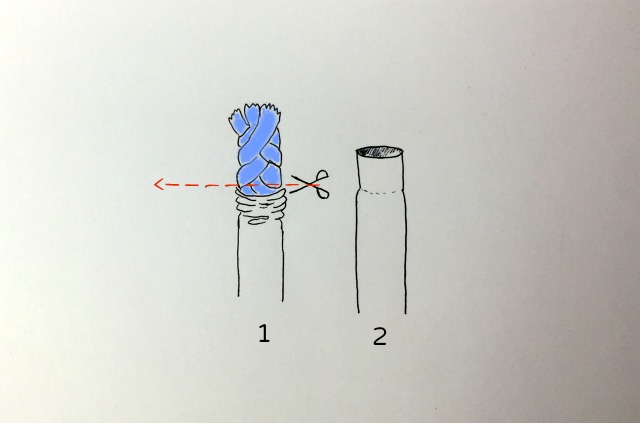
Pull back the short end of the tube from the stuffing and cut the stuffing off flush with the edge of the tube. Now the very last bit of the tube ends have no stuffing in them. Taking this bulk out of the ends makes it easier to finish off and close the tubes.
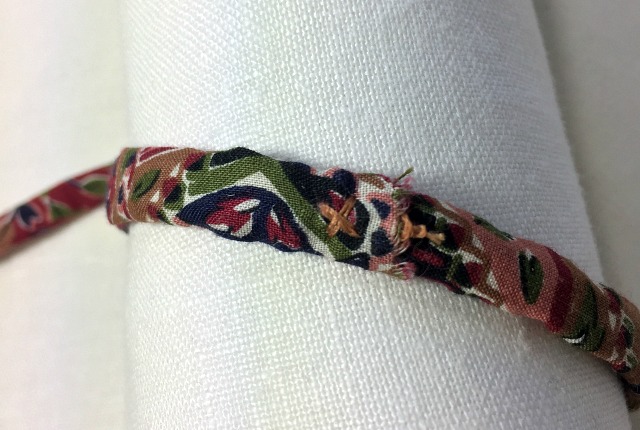
Overlap the raw ends, or stuff one inside the other and close the tube with hand stitches. I wasn’t concerned about raw edges since I don’t plan on throwing my necklaces in the washing machine.
You could add buttons or beads or fabric yo-yos, or tassels, or things I haven’t thought of yet to these tubes. You could also wrap them together in one area with a flat piece of tubing.
I like to wear these as a bunch but just two or three together looks good too. How do I know? I saw it on Instagram, Thanks, Mable and George. And please, do check out Mable and George’s Etsy shop. She makes her tube necklaces from Liberty of London lawn and doesn’t keep them for herself like I would. They’re quite lovely.
How unique. I like this. Thanks for sharing.
thanks!
Hello,
Is someone selling these fabric tubes? If so, would you give me contact information so that I may purchase some?
many thanks.
Tom T.
I’m sorry I don’t know of anyone selling these right now.