

Have you ever needed to make a simple little something but you made it more complicated then it needed to be? Well, actually, I do that a lot. Maybe “complicated” is too negative, let’s use the word “fancy” instead. Like when you make a sandwich but you take an extra step and add lettuce. Fancy.
I had a simple sewing request from my awesomely, creative mom and because it was for my mom, I had to make it Fancy.
But really, if all my simple sewing projects were as much fun as this one I would recommend making everything a tad more complicated, Fancy.
Of course, adding extra steps just because you feel motivated to do so doesn’t always turn out. Many times it turns into “What was I thinking? I could have been done hours ago”. Like my Thanksgiving dinner plans always do. But this time it didn’t. This time the little extra flourish took only a little extra time and the finished project looks so much better for it.
Here’s the Deal
My mom had bought a paint brush holder. The design of which is pretty straight forward. It’s a large canvas pocket divided up into smaller pockets. The brush handles go in the pockets and the back of the pocket extends up and folds over the tops of the brushes. Then it rolls up on itself and ties closed. Turns out this style of holder is called a roll up.
She liked her paint brush roll up but her shorter brushes got lost in the deep pockets and she would end up taking out more brushes than she wanted to just to find the smaller brush she was looking for.
And the other part of the deal is, although she taught me to sew she would rather paint and let me sew for her. Besides, she knew this project could go on the blog. She’s always looking out for me. Thanks, Mom.
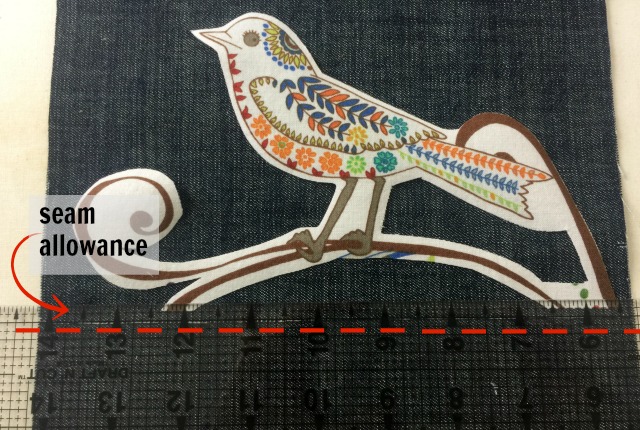
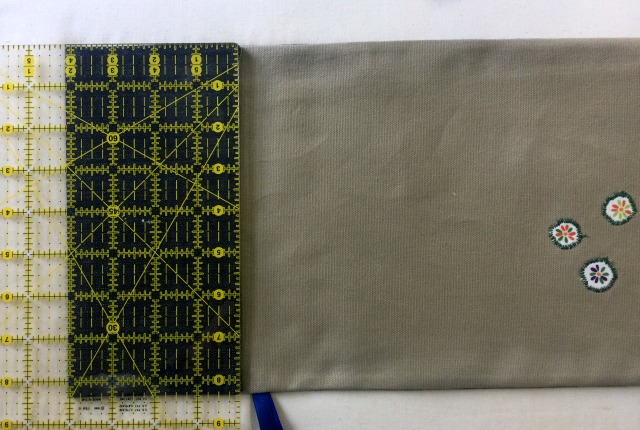
So I took pictures of her paint brush roll up (with a ruler laid on top for reference) and made some notes:
- Sturdy stiff fabric
- Paint gets on it
- Two ties on one side about midway up the side
- Pocket dividers are spaced apart in varying widths from 1 to 2 inches
- The flap overlaps the pocket
Simple enough. Maybe even boring. Yes, definitely boring.
How to Make a Fancy Paint Brush Roll Up
Let me just point out right now, if you haven’t already had this thought; this type of organizer/holder could be made to hold other slim vertical objects: color pencils, marker pens, tools, cords (when you travel and you have all those charging cords) makeup brushes, manicure tools, and other such stuff.
This tutorial makes a roll up holder which is 8″ / 20cm wide and 9″ / 23cm tall with a 4″ / 10cm deep pocket divided into six smaller pockets. You can make a roll up any size you desire, the instructions are the same. See the formula (under the next picture) to figure out what you’ll need to cut from your fabric if you wish to make a different size roll up from mine.
I suggest reading or skimming the entire tutorial before you start. Just because it seems like a good suggestion.
What You’ll Need for the Petite Roll Up (or any size roll up)
- Canvas, denim or sail cloth. Either one large piece or two pieces each 9″ / 23cm wide and 20″ / 50.5 cm tall (or see the formula below to make a different size holder). One is the lining and the other is the outside. These can be the same or different fabric.
- (optional) Interfacing. If your fabric isn’t as stiff as canvas or a heavy denim you can fuse a stiff interfacing to one or both pieces.
- Narrow twill tape, ribbon, cord, or other for the ties 20 to 22 inches or 50 to 60 centimeters long. The ties are one long piece but if you’re using scraps you can make this with two pieces equal in length (each being 10 to 11 inches or 25 to 28 centimeters long).
- The usual sewing supplies; scissors, sewing machine, thread
- The Fancy element
The Assumption That Everyone Wants to Be Fancy
This tutorial will explain the steps as if you too are adding a little decoration to the brush roll up. IF you want to make a roll up without the extra flourish you can. In fact a print fabric maybe all the fancy your roll up needs. Or maybe you see the beauty in the utility alone and wish to make your roll up in clean white canvas. This is all good. Just skip over the steps where the fancy is added.
What You’ll Need to Make it Fancy
- A printed fabric scrap that has a motif you want to add to your project
- OR fabric scraps you will cut into a pleasing shape and add to your project
- Heat-n-Bond
How We Do It
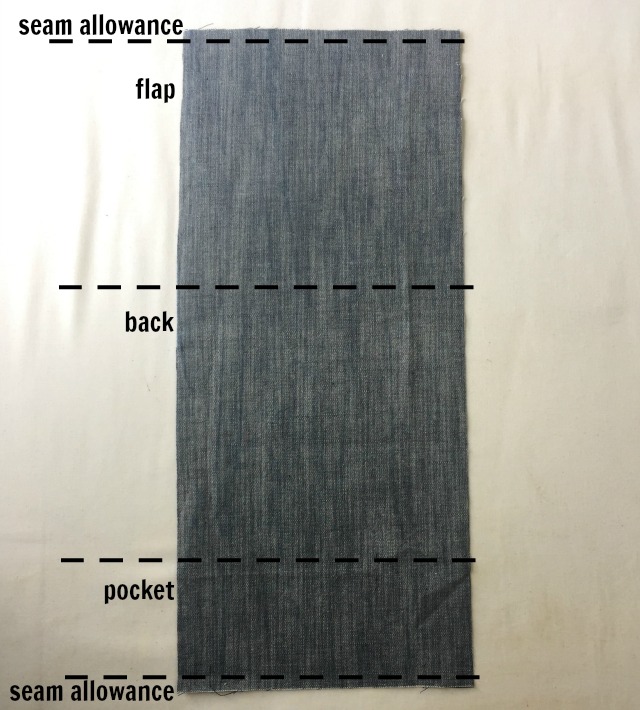
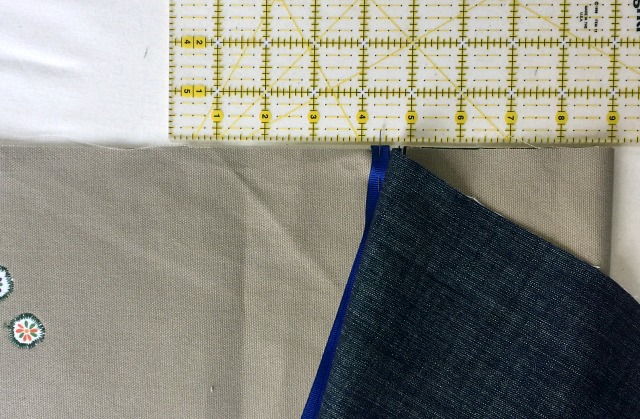
Cut one 9″ / 23cm x 20″ / 50.5cm rectangle from the outer fabric and one rectangle, the same size, from the lining fabric.
*If you want a bigger size it’s easy to change. The Formula: The width equals; your desired width of the caddy + seam allowance. The height equals; the pocket height + the caddy height + the flap + seam allowance. And for the ties, you’ll want to cut a piece of ribbon or cord 2x the width of the roll up plus three inches, or so.
Getting Fancy
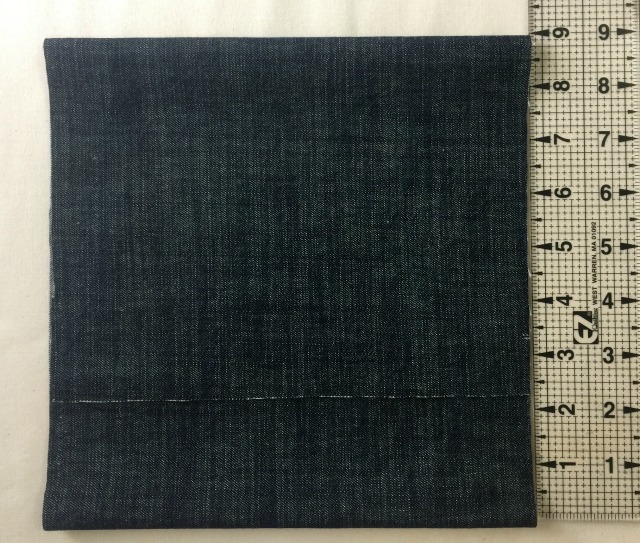
Fold up 4 1/2″ / 11cm from the bottom edge of your outer fabric. This is the pocket plus a 1/2″ / 1cm seam allowance. Fold down 6 1/2″ / 16.5cm from the top. This is the flap plus a 1/2″ / 1cm seam allowance.
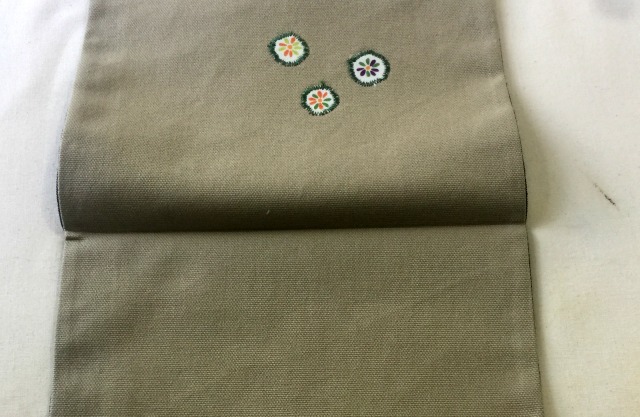
Folding the outer fabric as if it were sewn already shows you how much space you have to apply an applique. The applique could be applied to the flap, on the pocket or on the back. Your choice. Just remember the finished project, when in use, is rolled up and tied so the decoration is just a little extra color and fun when the user unrolls it.
Applying a motif or a few motifs from a print fabric adds a lot of visual interest for a little amount of work. But you aren’t limited to a motif. You could applique a wide band of a solid contrasting fabric or a band of a tiny print fabric across the flap.
There are other ways to decorate this project; embroidery, stamping, stenciling and adding trim. Whichever you choose now is the time to do it, before you sew the lining and the outer piece together.
After deciding what it is you want to applique check that it fits the space you have and think about how you want to align the design in that space. Remember, there is a 1/2″ seam allowance around the edge of the project fabric so leave space for that.
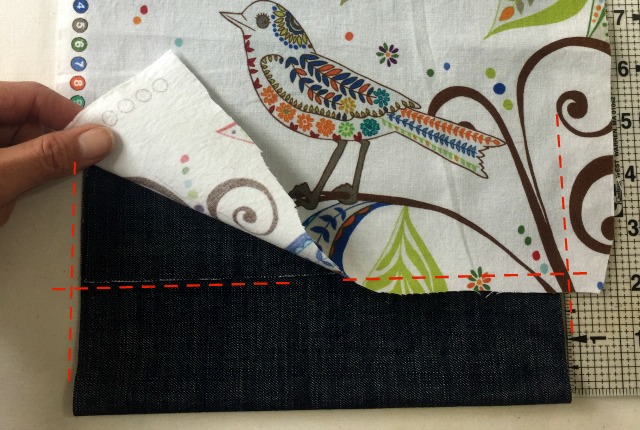
Iron the Heat-n-Bond (follow the directions that come with the bonding product you use) to the back of the fabric being sure to cover the motif plus some. It’s easier to fuse a larger piece of Heat-n-Bond to the fabric than to line up a smaller piece over the area you want to cut out.
Leave the paper backing on the Heat-n-Bond/fabric combo and cut out around the motif. Leave a little room around your motif for the applique stitch (a narrow zig-zag stitch). If you’re not quite sure how exactly you want to cut the motif out just cut away a little at a time and decide as you go. You can cut more after you check but you can’t add back more.
When the motif is how you want it peel off the paper backing and place the motif onto your project. Remember the seam allowance will eat part of your motif if you put it right up to the edge. Of course getting caught in the seam will also sew the motif down. No wrong way, just think about the finished design you want.
When the placement is where you want, use a press cloth and fuse your motif to the project fabric.
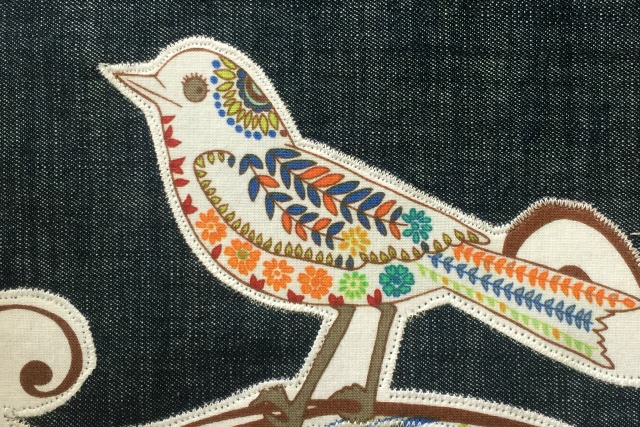
Sew the motif to the project with a narrow to medium width, tight (short stitch length) zig-zag stitch.
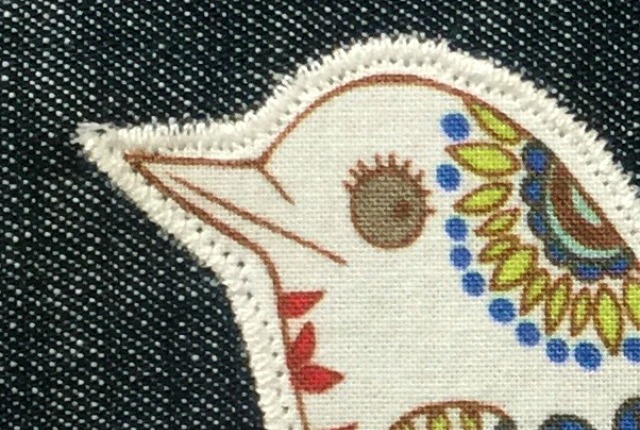
Go around the curves slowly stopping the machine, raising the pressure foot and slightly turning the fabric every few stitches to make your curves smooth.
Applique Your Heart Out and Then Let’s Sew This
Line up the lining and the outer fabric, right sides touching. Keep in mind which end is the top and which the bottom so your design ends up where you want it.
Lay the ties (the cord or ribbon), folded in half, so the fold (or raw edges if two pieces) sticks out a little past the edge. The ties are placed where it will be midway up the roll up when the roll up is finished.
To find this point you could eyeball it by folding the pocket up and making a crease where the flap will fold over. OR measure up from the bottom the seam allowance + the pocket to be at the bottom of the finished holder. From the bottom, measure up half the distance of the finished height. OR on this size project, measure up 9″ / 23cm from the raw edge of the bottom.
Pin the ties in place.
Pin the two layers together around the edge. The ties are sandwiched between the two layers.
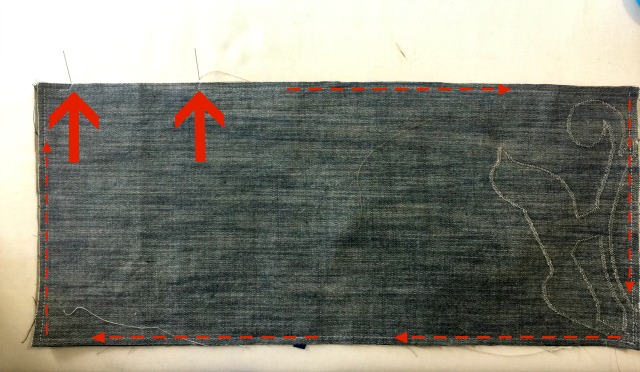
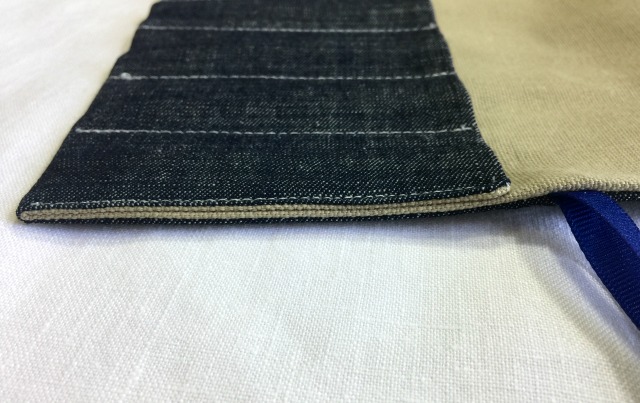
Sew around the entire outer edge leaving three inches / 7.5 centimeters open where the pocket is. You could have your opening anywhere but when it’s placed where the pocket is, or where the pocket is sewn to the back, the opening will be sewn closed when you make the pocket.
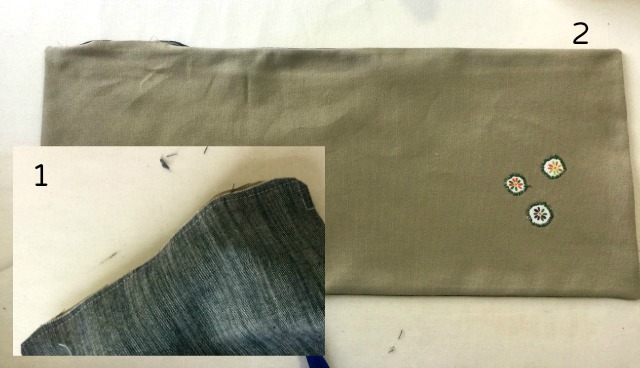
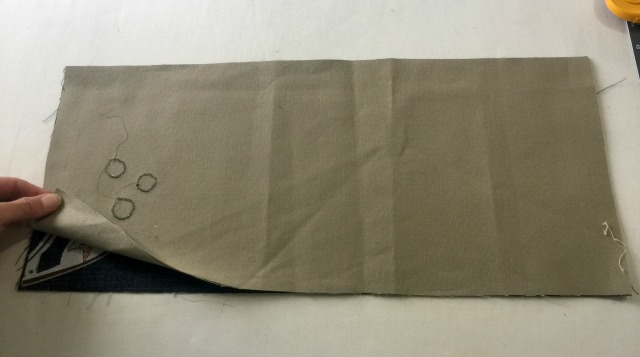
Clip the corners and turn the two pieces right side out through the opening.
Iron the layers so the seam is directly on the edge. (Sometimes, spraying the edge with water makes the fabric easier to manipulate. When it’s wet it’s easier to move the layers of fabric with your fingers into place).
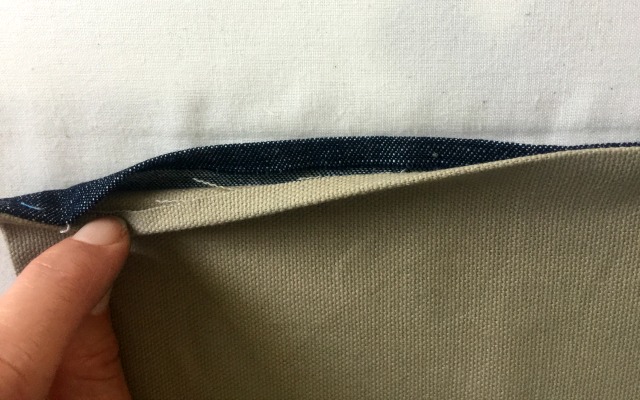
Fold in the seam allowance of the opening and press. Don’t sew the opening closed yet.
Fold the pocket up (here: 4″ / 10cm) and pin.
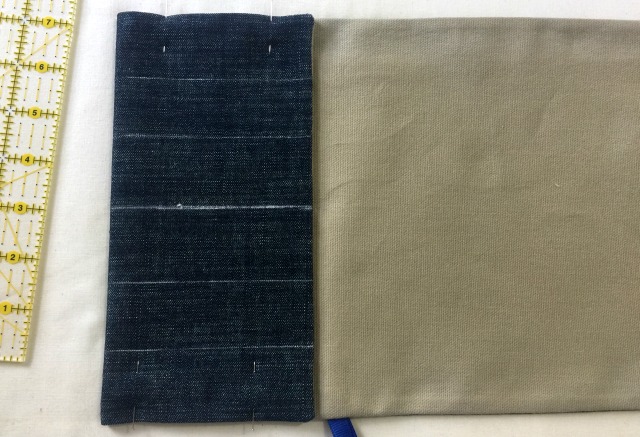
Mark the pocket dividers. The dividers can be made to the size you want.
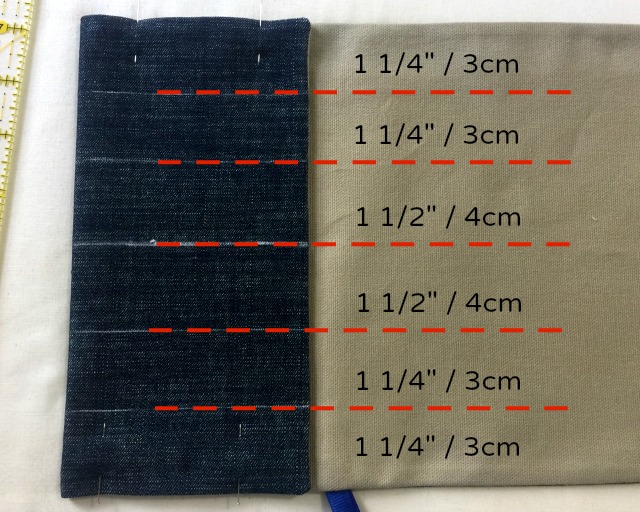
In this project, there are six pockets. The outer two on both sides are 1 1/4″ / 3cm. The inner two pockets are 1 1/2″ / 4cm wide.
Of course, you can change the number and the size of the pockets to fit what you need to put in the roll up.
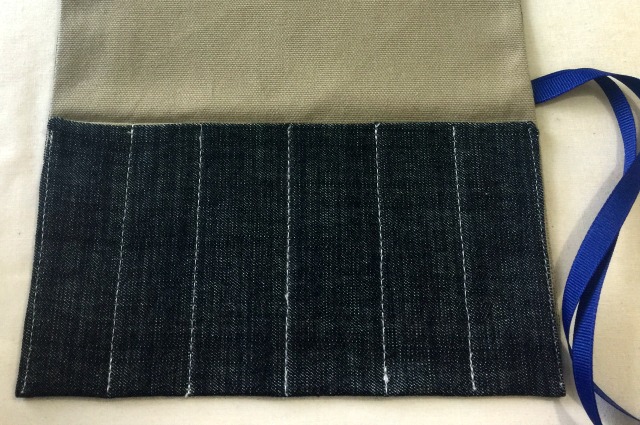
Sew the pocket down along the edges and where you’ve marked for the dividers.
You’ve just sewn the opening shut as well. Yay, you for saving a step. But now the step you can’t skip, press it.
Fold down the flap and press.
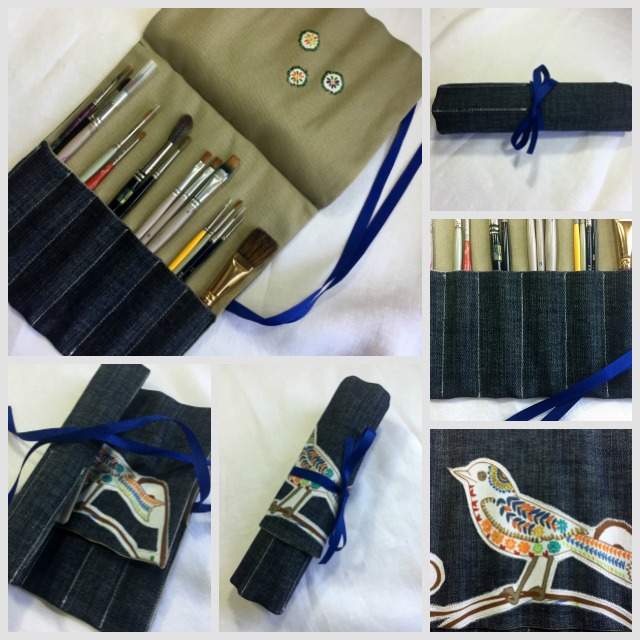
And that’s it. Easy and pretty fancy but not so fancy that it’s not useful or can’t handle getting a little paint on it.
My mom received her fancy roll up a couple weeks ago and loves it. (I like to think I’ve gained a few extra points over my sisters with this one). It does the job she needed it to do and that’s really what matters, adding the fancy part was just an extra touch that didn’t take too long and was fun to do.
If you have any questions about this project don’t hesitate to ask in the comments.