
There are two sides to patches besides the front and the back. There are the real patches, the work horse, practical, I got a hole that needs covering patch and then there’s the strictly fun, I have no purpose other than decoration type of patch (which I suppose technically should be called applique)
Both types of patches have their use and place but you know from the above description that the patch that’s strictly fun is the one you want to hang out with more. And lately, you have a lot of opportunities to do so. Patches seem to be every where.
Although, a correction is in order: the fun patch can serve a purpose. It can help you identify your backpack, your sweater, your black stocking cap, your clothing item from everyone else’s.
Decorative patches are fun. They allow you to individualize something, to make an item a little more you, to make it a little different, to add a little more color or character. They are available in numerous designs; sports team logos, pop culture references, romantic florals, tattoo looking florals, snarky sayings, food with or with out faces and more.
But you can make your own, even if you don’t own an embroidery machine. And it’s easy.
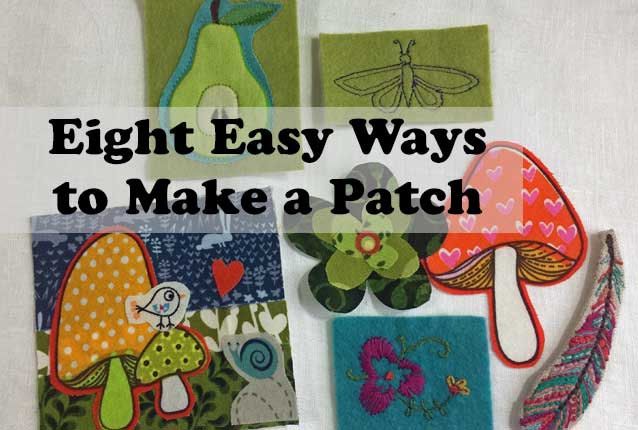
Here are 8 ways to make a patch, for covering a hole or for just looking sweet.
(and soon to come: Part 2: Ways to Apply a Patch)
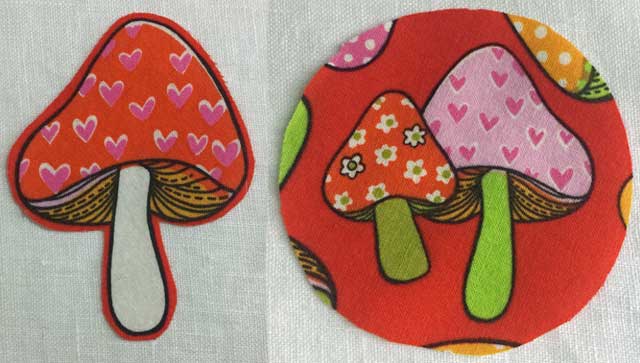
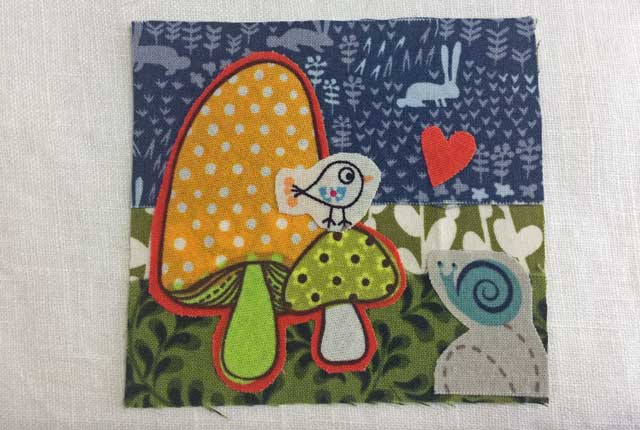
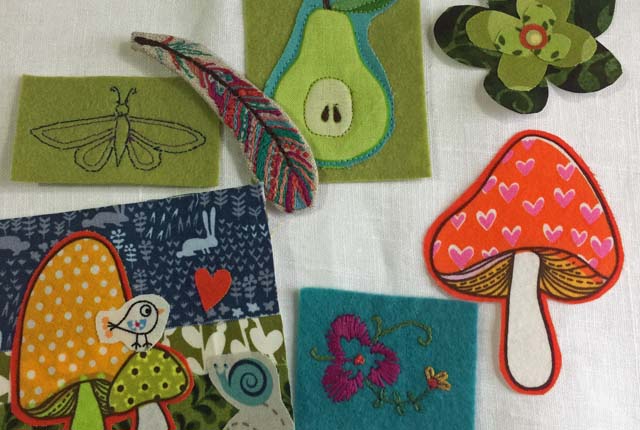
Select a Design From a Print Fabric
This is probably the easiest way to make a decorative patch. And I’m using it to make two different types of patches. Simply select a motif from printed fabric to be your patch.
Start by applying Heat-n-Bond to the back of the fabric which has the motif you selected. The Heat-n-Bond needs to be slightly larger than the shape you are going to cut out from the fabric.
How you cut out the motif makes the two types of patches just a tad different.You could cut around the object resulting in a patch that is shaped like your motif or cut out a shape like a circle, oval, square or rectangle around the motif you’ve selected.
You could cut around the object resulting in a patch that is shaped like your motif or cut out a shape like a circle, oval, square or rectangle around the motif you’ve selected.
If you decide to cut the patch so it is the shape of the motif don’t cut right on the outline of the motif. Instead cut out the motif so there is some fabric (about 1/8″ to 1/4″) around its outline.
This “extra” space is where the stitches to adhere the patch to the garment will be. If you cut directly on the outline of your motif some of the design will be covered up by the stitches (not much though)
But wait, isn’t this a fusible patch? Yes, but if the garment your sewing the patch on to will be washed you’re going to want to secure the patch with stitches.
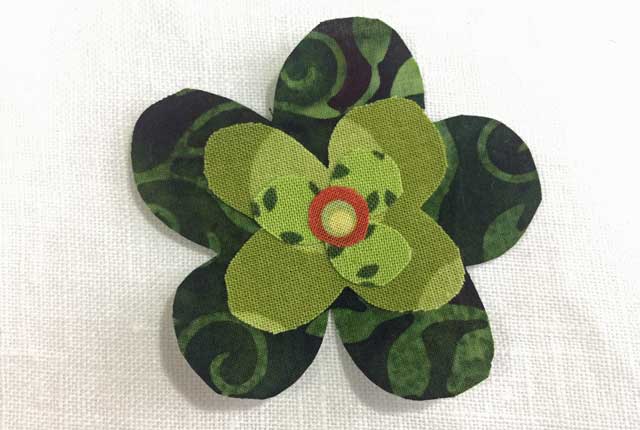
Layer Different Fabrics to Make a Design
This is a great way to use up some scraps and satisfy your need to be creative in a small amount of time. It’s easy too.
Draw out or trace a simple design. Flowers work great because of the natural layers but other objects come in layers too; a target or an abstract design. Any object could be broken down into layers, such as boats, butterflies, fruit, sneakers, hearts, rainbows. You get the idea.
After you’ve drawn your design as a whole object break it down into layers. What would be on the bottom, then middle, then next, then next…
Figure out the largest layer of your design. In my flower example, the largest layer is the bottom petals. The largest layer is your base level.
If you were making an ice cream cone with three scoops your base layer could be the outline of the entire shape; the cone and the scoops. Or you could make the cone your base layer. Then add the base layer of the scoops (one shape) and overlap the cone (fused together where it overlaps). Then layer up the other scoops and drips on the cone.
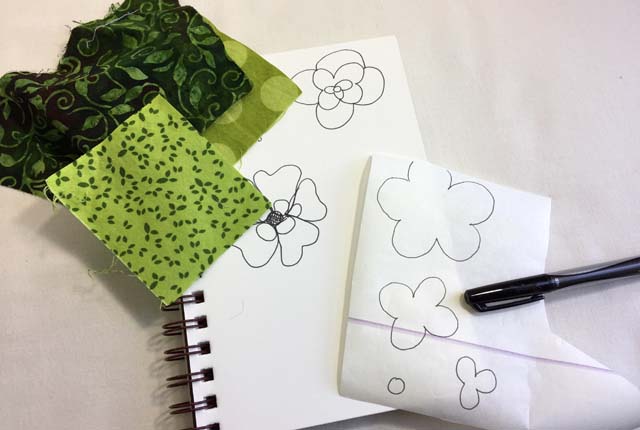
Draw or trace the different layers onto Heat-n-Bond. A fine line sharpie works great for this.
Cut out the shapes from the Heat-n-Bond either around the drawn line or in larger chunks like a square. Fuse the Heat-n-Bond shapes onto the back of the scraps of fabric you’ve chosen for the design.
Cut the shapes out of the fabric following the lines you drew onto the Heat-n-Bond. Fuse one layer at a time to build your design. Leave the paper backing on your base layer so you don’t accidentally fuse it to your ironing board 😉
It may save time to peel off the backing on all the shapes and layer them up to fuse at once, but be warned, some of the layers will shift when you place the iron on top of the stack.
This method can also be used to make a “picture” patch; a collage with fabric.
 Play around with scraps of fabric to build your design. Because Heat-n-Bond is easier to apply to a larger piece of fabric than a tiny one, apply Heat-n-Bond to the back of a fabric you’re pretty sure you’re going to cut a motif out of before you cut the motif out.
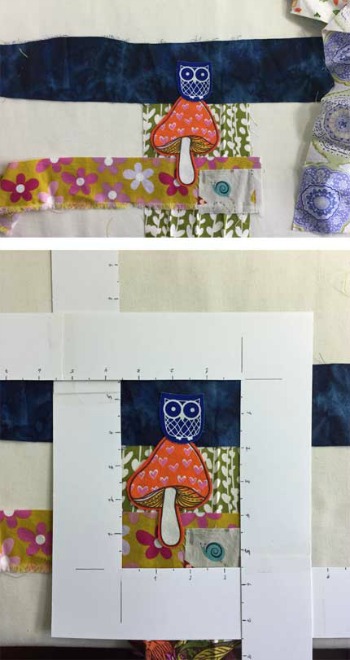
A good way to really “see” your finished design before you cut your scraps short and before it is finished is to define, with paper, the edges of your design. The paper should be wide enough to block out distracting fabrics and colors. (short post about it here)
Apply Heat-n-Bond to the back of different scraps to make a background or base layer. Then build your picture fusing on the different elements.
The different pieces could be stitched down with a straight machine stitch, and they should be if this patch will be in the washing machine, or you could add embroidery stitches, decorative stitches, or even rows of stitching like quilting.
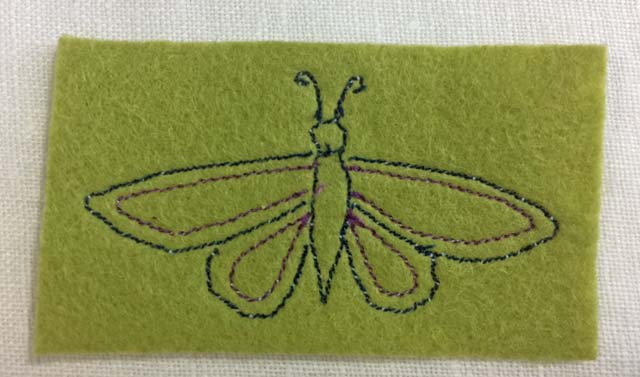
Stitch a Design
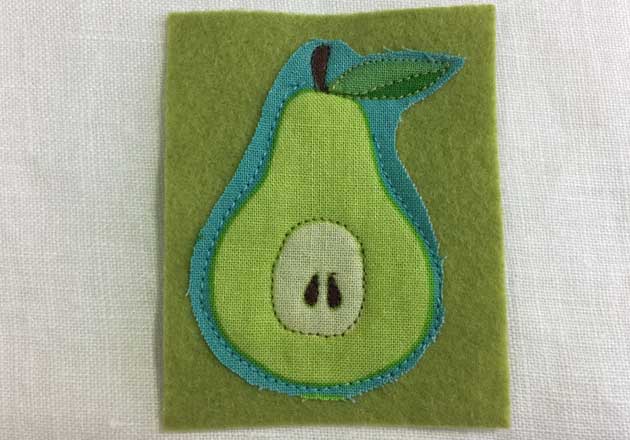
You can stitch a design onto any fabric. Denim, Linen, Ultra Suede, etc. but I noticed many of the patches sold on Etsy from folks making them on their embroidery machines are stitched onto felt.
Felt gives patches some loft and heft. This patch can be stitched with either a regular sewing machine or by hand. Because the felt is stiff you do not need an embroidery hoop when hand stitching.
Use a wool blend felt and be sure to wash it with cold water (by hand) and air dry before you start stitching onto it. Acrylic felt could be used too just look for a piece of consistently thick felt. Sometimes the pre-cut squares at the craft store are pretty flimsy.
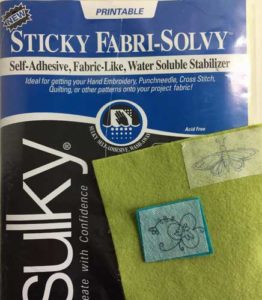
To transfer your design onto the felt use Solvey stick on water soluble stabilizer. Draw your design onto the stabilizer. Peel the backing off the stabilizer and adhere it to the felt. Stitch your design.
Cut the felt around the design or in a shape around the design, like a circle, oval, square or rectangle
The stabilizer will dissolve under cold running water. It does leave the backing fabric, felt or other, a little stiff, or maybe I’m not rinsing it enough. I also notice when hand stitching through the stabilizer, while easy, it always feels like my needle is getting gummed up. (FYI: Sulky has changed the packaging for their Fabric-Solvy if you go looking for it)
If you’re going to machine stitch a design keep the design simple. Use a straight or tight zig-zag stitch and take your time.
Stitch Around Someone Else’s Design
Your design doesn’t have to be an original. As my painting teacher, Franklin, used to always tell us, “Walk around the class and borrow ideas. It’s not copying, it’s borrowing.” So, walk over to your fabric stash, or scrap basket and borrow a design.
Cut out a motif from a printed fabric and stitch it on to the felt. No Heat-n-Bond needed. You could stop at stitching it down or stitch more lines in the motif to give the patch a quilted texture.
Do you have a favorite young person whose is into dinosaurs, ballerinas, trucks, or an animated character? This method is a great way to make a patch for their hoodie or lunch bag or T-shirt. Then when the item is out grown, but still in good condition, the patch can be removed and the item handed down to their cousin who doesn’t think the same way about princesses.
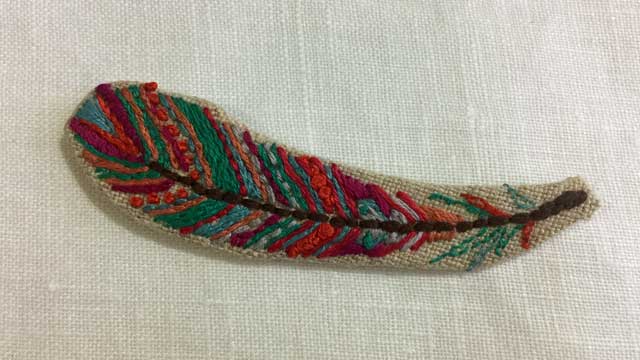
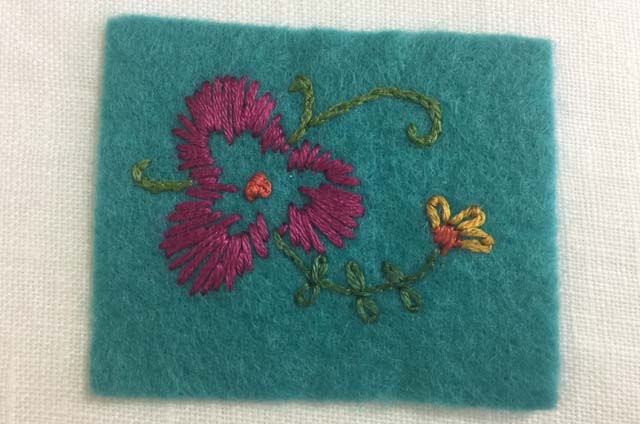
Embroider a Design
Embroidering by hand is like today’s “adult coloring books”. It’s meditative, it’s playing with color, it can be picked up and put down in an instant and it’s transportable.
But what do you do with your embroidery when you’re done? If your home decor doesn’t lean toward embroidered cushions or stitched and framed works hanging on the wall, make a patch. You could embroider directly onto a garment but if you don’t yet have a particular garment in mind or the garment isn’t easy to work on for hours (too big, too scratchy, too warm) embroider your design onto a piece of sheeting (as in old cotton sheets) or linen, or other mid-weight fabric. Then sew your finished embroidery onto the garment like a patch.
Draw your design onto Solvey water-soluble stabilizer or directly onto the fabric. Stitch.
Cut around the finished piece leaving enough fabric to fold under the design. Press the raw edge to the back.
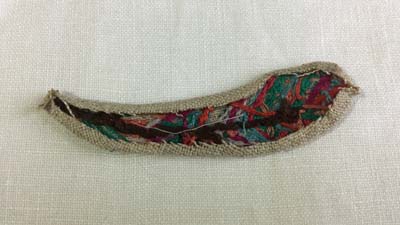
Funny enough, a great resource for designs to embroider is adult coloring books.
Many of the coloring book designs are very detailed which is great for adding lots of different colors. Or you could stitch just the lines in one color and leave the fabric exposed as the “fill”. You could also simplify the design to your taste and time constraints.
This was just eight ways you could make a decorative patch. I’m sure you could come up with more, like, using photo transfer, copying a child’s design onto the printable stabilizer to stitch, patchwork…
Do you have another idea for a patch? Please share.
Wow, thank you for this post. The designs are lovely. I’m actually using patches for my business that’s why I’m finding this post interesting.
sewing a patch is much more like an applique. sometimes it is lot more difficult task to do. but with a nice guidelines it is really easy work. Your patch is really awesome one.
thanks
thanks! It is applique – you just don’t have to turn the edges under with a lot of patches, which is nice.
Thanks for all the cool ideas.
thanks – ideas are never in shortage (except what to make for dinner) it’s finding time to execute all our ideas, right? 😉