
Bias bound edges are popping up on all sort of designs lately; necklines of dresses, hems of sleeves, the tops of pockets. On some designs they add a cute factor, on others they give a nice polished look to the garment. I’m getting over my past prejudices that bias binding made garments look homemade, in a not good way. A bound edge finish is not appropriate for all garments but when it is why not use it? Bias binding is certainly an easy way to finish an edge, it eliminates facings and it can be just the decorative touch you want.
Making your own bias binding gives you full control over the type of fabric and the choice of color or even print of your binding. It isn’t hard to make bias binding and not at all hard to sew on to a garment or other project.
This post shows how to cover a raw edge with bias binding and how to join the ends of the binding when sewing it on a continuous opening such as a neckline, armhole, or hem. Bias binding can also be used in place of a full facing but this post will not cover that method.
To Sew Bias Binding On:

Unfold one long edge of the binding and line it up with the raw edge that it is to be covered. Right sides of the fabrics are touching. Pin in place.
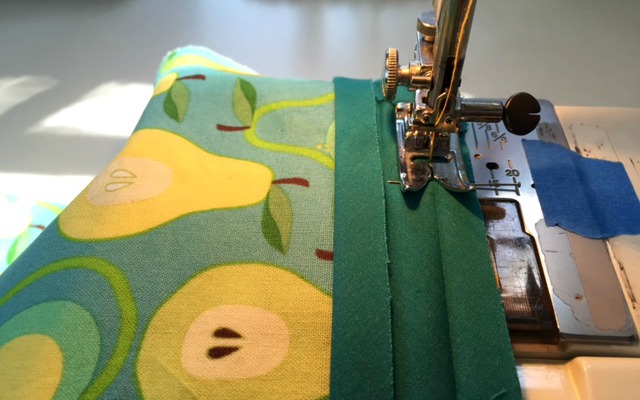
Sew the binding to the fabric in the binding’s crease using a straight stitch and a stitch length appropriate for the weight of your fabrics.
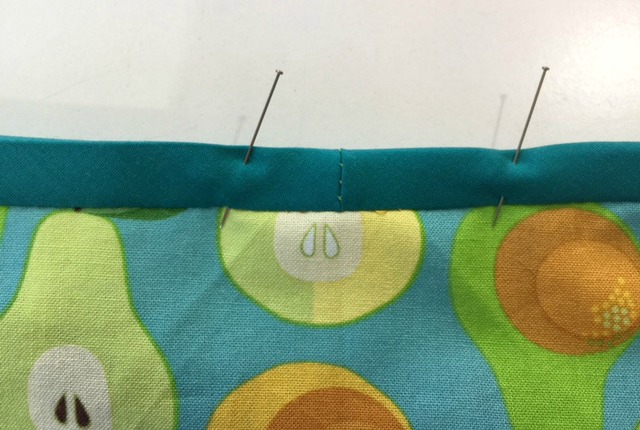
Fold the binding over the fabric’s raw edge keeping the raw edges on the binding folded inward.
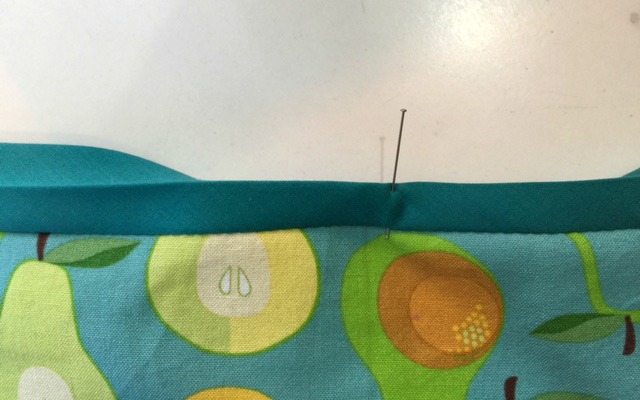
Pin down to hold in place and press with a hot iron.
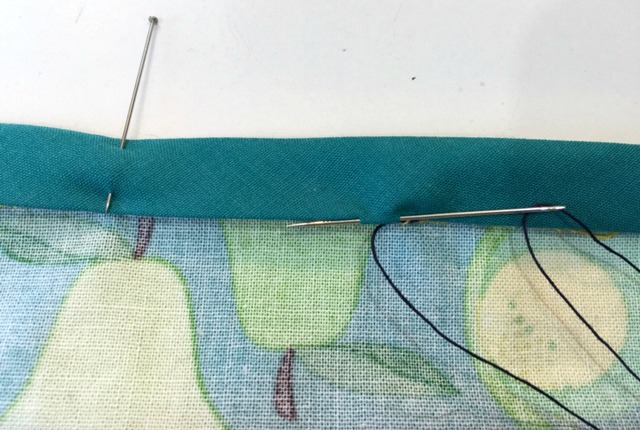
Either slip stitch the binding down on the wrong side of the garment by hand OR if you want to sew it by machine…
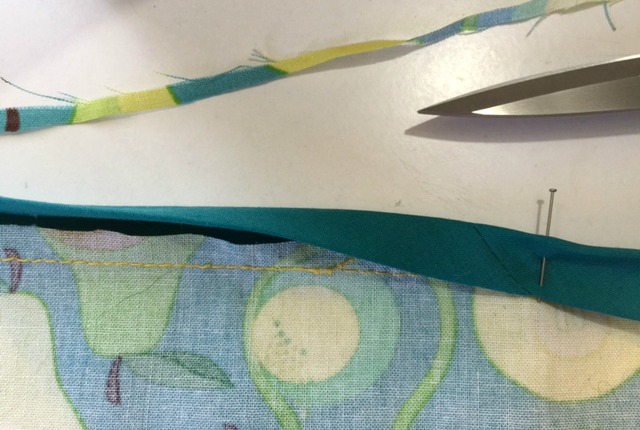
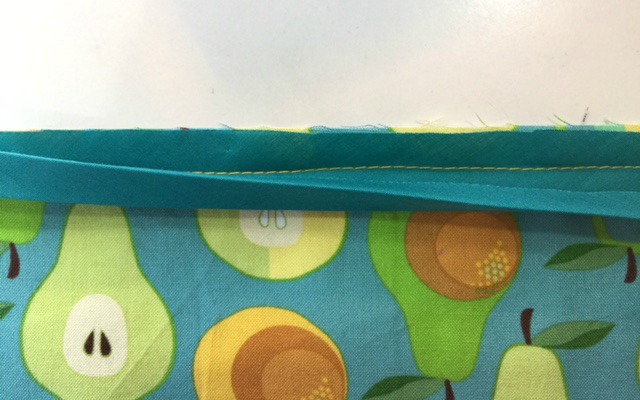
Trim down the seam allowance a little bit before folding over the binding. Try to keep whatever amount you trim to be even. Fold the binding over the raw edge as before but this time the binding on the underside needs to extend beyond the stitching that sewed the binding to the fabric. You may have to work the binding with your fingers to get it in place. Pin down the binding and press.
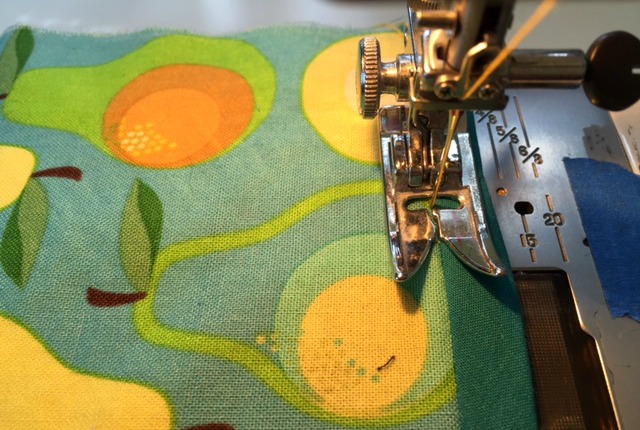
On the front side of the garment stitch in the ditch. This is to stitch in the seam, on the right side, where the binding was sewn onto the fabric. You will catch the binding on the back side, sewing it down, with this stitch.
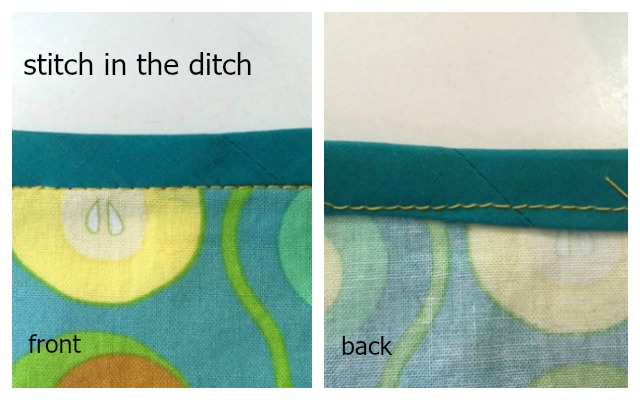
Using a thread that blends with either the binding or the fabric will help camouflage any stitches that strayed out of the ditch. The back is a little uneven in my hurried example above. Don’t let perfectionism keep you from machine stitching the binding down. The time saved is too great to worry about that.
And what if in a couple places you don’t catch the back binding in the stitches? You can hand slip stitch these missed areas down if they are longer than a half inch.
To Join the Ends of the Bias Binding Together:
If your binding is going to form a continuous loop (necklines, hems, armholes) you will need to join the beginning and the end of the binding together where they meet up. Since the seam where you join the two ends will show on the outside of the garment or project you should plan to put the join in an inconspicuous place. On a neckline this could be center back. On an armhole place the join at the side seam under the arm.
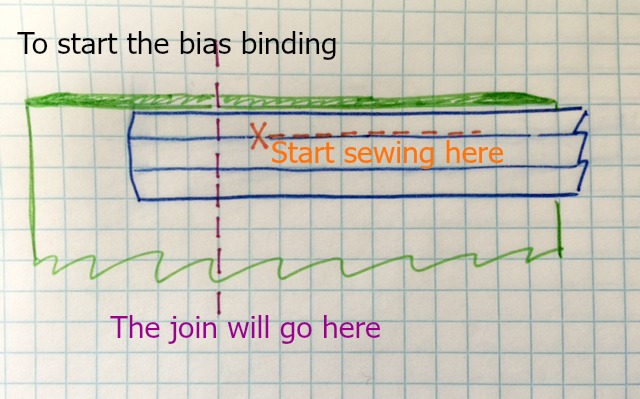
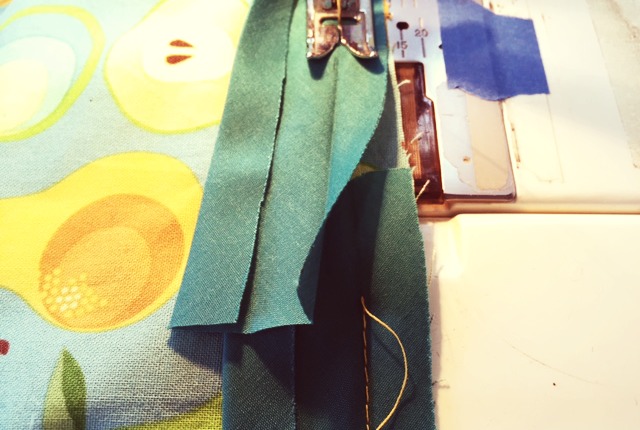
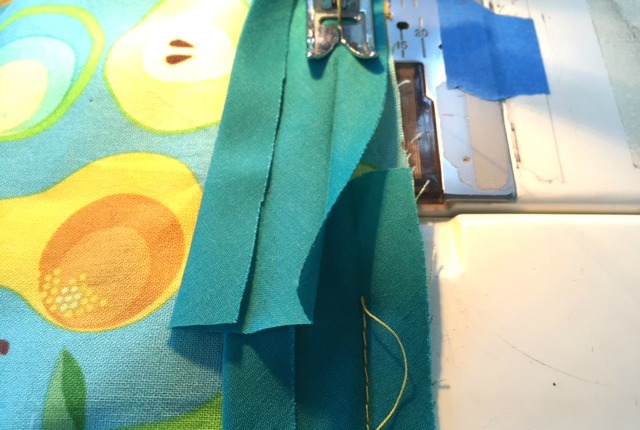
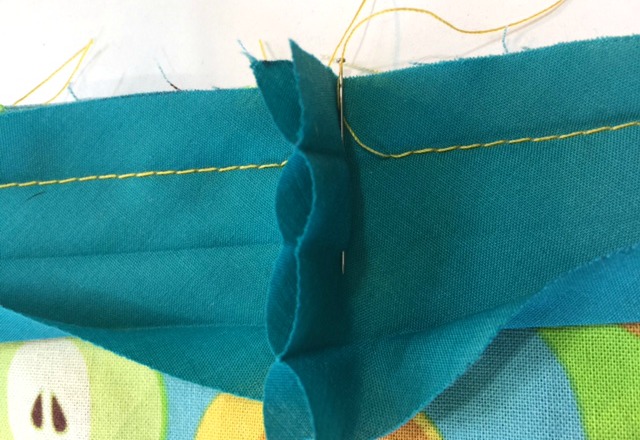
Lay the starting end of the binding a half inch or so before the point you want the join to be. Place the machine needle down into the fabrics, on the crease of the binding as explained previously, not at the start of the bias binding but a little ways past the join.
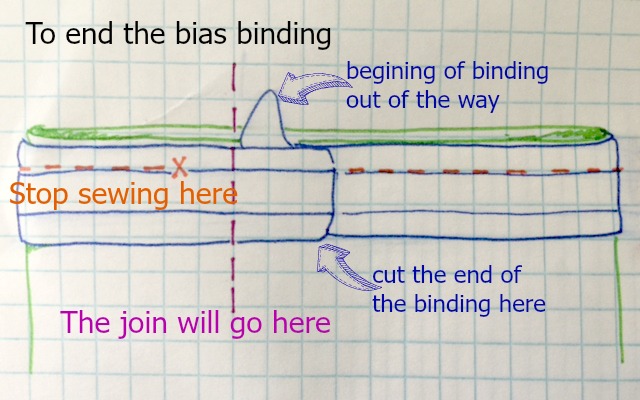
Sew in the crease as above but stop before you reach the point you are planning the join to be.
Take the needle out of the fabric. It’s that kind of stop. A real, clip the threads, type of stop.
Pinch the ends of the binding together close to the fabric surface where you want the join to be. Pin or mark with marking chalk where you need to sew (join) the binding together. If you sew too far away from the fabric the binding will be too big and will not lay flat on the fabric.
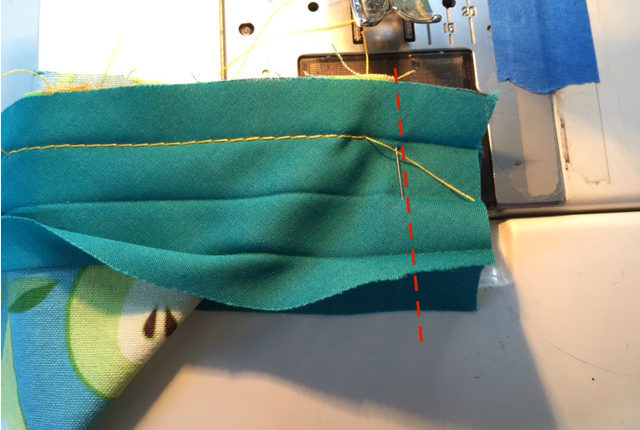
Fold the fabric back and out of the way before sewing the binding together.
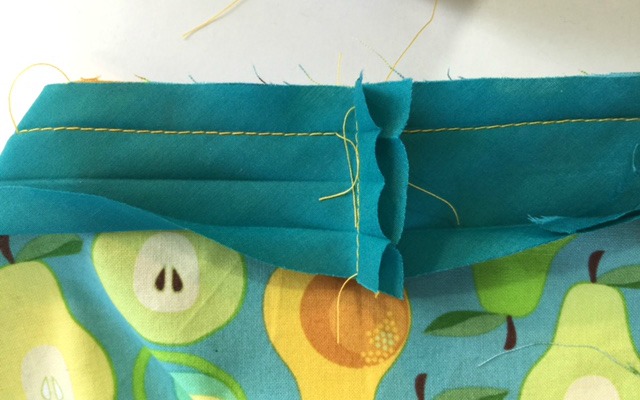
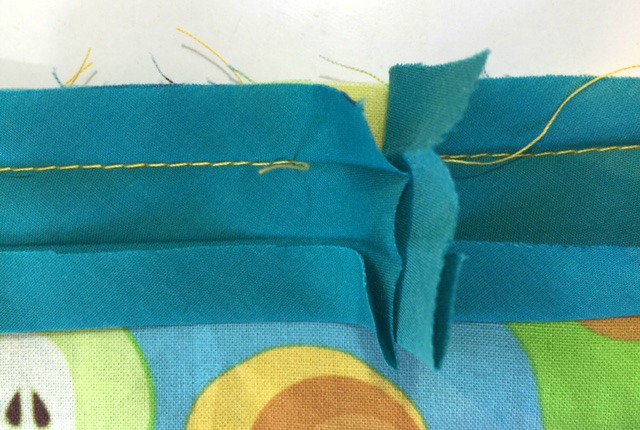
Sew across the binding to join the two ends. (If you leave long enough binding ends – and I always forget to – you should sew the ends together at a right angle so the joining seam will also be on the bias like the seams that sew the strips together to make the binding)
Trim the seam allowance of the binding join to 1/4 inch (2 mm) Press open (I didn’t in the photo) or at least finger press the seam open (I was extra lazy and didn’t even do that).
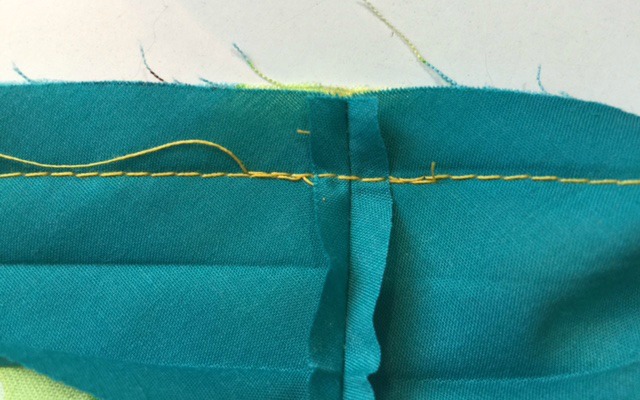
Finish sewing the binding down to the fabric over the joining seam.
Fold the binding over to the wrong side of the fabric and press. Sew the back of the binding down either by hand with a slip stitch or stitch in the ditch with a sewing machine. See explanation above for details.
Here’s a refresher on how to make your own bias binding
I hope this method of applying and joining bias binding has been helpful. Please leave any questions in the comments below.

Thank You for the Bias Tape details !!! I was making napkins and was not sure how to join the raw edges to finish – worked out perfect
That’s great. Thanks for letting me know you found this helpful 🙂
I love this method. I made a rain cape for my granddaughter and finished the hem with bias. It worked perfect. Thanks so much for sharing. H
Thank you. I like how binding can be a little decoration sometimes – not too crazy but just a little interest. And also, it’s a great way to use up that extra fabric you have sometimes after cutting out a pattern.