

It’s easy to love an A-line skirt:
- It flatters almost every body
- It’s easy to sew
- It takes a mere two yards of fabric
- It’s simple silhouette can be made up in wilder prints and will still look classy.
- It’s a work horse; errands, date nights, work, gatherings. It always looks like you made an effort even when worn with a T-shirt
- It can be changed up in lots of ways; patch pockets, a contrasting hem band, top stitching and endless options for embellishments.
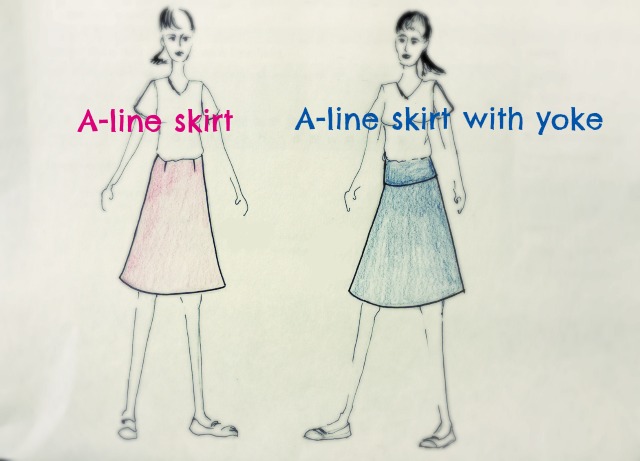
One way to change up your basic A-line skirt is to add a yoke. It’s a nice style line which can make the skirt even more flattering for some body types (like “apples”). The yoke could also be a design feature by being in a different fabric, or lend itself to design details such as top stitching that echos the style line or colorful piping inserted in the yoke seam.
You can buy an A-line shaped skirt pattern with a yoke detail. (I own a fabulous yoked A-line skirt pattern by You Sew Girl that I’ve sewn up a lot.) But why spend your hard earned cash on yet another pattern if you already have an A-line skirt pattern that you like. It’s an easy hack to make a yoke for the A-line pattern you already own and it’s almost free (you will need tracing or tissue paper and about an hour) and you get to do some pattern drafting which is fun.
You’ll need your A-line skirt pattern, a flat space to work on, tissue paper or tracing paper, a ruler, a pencil, a little tape and if you have a hip curve or a french curve you’ll want that too.
(Of course, this hack would work on a straight skirt pattern too. It will just be a straight skirt with a yoke, or you could add some flare to the side seams.)
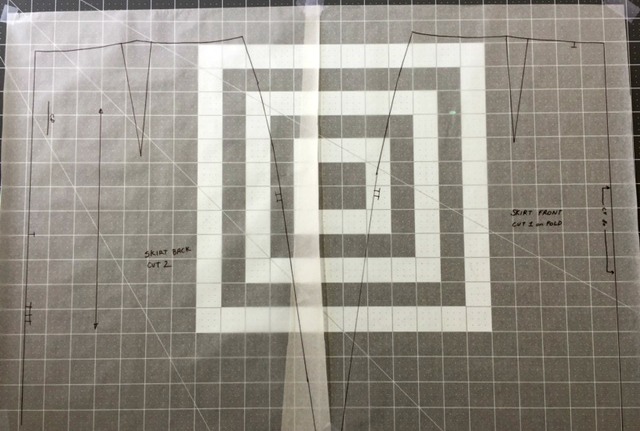
Trace off the skirt front and skirt back of the pattern you already own in your size. If you’ve never made the skirt before either make a muslin now to work out fitting issues or know you’re going to need to make one before you make a final garment. Making a muslin isn’t a mystery and it takes away that moment of rage when the garment you just spent hours sewing doesn’t fit right.
When tracing include any notches, the grain line, instructions, and write which piece it is (the front or the back).
Does your pattern look different then mine?
My skirt pattern is made of one skirt front (half the pattern is drafted and it’s cut on the fold) and two skirt backs with a center back zipper. If your skirt pattern has a side zipper the alterations to the pattern will be the same but your back pieces may look different then mine. They might look similar to the front pieces. If your skirt pattern has a waist band just ignore it. Really. You could have a waist band and a yoke but you could leave the waist band off completely. If your skirt has details like pockets, including inseam pockets (side pockets with openings in the side seam), know that this alteration will bisect the skirt front and back only so you will be able to put your pockets in once the yoke is attached to the skirt and before the front is attached to the back.
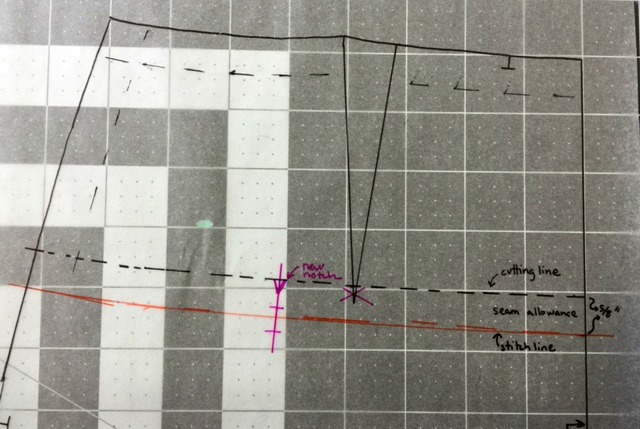
Mark the seam allowance across the top if seam allowance is included in your pattern.

Decision time since you’re the designer here. How wide of a yoke do you want? Four inches is what I chose. It’s wide enough to include most of the waist dart and to look like a yoke and not a waist band when it’s sewn up. A shorter skirt would want a narrow yoke and a maxi skirt could have a wide yoke. It’s all about proportions and balance.
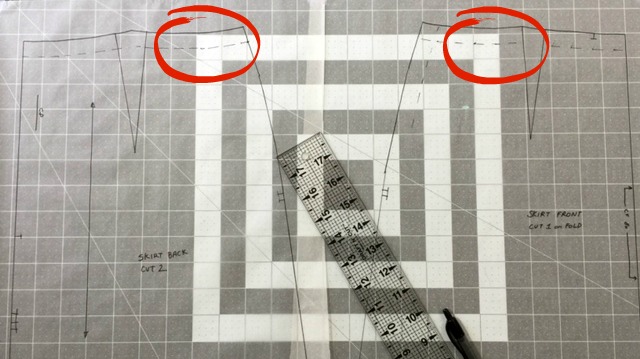
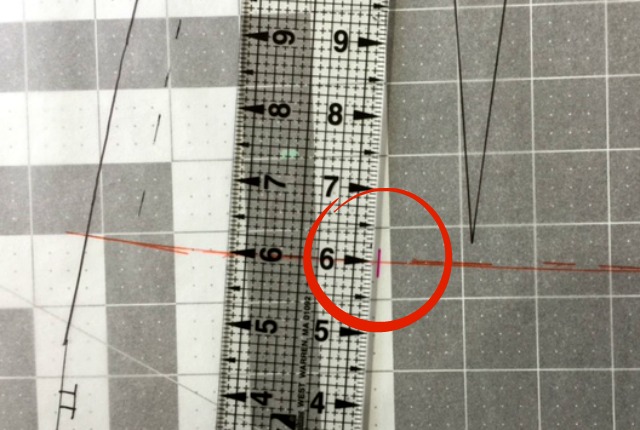
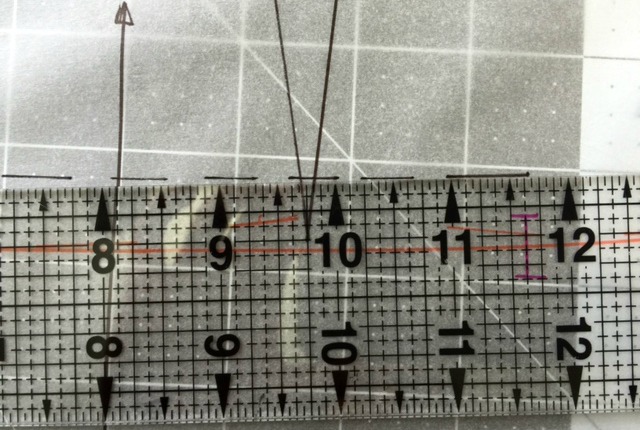
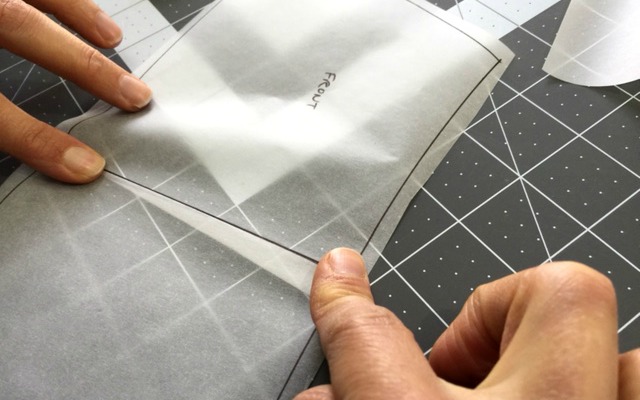
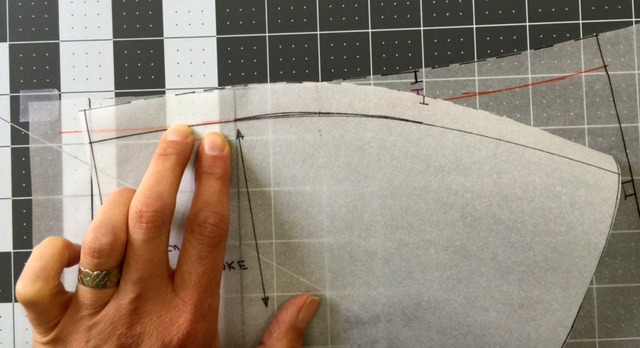
What ever you decide for the width of your yoke measure down and parallel from the waist seam that distance. Measure from the seam or stitch line and do not include the seam allowance. Do not worry about seam allowance for the lower edge at this time. Just measure the finished width of your future yoke. Do this on the front and the back skirt pieces and don’t be alarmed if it looks a little wonky at the darts.
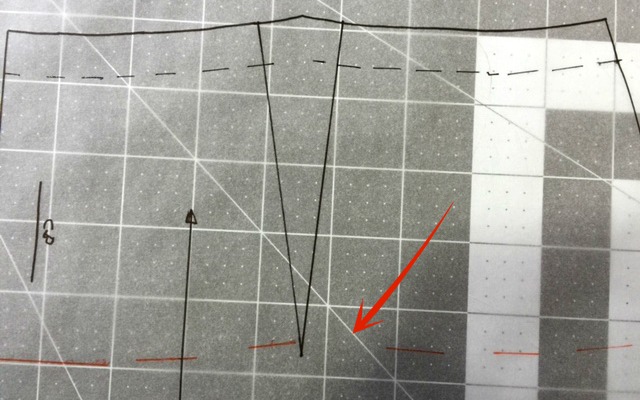
Yes, a little wonky at the darts (especially the back dart because it is wider). We will fix that.
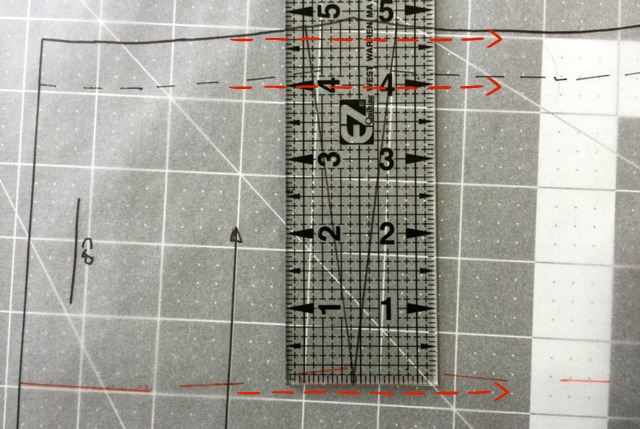
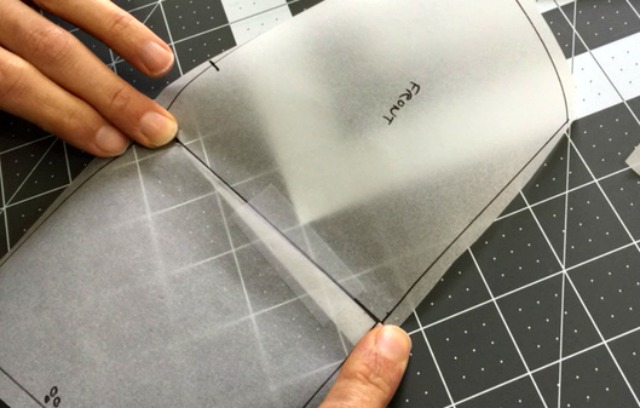
Visually (no pencil, just your eyes) draw a smooth line across the dart as if the dart wasn’t there. Move your ruler to see where your desired length would be from the visualized line (bottom dashed line in photo). Then actually draw that line.
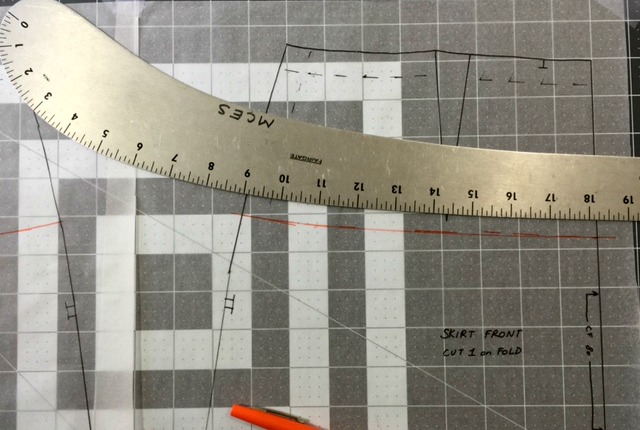
Now join your measurement points and smooth out the entire line using a hip curve, a French curve or just eye ball it. This line should be some what parallel to the waist line.
Do the same on the skirt back.
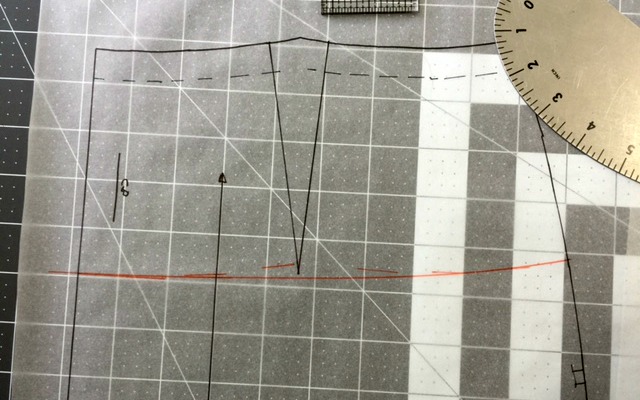
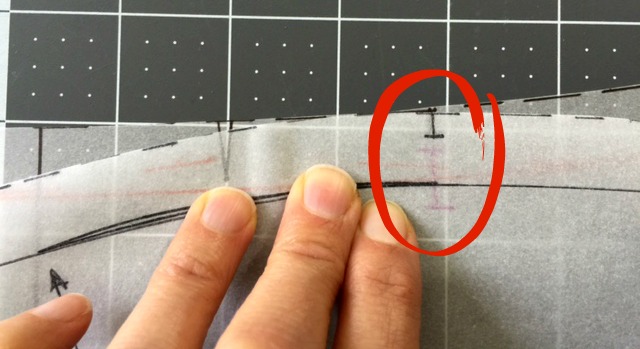
Some where, between the dart and the side seam draw a short line perpendicular to the new style line. This is a reference mark. After the yoke and the skirt pattern pieces are separated and the seam allowance added, you will use it to make sure your pattern pieces still fit together. When the pattern is cut out of fabric this line will become a notch.
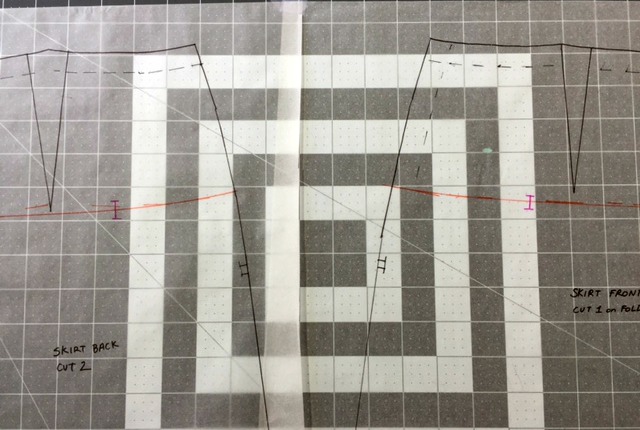
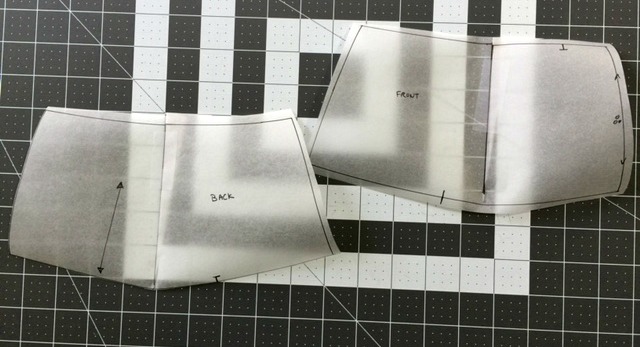
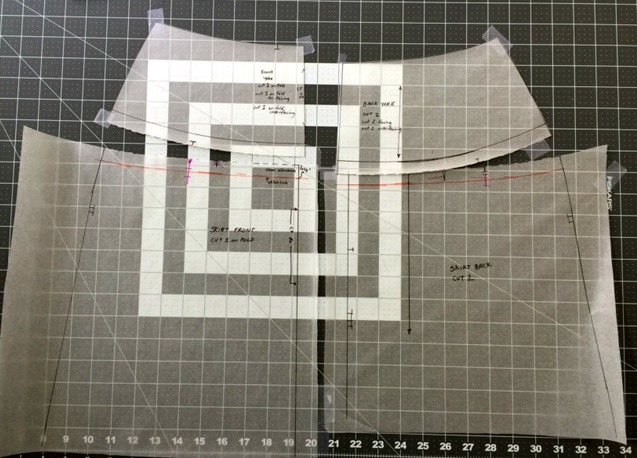
Here is the skirt front and skirt back pieces with their new style lines drafted.
Trace off the top of the skirt front and back from the new style line up; your new yokes. Your paper doesn’t need to be much bigger than the new yoke you’re tracing off. My piece in the photo above is much bigger than you need so use a scrap if you have it. This is a transition tracing and will not be a final pattern piece.
Place these yoke pieces aside for now.
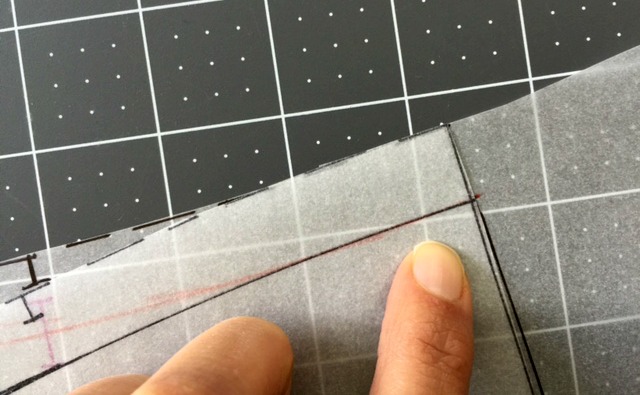
Going back to the skirt front and back, add seam allowance above the style line you just drafted. Since I started with a commercial pattern which included a 5/8″ seam allowance for every seam I added a 5/8″ seam allowance to the new seam. Less to remember when it comes time to sew the skirt.
Extend the reference mark you made across the style line so it hits the outer edge of the added seam allowance if it doesn’t already.
And don’t worry about dart tips. They will be taken care of in the yoke pieces you traced off.
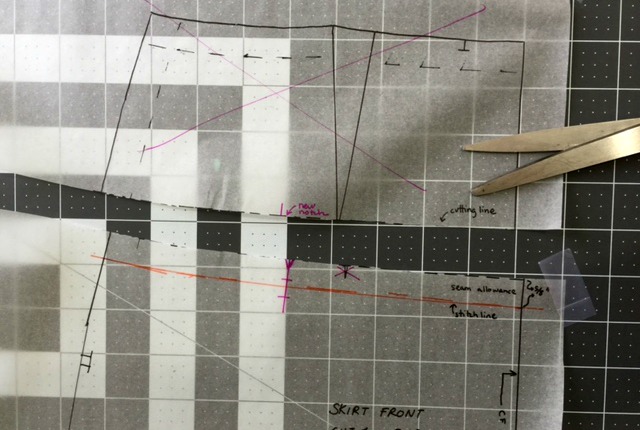
Cut the pattern on the cutting line. The style line you drafted is the new seam or stitch line. Then there is the seam allowance above that. Cut on the upper edge of the added seam allowance. Toss the top section into the recycle bin.
Repeat for the skirt back. These are now your new skirt front and skirt back pattern pieces. Set them aside.
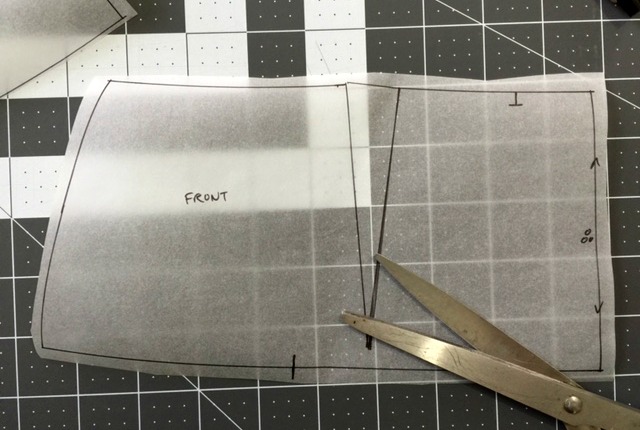
Now back to the yoke pieces. Trim down your tracings close to the drafted lines.
Grab one of the dart legs and fold it. Also called pinching out your dart.
Line it up to lay on top of the other dart leg.
Tape it down.
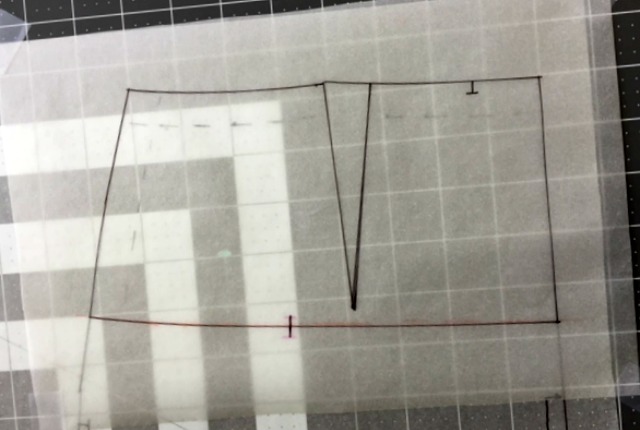
Check in point. This is what your front and back yoke pieces will look like with the darts folded out and taped down. Yes, the style line doesn’t look so smooth anymore but do not fret, we will take care of that now.
More paper!
Trace off the yoke pattern pieces. Smoothing out the style line and the waist line. (see details below).
Have a large enough piece of paper to add the seam allowance to the bottom edge of the yoke.
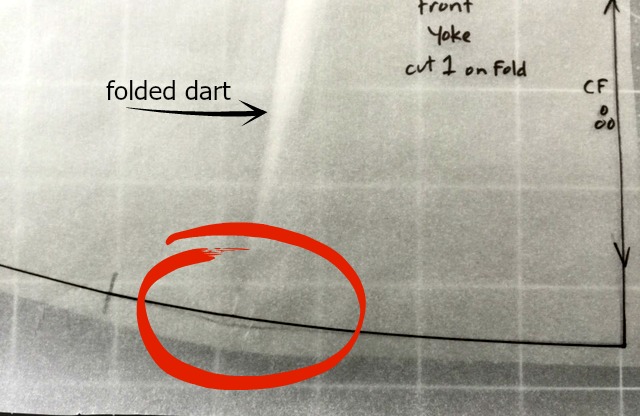
Smooth the line at the bottom of the folded dart. Use a hip curve or French curve to help you or just eyeball it.
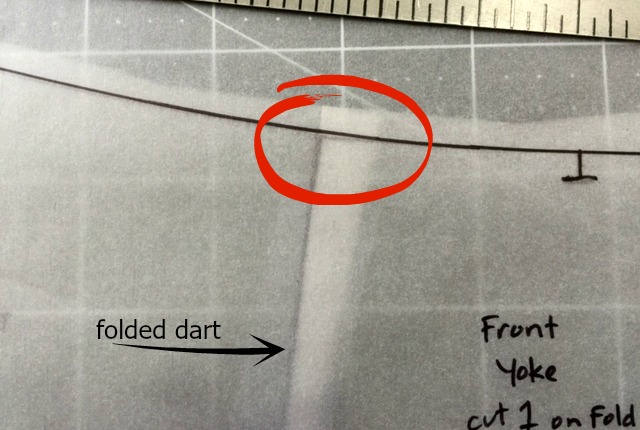
Smooth the waist line at the top of the folded dart.
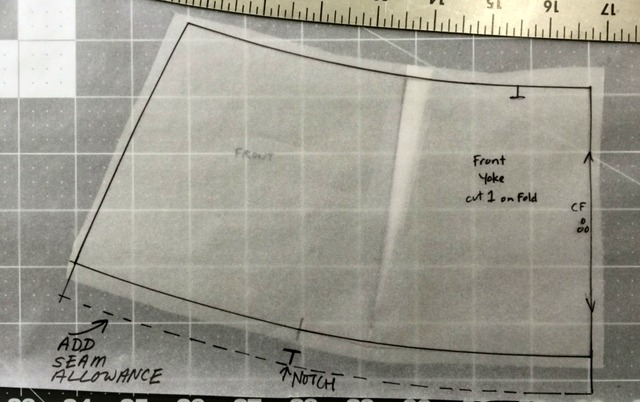
Add seam allowance to the style line and transfer your reference mark (notch).
Repeat to make the yoke back. Cut out your yoke pieces.
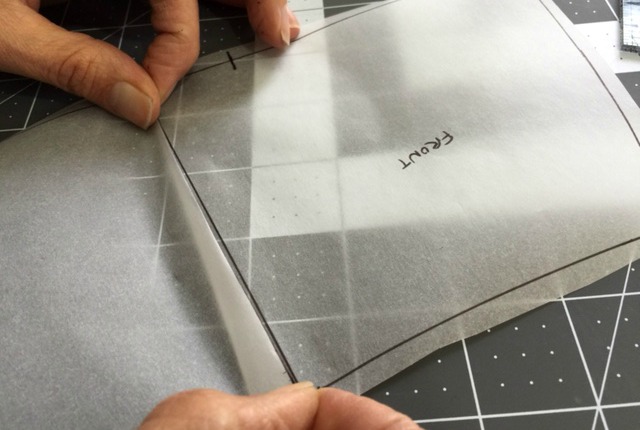
After drafting a pattern you need to walk the pattern pieces together to see that they are true. That’s the jargon to say you’re checking that they line up together. (I also check that patterns from a “new to me source” are true before I cut them out. You’ll be surprised how many are not).
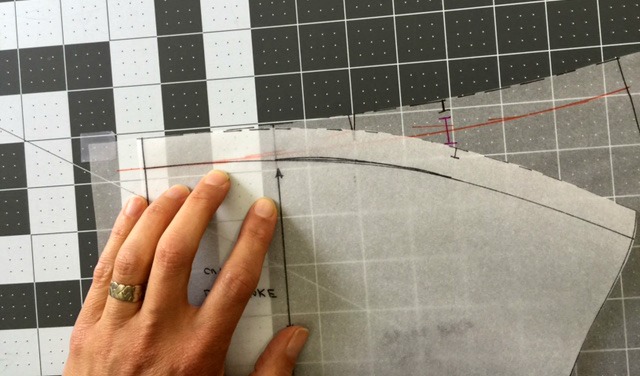
To true up your pattern place the seam or stitching line of the yoke (where it attaches to the skirt) on top of the skirt’s seam or stitching line. Ignore the seam allowance. Line them up on the center front or center back. Your hands are going to “walk” the top piece along the bottom piece lining up the stitching lines of both as we go. As if our hands are the sewing machine, stitching the two pieces together.
Keep walking (no, they don’t stay lined up on the entire length of the stitch line) Remember, it’s as if you’re sewing the two pieces together.
The notches should match up. Keep walking.
The side seam end should match up too. If they do you’re done. Now check the skirt and the yoke back.
If the seam doesn’t match and they are off by over 1/16″ or 2 mm you’ll need to adjust the side seam. Simply divide the difference and add that to the short side and subtract that to the larger side. This way they meet in the middle. Read the details here about truing up seams when they are off.
(Ok, but say that between the side seam and the notch the seams line up and that between the notch and the center front or center back the seam is off. Then line up the center front or center backs (because of, you know, grain line) and redraw the notches so they do line up, and adjust that side seam.)
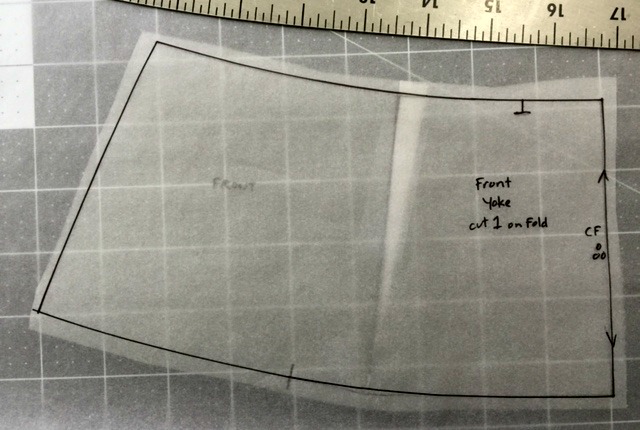
There you go. Two skirt pieces and two yoke pieces that are trued and ready to be cut out of fabric. How easy was that? Like making a cake from scratch; you may think it’s going to be hard, and it’s easier to just buy a box mix, but it actually wasn’t bad and you totally did it yourself.
You will need to cut out two sets of yokes. One set will be the yoke on the outside of the garment and the other set will be the facing to be sewn in at the waist seam.
P. S. How to construct this garment:
- First, look at your original pattern instructions. You can attach your yokes to your skirt pieces and then treat them as the one solid skirt front and skirt back that your pattern intended.
OR the quick and dirty, off the top of my head, order or construction:
- Cut out the yokes, the skirts and the yokes again in a facing fabric (which can be the same as the outer fabric or not) and the yokes again in an interfacing.
- Apply the interfacing to the yoke facing. Finish off the lower edge of the yoke facing.
- Sew the yoke front and backs together at the side seams. Sew the yoke facings together at the side seams. Sew the skirt together at the side seams
- Attach the yoke to the skirt at your new style line – the yoke seam.
- Place in your zipper
- Attach the yoke facing to the yoke at the waist seam.
- Flip the facing to the inside.
- Hem your skirt.

That was very insightfull and easy to follow. Thank u very much
I’m going to try this. I’m inspired to throw out the waistband!