
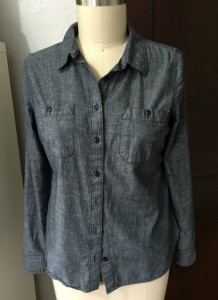
I have a basic shirt that I bought it in a department store. I really like the fabric it is made up in, a soft navy chambray. I don’t like that the chest pockets screamed “look at my breast” so I only wear it under sweaters. I put it on a couple of weeks ago and noticed how tight it was across my upper back and upper arms (I’ve been lifting weights for a few years now). Why put up with this I said to myself. It was time to get rid of it OR it was time to hack it.
Seeing all those men’s shirt hacks on Pinterest finally got through to me. I figured I could hack this already constructed shirt with a little effort into a top that I could wear without a sweater and if I couldn’t, well, I didn’t have anything to lose; the shirt didn’t fit me now.
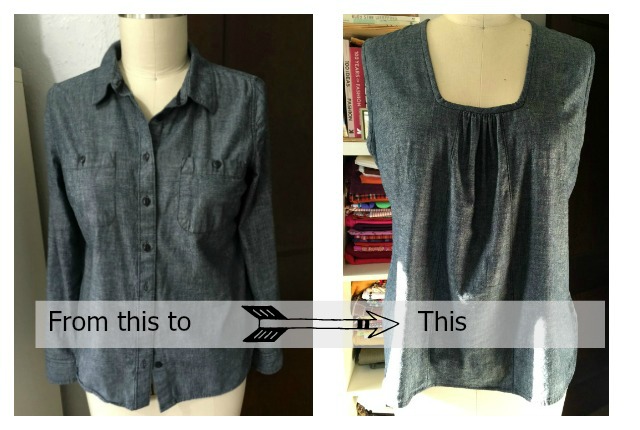
I wasn’t sure at first how I was going to change the shirt to address my problems with it but I figured it out as I went. It wasn’t hard. It was the quickest top I ever made (because most of the work was already done 😉 If you have a similar problem shirt don’t put up with it. Change it. And you don’t have to change it like I changed mine but maybe some of the changes I did, and how I did them will get you started.
The shirt fits my dress form fine but on me it pulled across the upper back and across the chest. It was also too tight in the upper arms and shoulders. It’s not just my body though that made this shirt a candidate for the Good Will box, those pockets are just too big for a women’s shirt. They are not flattering. My objectives for this alteration is to make the shirt more flattering, and eliminate any tightness in the sleeves and upper torso. My constraint is, unlike a men’s shirt hack usually done with a large shirt, there was not a lot of extra fabric to play with.
Objective 1; Make it more flattering:
It was obvious that the pockets had to go for this objective to be reached; if nothing else was done removing the pockets would help. The neckline could also be altered to be more flattering. With a seam ripper I took off the pockets, the collar stand and collar. I didn’t want to cut the collar stand off the bodice because I wanted to keep as much fabric to work with as possible.
Objective 2; Sleeves too tight:
The easiest way to fix the sleeves being to tight was to make the new top sleeveless. Sacrificing the sleeves was also the only way to get extra matching fabric to use in the hack. Yes, I could have used a different fabric that went with the original fabric in order to keep the sleeves, but my sleeves didn’t fit anyway. (A 3/4 sleeve would have been cute on this top, just cut off the cuff and sleeve placket and bind the sleeve hem.)
Objective 3; Upper back and chest too snug:
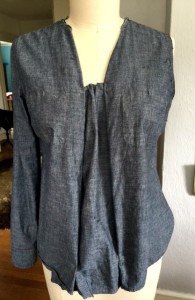
I knew I needed to add some fabric to the body of the shirt to alleviate the pulling across the upper torso. After playing around with the one sleeve I took off the shirt, I settled on my design. One sleeve would become a center front panel gathered into the neckline to add more room to the shirt body and the other sleeve would be my easy solution to finishing the neckline and the armholes.
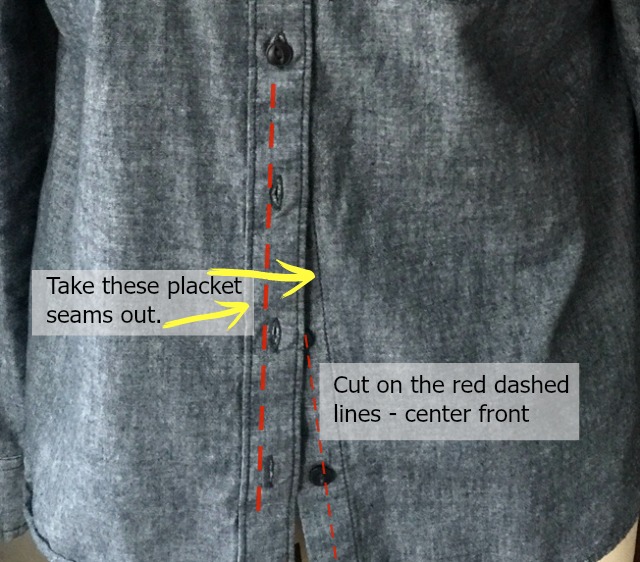
Take the buttons off the shirt. Cut up the center front (or as close to it as you can) on both plackets, the button placket and the buttonhole placket. Take out the placket seam that is left on the shirt after you cut up center front.
Even though the side that has the buttons leaves more fabric on the shirt than the buttonhole side if you deconstruct the plackets, you need the two sides of the shirt (the right side and the left side) to be the same width so that the shirt front remains symmetrical. If your front sides are not equal the center panel will be off center when you sew it on.
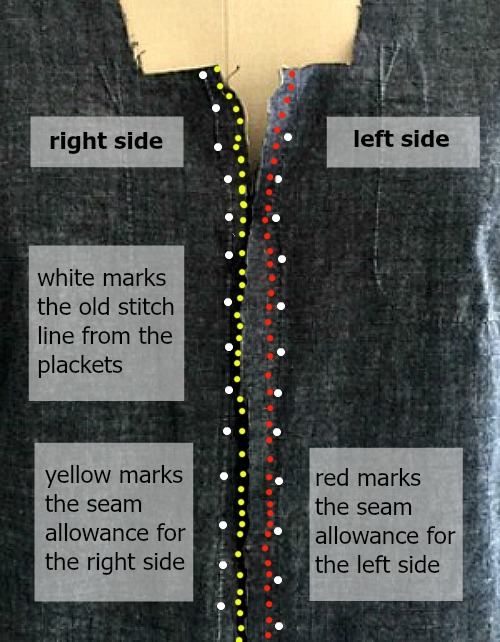
Shirt patterns have both the buttons and vertical buttonholes on center front. You can use the marks where the buttons were sewn on and where the holes were as reference points to where center front is on your shirt pieces. Use the old stitch marks (in white above) from where the placket was sewn down as your new stitch guide when you sew the center front panel to the shirt side fronts.
Leave an even amount of seam allowance on both sides of the shirt. The amount of seam allowance is up to you and will depend on how much fabric you have after cutting off the plackets.
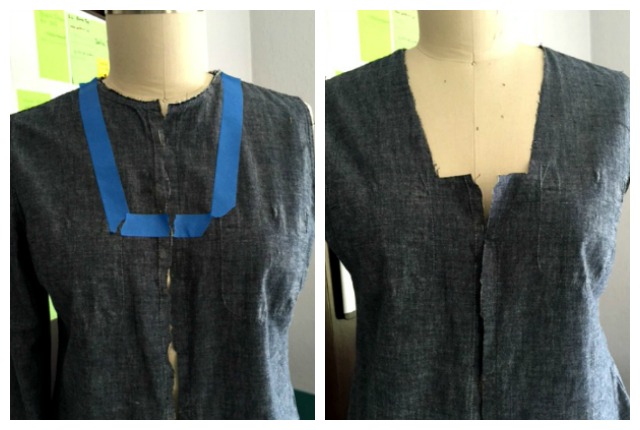
To see how different necklines will look “draw” on the shirt with painter’s tape. You could also pin twill tape down on the shirt to see the style line. (I “drew” on the left and right side of my shirt. It is optional to mark your style line on both sides or on only one side).
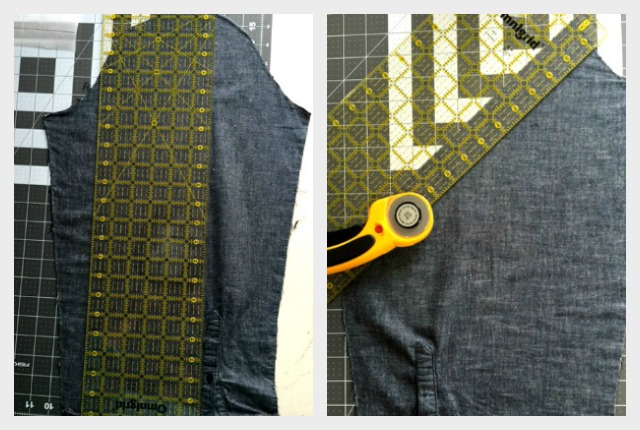
To cut the neckline out symmetrically, compare the left and right side style lines since they probably vary slightly. Pick which is the best looking side and take the tape off the rejected side. Fold the shirt on the center back (line up the neckline so the old seam lines are matching) and cut through both layers following the style line (the tape). The neckline is finished with bias binding in this hack so no seam allowance is needed just cut on your style line or slightly to the side of it.
Take the sleeves off the shirt either by ripping the seam out or cutting carefully on the bodice side of the seam. Most ready made shirts have over-locked seams so cutting is a big time saver over picking the seam out. Iron the sleeves flat. Since one sleeve will be used as the center front panel of the shirt check both sleeves for elbow wear. Use the sleeve with the least wear for the center front of your new shirt.
To make the font panel cut a rectangle out of the sleeve 6″ wide and as long as you need to go from your shirt’s new neckline to the hem plus some fabric left to be hemmed.
Cut the other sleeve into 1 1/2″ (about 35 mm) bias strips and make bias binding with these strips. You need enough binding to bind the neckline and the armholes.
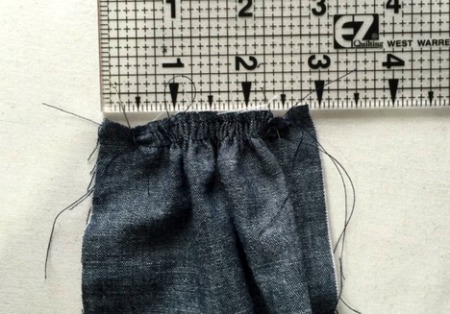
Gather the top of the center panel (the rectangle you cut from one of the sleeves) so it measures about 2″ (5 cm) across the top not including the side seam allowance. Remember to start and stop the gathering stitches inside the seam allowance. The amount of seam allowance is up to you but should be the same amount you decided on when cutting the shirt’s side fronts.

Line up one long edge of the center panel with one side of the shirt front, right sides together with the gathered end at the top (neckline) of the shirt. Sew the panel to the shirt just beside the old stitching line (where the placket was sewn down) so that the old marks are in the seam allowance and not on the outside of the new shirt.
Repeat on the other side.
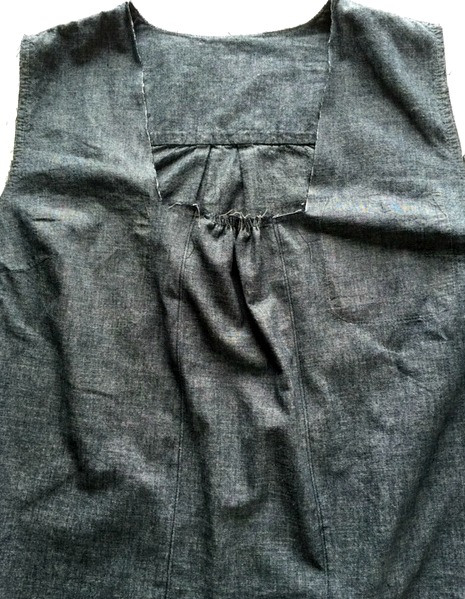
Press the seam allowance toward the sides and top stitch along the seam stitching through both layers of seam allowance.
Stay stitch around the neck line and the armholes so they do not stretch when applying the bias binding. When stay stitching the neckline go over the gathers. This helps the gathers stay in place. (Stay stitch is to run a line of stitching using a long stitch length along the seam line or just inside of it through a single layer of fabric. You are not sewing anything to anything it’s just a line of stitches. The stay stitching prevents the area from stretching. Stay stitch is usually done on curved areas like necklines and armholes because the bias will stretch.)
Hem the center front panel so it lines up with the side front hems.
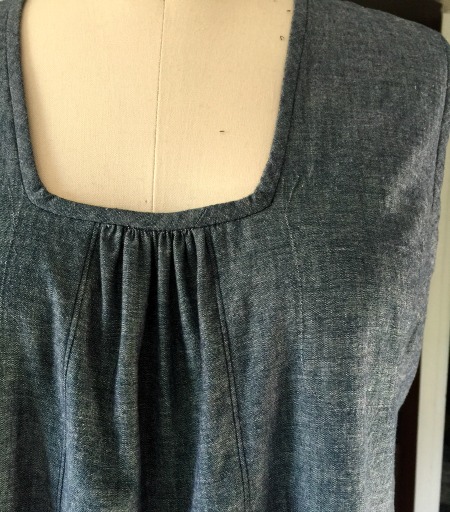
Apply the bias binding to the neck line and arm holes. Press. Add any top stitching you desire. You could add pockets or a hem band in another fabric if the shirt is on the “cropped” side.
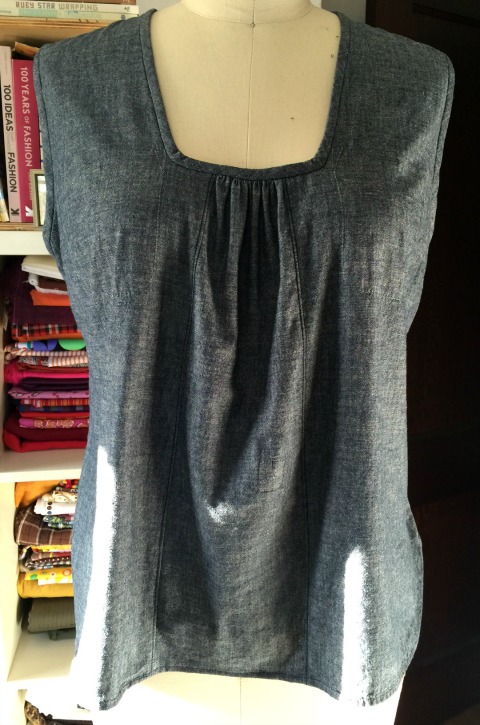
This hack was a lot of fun to do. I’m starting to look at all my clothes a little differently now. That’s right, once favorite paisley tunic, I got my eye on you. It’s just you, me and Mr. Scissors.
By the way, after I sewed up this top I washed it hoping it would relax the fibers enough to erase the marks left from the old pockets. The marks faded but they are still there. I know over time they will fade more but this isn’t the top to wear if any fashion scrutiny will be going on. WAIT a MINUTE: It’s been a few weeks now since I’ve made this top and I’ve worn it a lot. Which means I’ve also washed it a few times. Sure enough, the holes left on the bodice where the pockets were sewn on have vanished. They probably left after the third wash and dry. Gone. I really like this top now. I have a couple other button ups that are about to be remade in this same way. AND, I recently made this Lotta Jansdotter top, (from scratch, no pre-made shirt to hack) which looks a lot like this top.
I just discovered your site while searching on another sewing issue. Love your new hacked top! Very clever and inspiring.
Thank you. I find I like wearing it over long-sleeve T-shirts best. Now that I think about it, It’s because the neckline is a little too loose – a pleat or tighter gathers for that center panel would be better than what I did. Next time, right?
I found your site by searching “Super Cute Swingy Denim Tops to Sew”. Thanks for this! I really appreciate your documenting skills and your humor. You gave me great ideas, and a shot of inspiration 🙂
Thanks. I still wear that top but just in the cooler months over another shirt. I should have made the neckline a little higher OR not so wide at the bottom of it. So I think that the revealing neckline gave me the idea to try it as a layer. But I do love it mainly because it reminds me of the smock tops my mother sewed for my sisters and me for our school-clothes. It was the 70’s 😉