
Up to this point the tote bag is flat. I do own a few totes that are flat and they’re fine, they just don’t hold much.

This tote bag is meant to hold your lunch, your kindle, your small purse, a bottle of water, and of course, your sewing kit (just kidding). In order to hold that much we got to add some structure; a bottom and some sides.
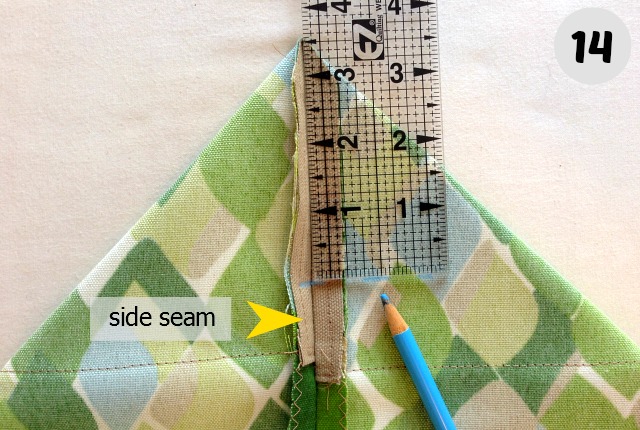
Take the side seam and lay it open and flat so it is center with fabric on both sides of it and the bottom of the bag under it. Line up the side seam to lay on top of the bottom seam, if you have a center bottom seam. If you do not, as I don’t, (because I cut the front and back together as one single piece), line the side seam up with the bottom’s center crease. (press in the crease again if you have to. It’s easy now that the side seams are sewn).
When you “open up” the side seam and lay it on top of the center of the bottom (seam or crease) a point will form and your bag forms a triangle on this side. The technique to add sides and a bottom at the side seam follows the same rules no matter the desired width of the sides & bottom. Just measure down, along that centered side seam, from the point half of your desired width. I want a 7″ wide side and bottom so I measure down, 3 1/2 inches. If I wanted a 4″ bottom I would measure 2″ down from the point along the side seam. Mark
Lay your ruler across the mark you just made and perpendicular to the side seam. Mark this line. This is where you will stitch.
For any flat bag, even one you already own, his technique will add some dimension. I also used it when sewing a small tote awhile back. Almost always this technique is done on the inside of the bag, wrong side facing you, as the picture above shows, however, it can be done on the right side of the bag for a design element.
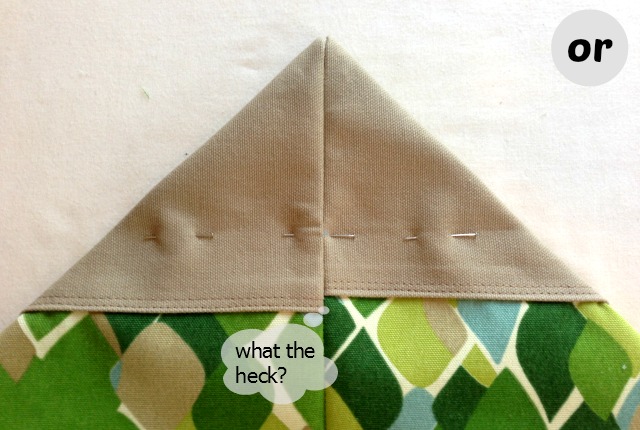
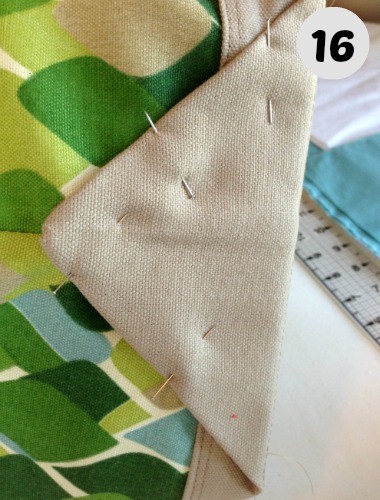
This is how sewing on the right side will look. I frequently pin before I sew, placing the pins where the stitches will be, to see how it will look when it is sewn or, more often, to see how a step, what ever step in what ever project, is going to work. Pinning as a preview saves a lot of heart ache.
Since my reinforcement piece didn’t line up at the side seam, I am going to go with sewing on the right side of the bag and flipping the triangles up over the edges. This will hide my horribly mismatched panel. When I add structure to the lining of the bag I will show how this technique looks when done on the inside of a bag.
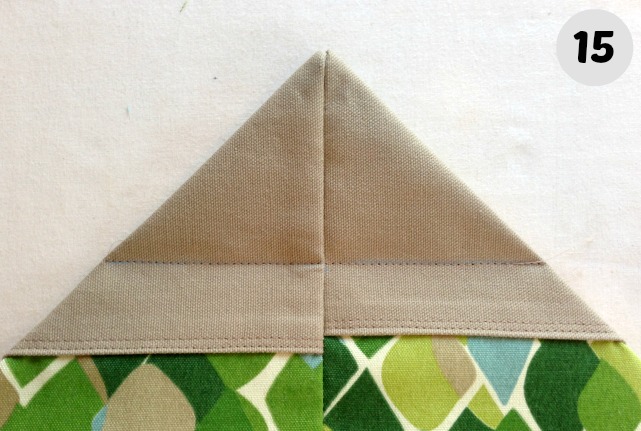
So, back to the beginning. Right side out or inside out, line the side seam up to match the bottom center and measure down half the desired width.
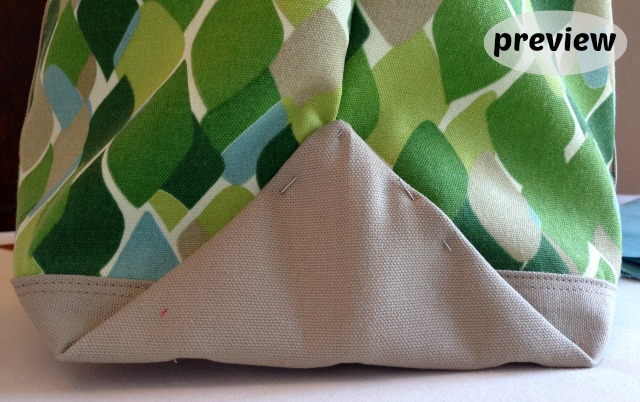
Stitch across on the right side. Press the triangle with gusto, making it crisp and sharp.
Fold the triangle up, use the line you just stitched as the “where to fold” line, and match the tip up with the side seam. Pin in place.
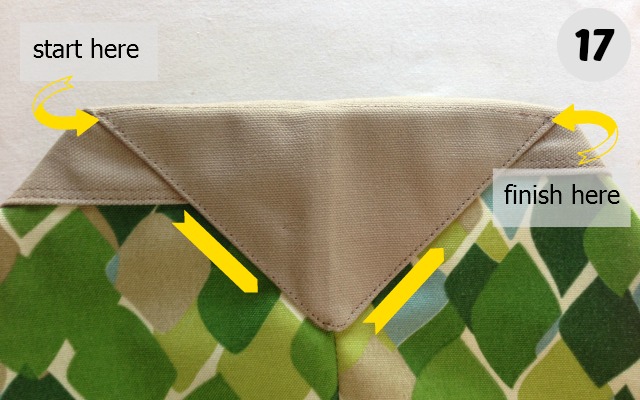
Sew from one corner, to the tip, down to the other corner. Press again. Repeat on the other side. Exterior is done.
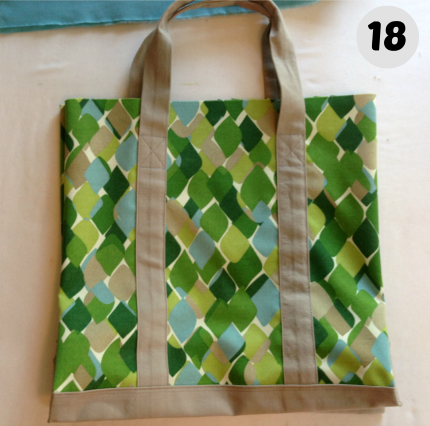
Yay, a little celebration as I get closer to finishing this tote bag. (I recently finished a book on overcoming procrastination. I think it has helped. Of course, it wasn’t the first procrastination book I attempted but it was the first I finished. Not kidding.)
Next – how to sew the lining.
If you missed the first steps for this tote bag, here are the links:
Prequel: How to make tote bag handles
Part 1: Making a Tote Bag
Part 2: How to finish tote bag handles